 View Profile
 View Forum Posts
 View Forum Threads
 Show All Albums
 Private Message
 View Articles
 View Blog Entries


Looks like I'm a little late to the party, but WOW!


Looks like I'm a little late to the party, but WOW!
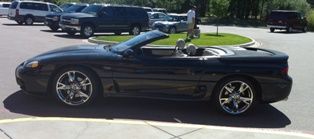
'95 Spyder VR4:
Exterior/Suspension: '99Front End/Rear Garnish; 19x9 370Z forged Rays Eng wheels; CF 575 Hood; Tein S tech (front) and H tech (rear) springs with rear adjustable control arms; Adjustable Front Tein Pillow Ball Mounts.
Interior: Hella TPMS; LCDBC; Remote Top; Interior Rearview Mirror with Temp/Compass/HomeLink.
Brakes: DBA 4000 Slotted Rotors - HPS Pads - SS brake lines.
Performance: Pampena Bell-housing reinforcement; Pampena pistons; Ninja Lightweight Rods; Dynamic Racing Stage 3 heads and Billet DR650s w/9 Blade turbine and Billet actuators; ported I/E manifolds; DSM SMICs; ID1000s; Flashable ECU ('98) - Chrome 2.0; GM 85mm MAF & translator; 3SX Downpipe; IPS Quad tip exhaust; Walbro 450LPH E-85 fuel pump; K&N fuel filter; AEM AFPR; ACT pressure plate MB019; Maximal/Setrab Oil Cooler; 3SX high capacity radiator; 3SX adjustable cam gears; 3SX Poly mounts; HKS Twin Power.
Did you use these values:Originally Posted by Jimvr4

4.7V/3.312mSec 7.0V/1.680mSec 9.4V/1.032mSec 11.7V/0.672mSec 14.0V/0.432mSec 16.4V/0.264mSec 18.6V/0.144mSec
Last edited by awdonly; 08-16-2013 at 05:21 PM.

Good find right there sir!

I can't take the credit for the part number. I found it through the other site but I did find where to buy it.
Ironically it didn't solve my problem because the bearing spun around the compressor housing and cut a groove into it. All I can say is you CAN overtighten the AC belt. The clutch housing pulling off so easily was not a good sign as it could only happen because the softer aluminum casting gave way to the hard steel bearing when the belt was overtight.
Thanks Marc. I'v currently flashed these numbers although I have yet to make any runs with them. Should I change them?
16V - 0.628
14V - 0.748
12V - 0.928
10V - 1.208
8V - 1.688
6V - 1.900
Pretty sure those are the same numbers I have, although I'm still wrapping up my rebuild and haven't driven it yet.. I got my numbers from Gump, who I bought my injectors from. I'll look it up later.
For what it's worth about the flash btw, my first flash took a really long time and had me nervous too. Every flash since has been much quicker.
Mods: 2g 3k body conversion, 2g Brake upgrade, Rota P45R rims
Projects: Interior sound deadening, 14Bs, forged bottom end, custom radiator and sound mounts
Jim,
I'm 99% sure the ones I provided are the values used by the stock EVO ECU with the 560cc injectors. I haven't done the math - they may scale the same. See this post - http://www.3sgto.org/3000gt-stealth-...tml#post235567
Last edited by awdonly; 08-17-2013 at 02:49 PM.
Replaced the expansion valve which is mounted in the evaporator. Remove the glove box and a few more bits to gain access
Here's what the AC compressor looks like inside. This is a scroll type design
Here's the manifold with the RPM sensor at the right and the pressure relief valve at the upper left. The RPM sensor is the part that wouldn't fit when I tried to attach the manifold.
Rebuilt AC compressor ready to install after filling with 5 oz of PAG 46 oil. I later re-read the manual and the entire AC system should have 5.5 oz of oil so I reduced the amount to account for oil in the other components
She doesn't drive anywhere yet but she looks DAMN good on jackstands


Very very nice Jim
July 2014 COTMWe follow the earth. The earth follows the stars. The stars know their way and though the body dies. The stars will remain, like the waves of the sea and restless slate.
Very, very nice indeed! Great work!
Interesting that a scroll type design was used, that partially explains why there's a pretty good amount of drag when the A/C is turned on.
R135
╚╬╬╝
- 24
|
3000gt.com 3000GT / Stealth International WWWboard Archive Jim's (RED3KGT) Reststop |
|
Team 3S 3000GT / Stealth / GTO Information daveblack.net |
|
Michigan 3S MInnesota 3S Wisconsin 3S Iowa, Nebraska, Kansas 3S |
North California 3000GT/Stealth United Society of 3S Owners 3000GT/Stealth/GTO Forums 3000GT/Stealth International |
|
3S National Gathering East Coast Gathering Upper Mid-West Gathering Blue Ridge Gathering |


 Reply With Quote
 Visit Homepage





Bookmarks