Page 10 of 48 FirstFirst ... 8910111220 ... LastLast
Results 91 to 100 of 472

Thread: Slightly tweaked 3000GT TT

  1. #91
    Forum User
    Join Date
    Oct 2011
    Owner Since
    2007

    Location
    Sundsvall, Sweden
    Posts
    928
    Thanks
    330
    Thanked 119 Times in 77 Posts
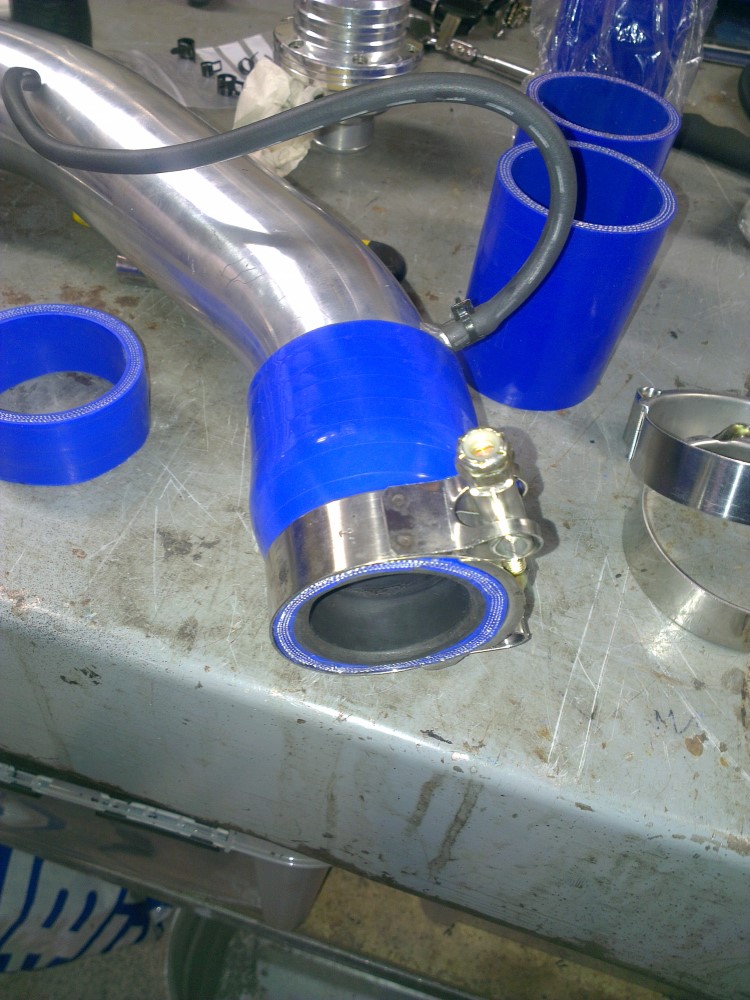
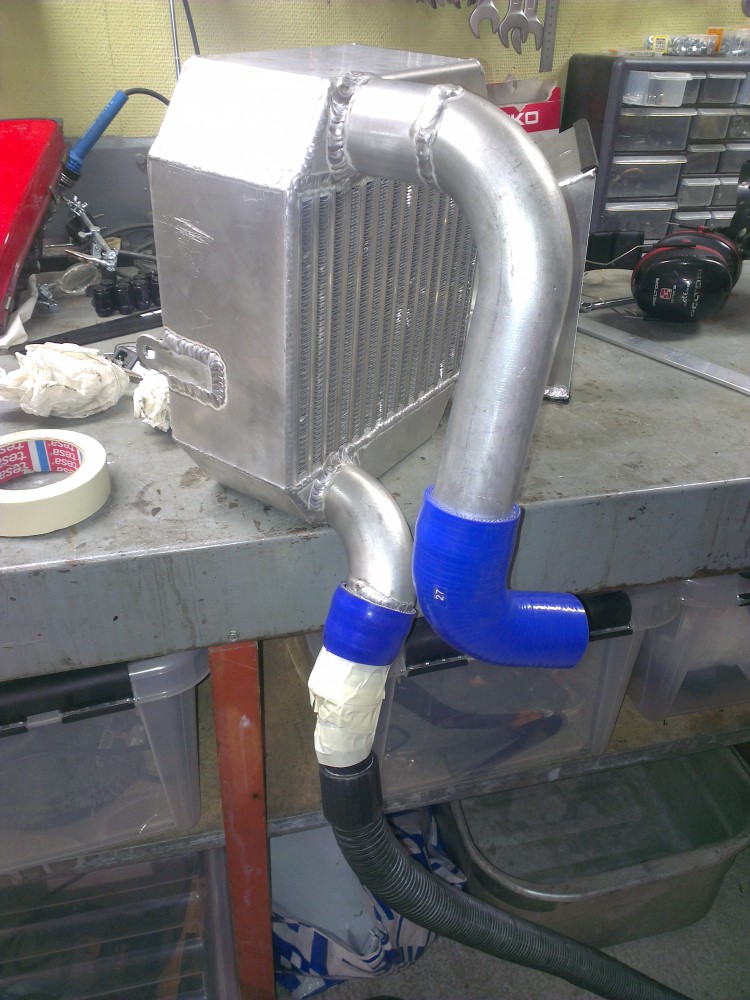
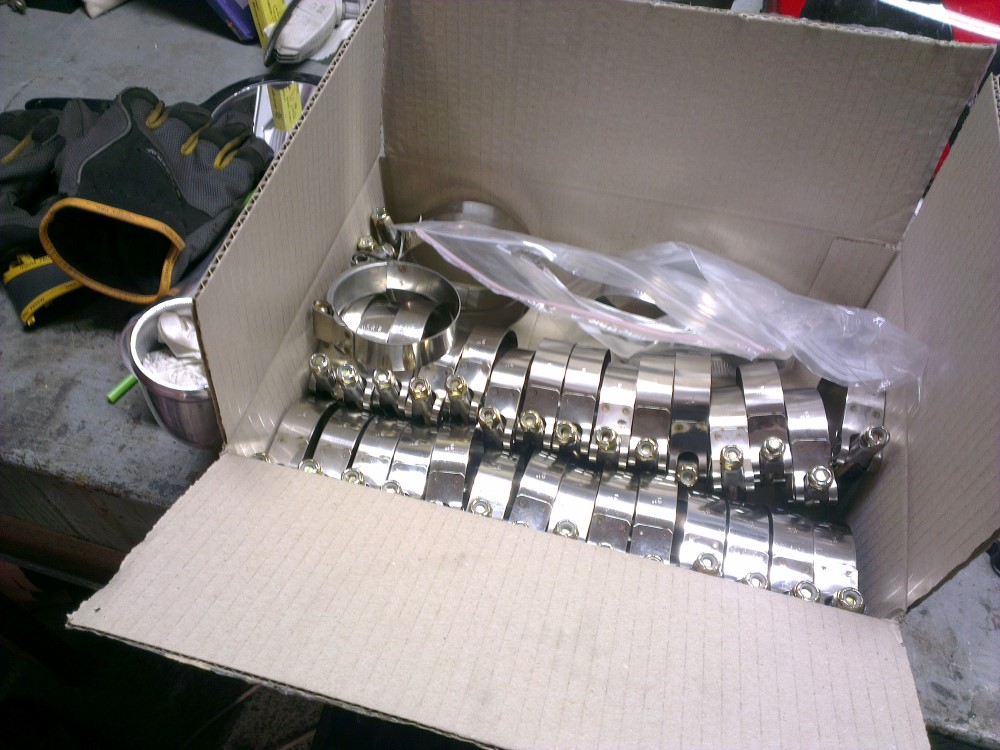
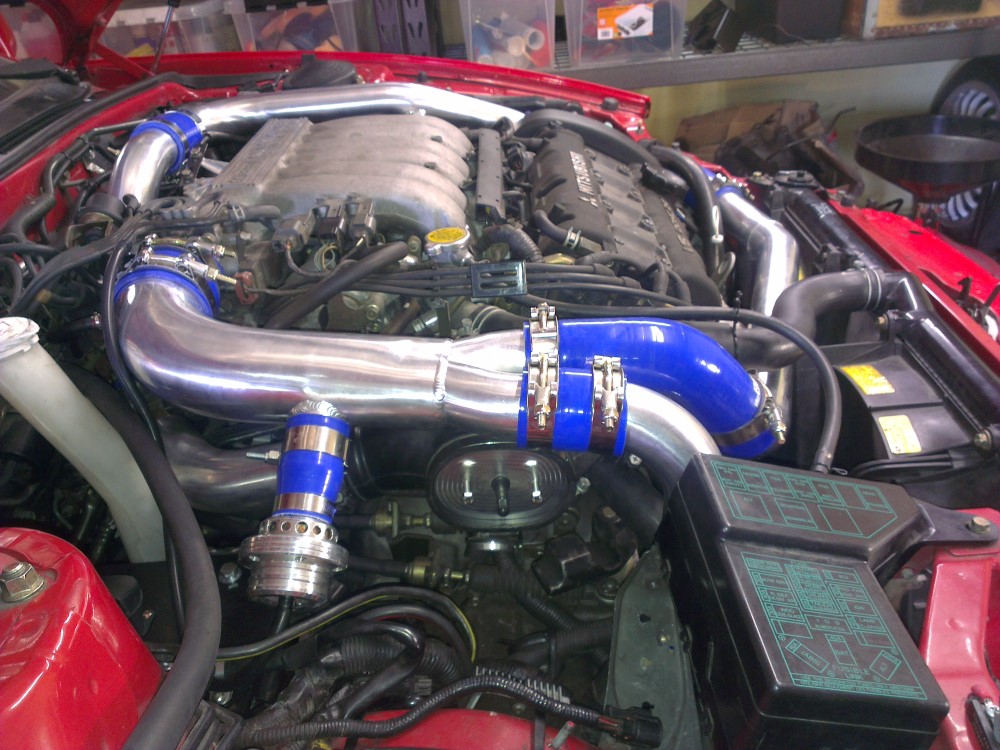
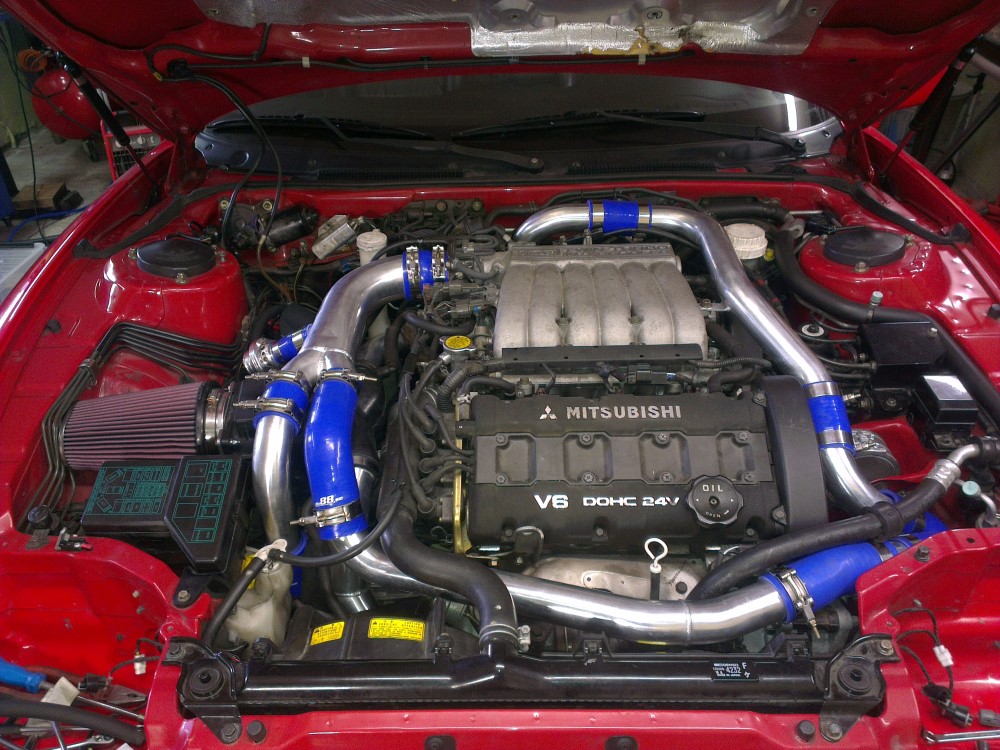
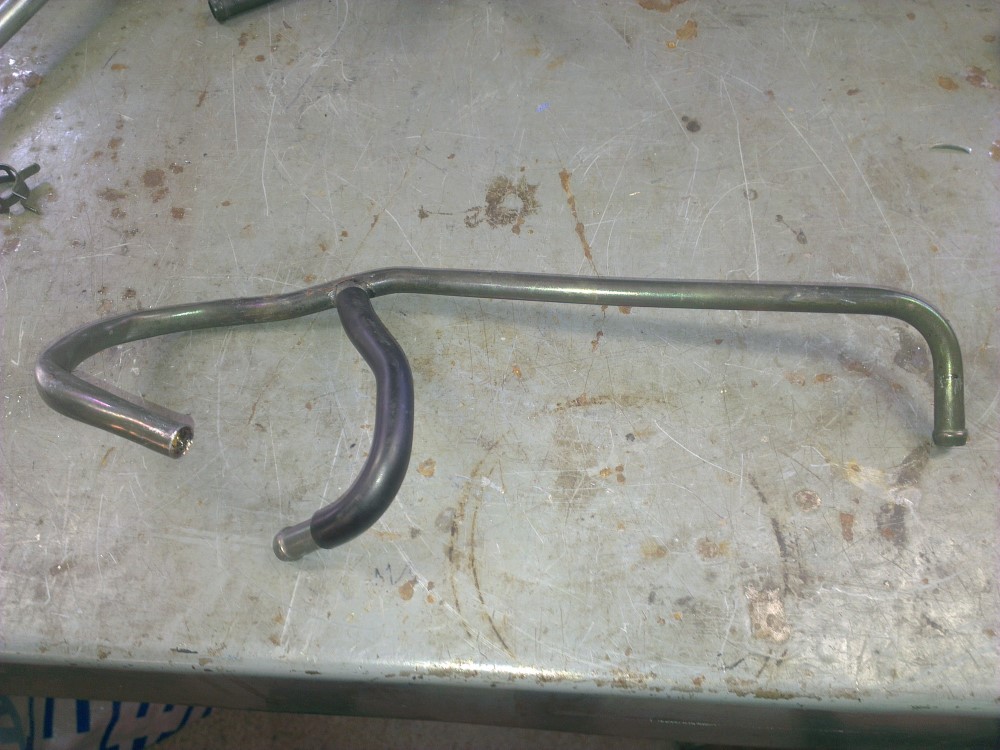
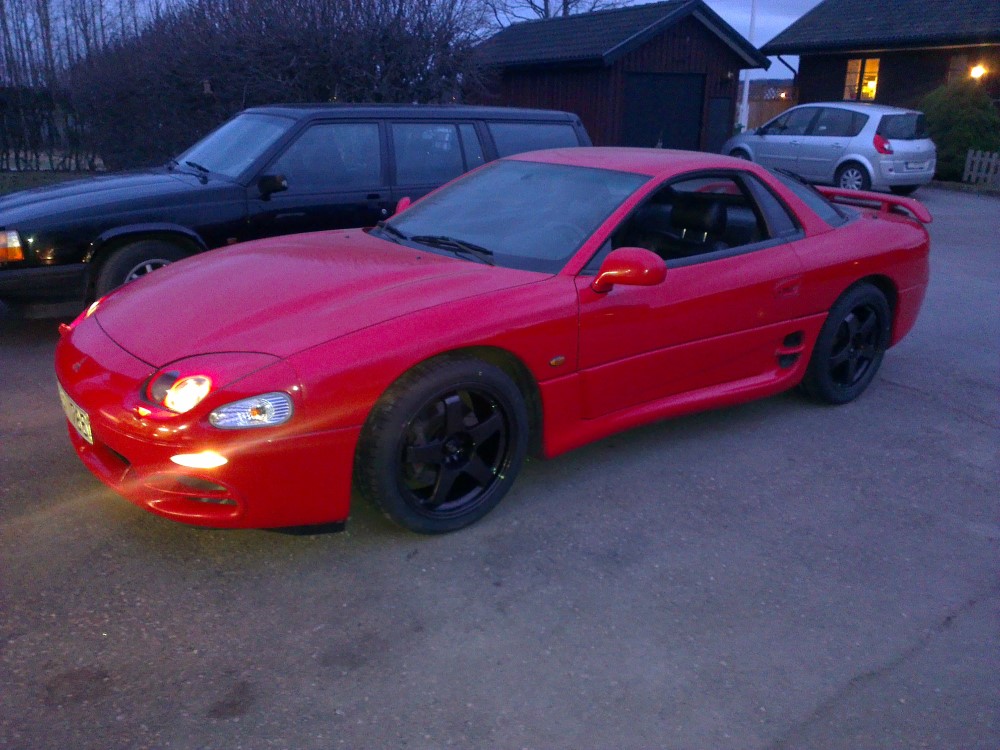
    I finally got the intercoolers and all the piping in place today so that I could start the car. I ended up replacing two thirds of the silicone couplers that came with the CX Racing kit because they where either to short or didn't work with the piping on the intercoolers.


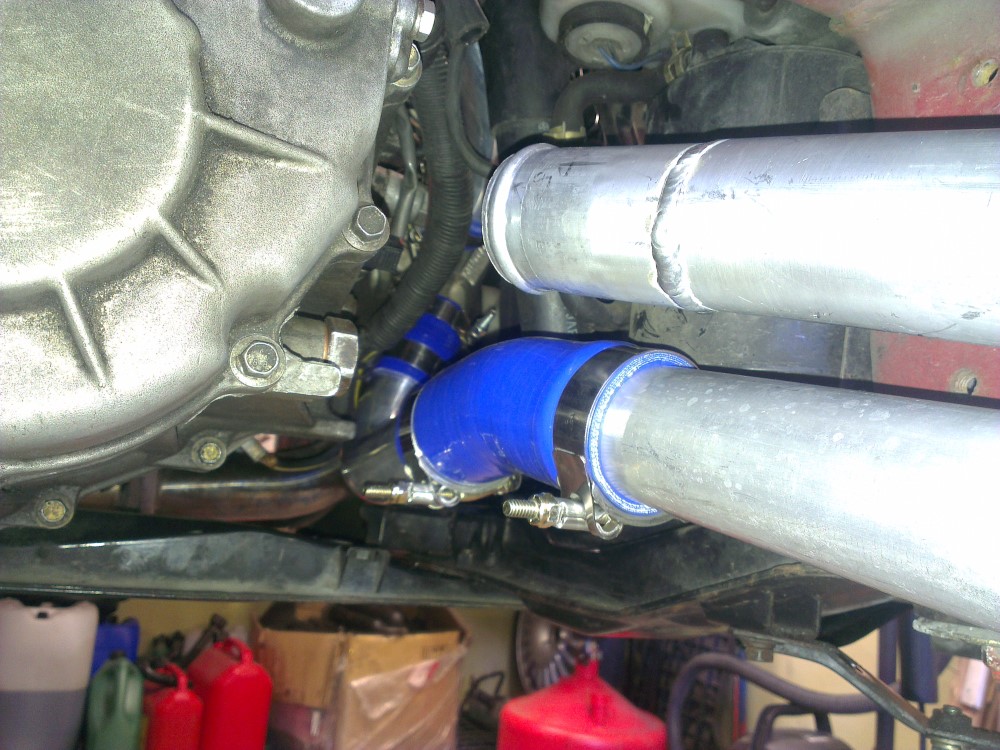
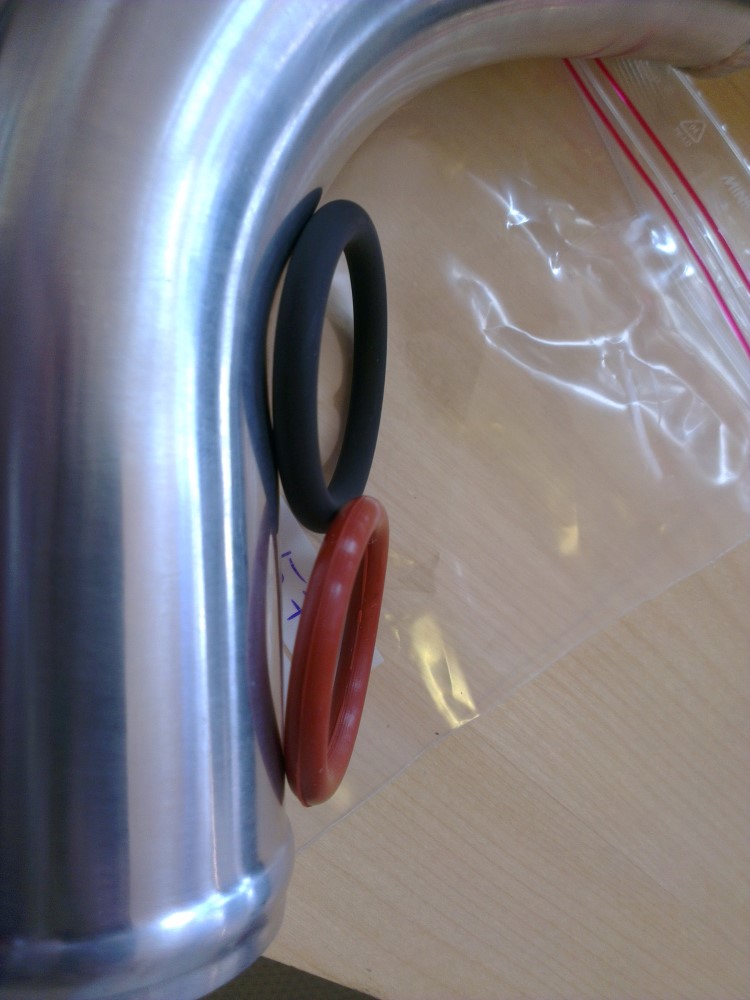
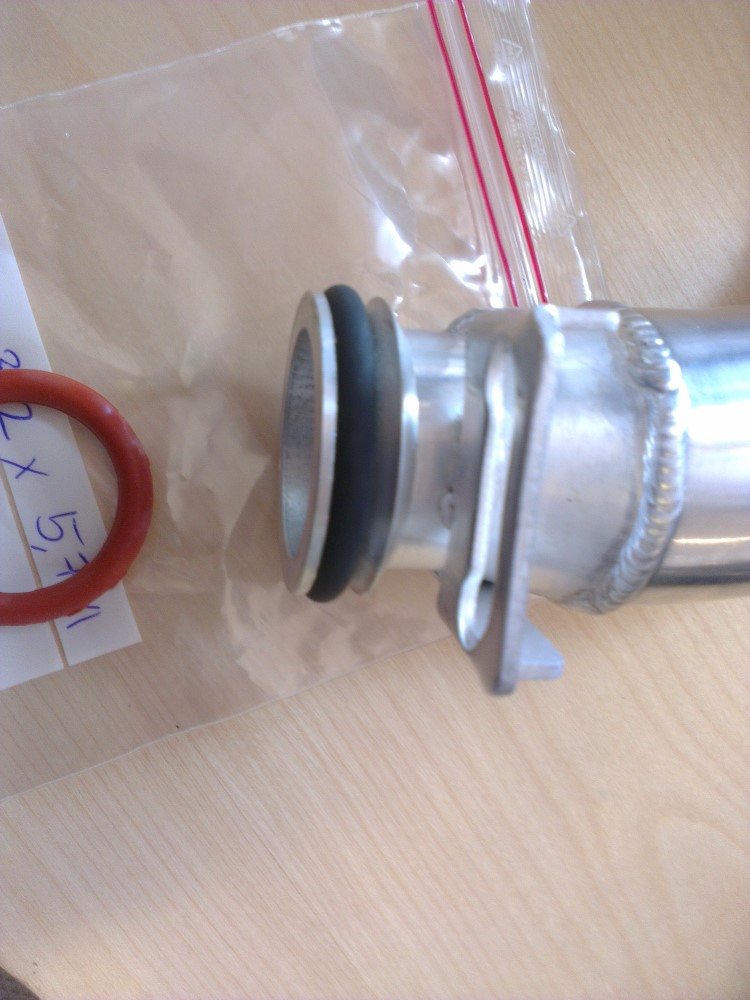
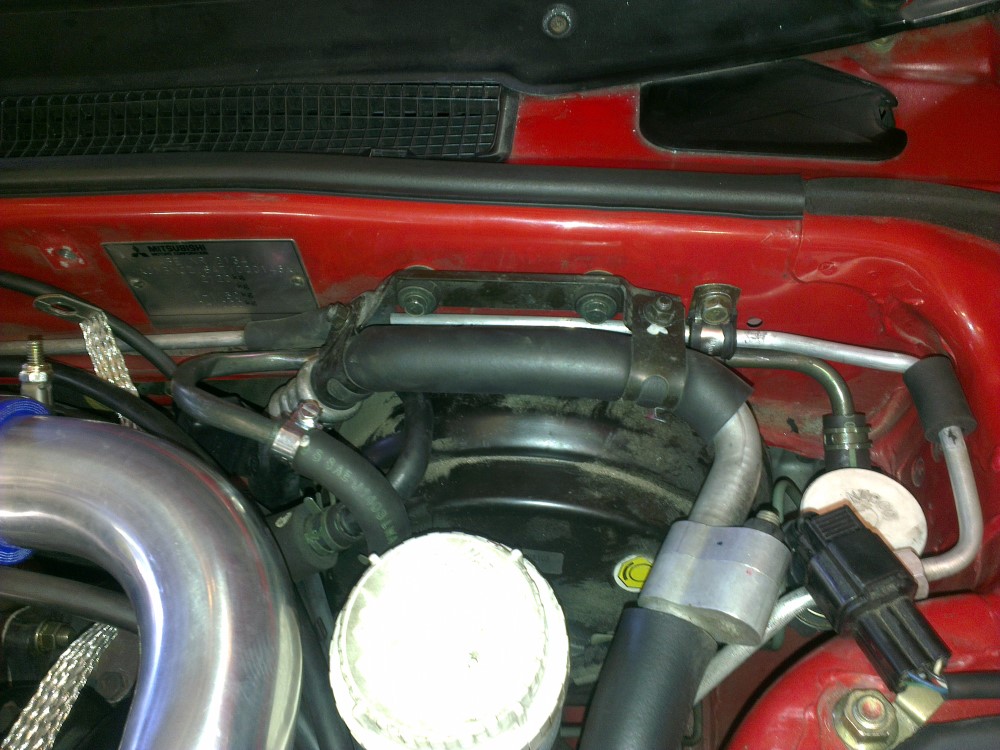
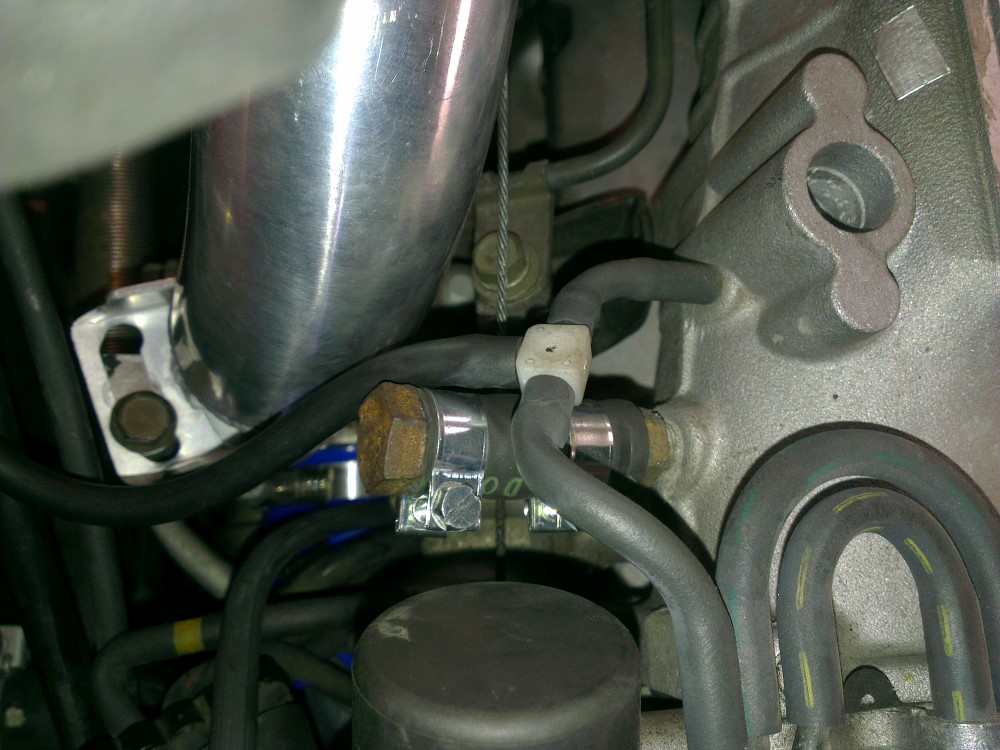
    The silicone couplers for the pre-turbo intake pipes where the worst. I replaced the ones that came with the kit with 2.25" to 2" reducers and then added the rubber ring from the stock pipes in order for them to fit the turbos.

    Since there are no stores around where I live that stock and sell decent silicone couplers I ended up having to do three separate online orders before I had figured out exactly which couples I needed to make everything fit together.

    I now thought I was ready to bolt everything up now apart some minor adjustments to the side mounting brackets of the intercoolers. But I was wrong... very wrong!

    This thread on 3SI sums it all up very well: Genes Performance Ginormous Sidemount Intercooler install thread - 3000GT/Stealth International Message Center

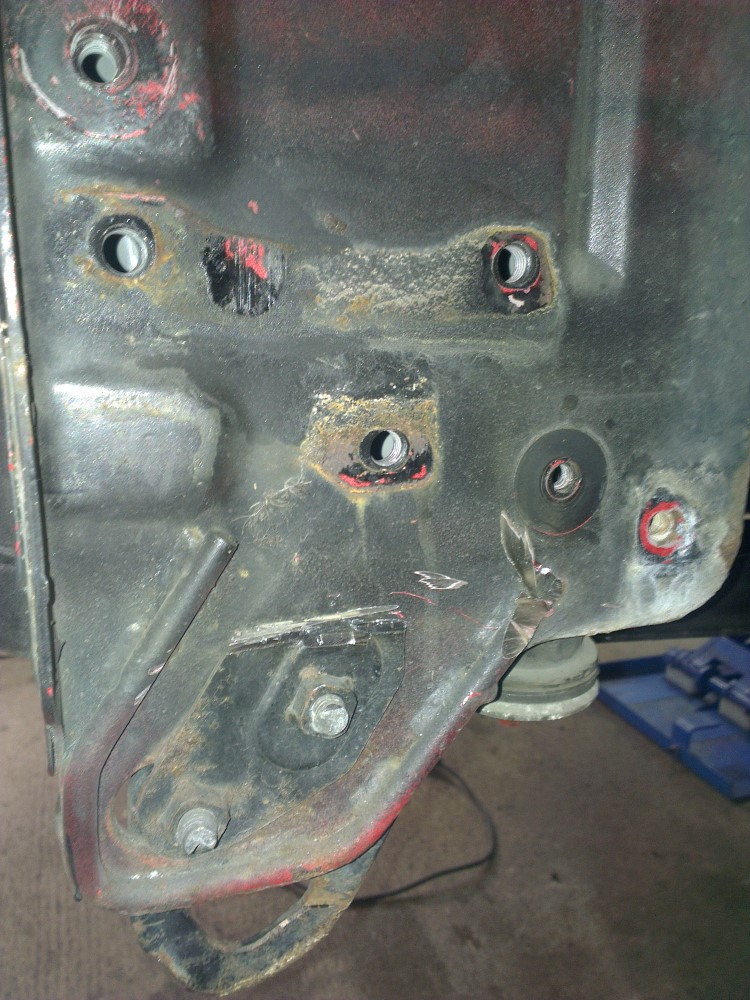
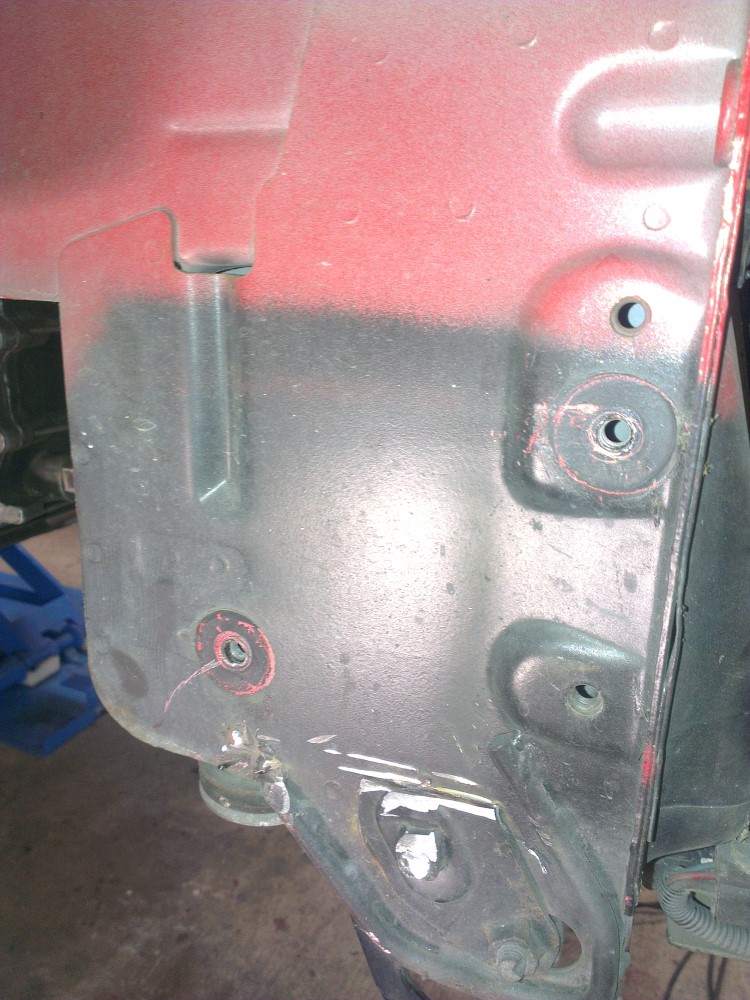
    Not only where the mounting brackets not aligned with the holes in the frame but they also placed the intercoolers to low and to far out from the car for the front spoiler to fit properly.


    I ended up completely removing the old mounts, but that wasn't enough...


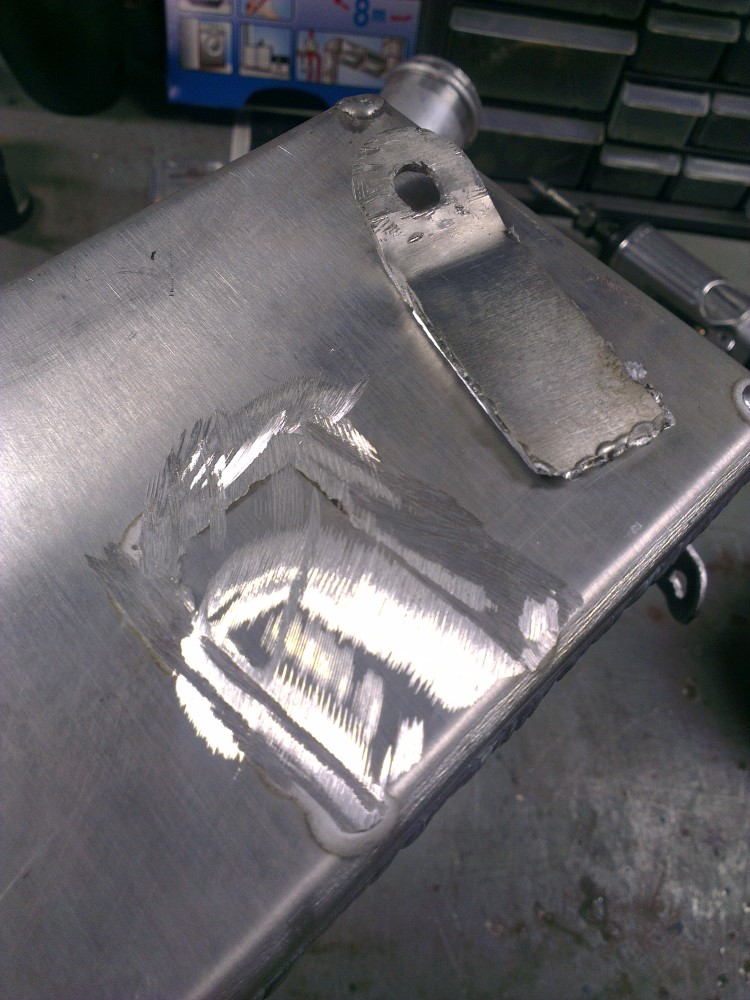
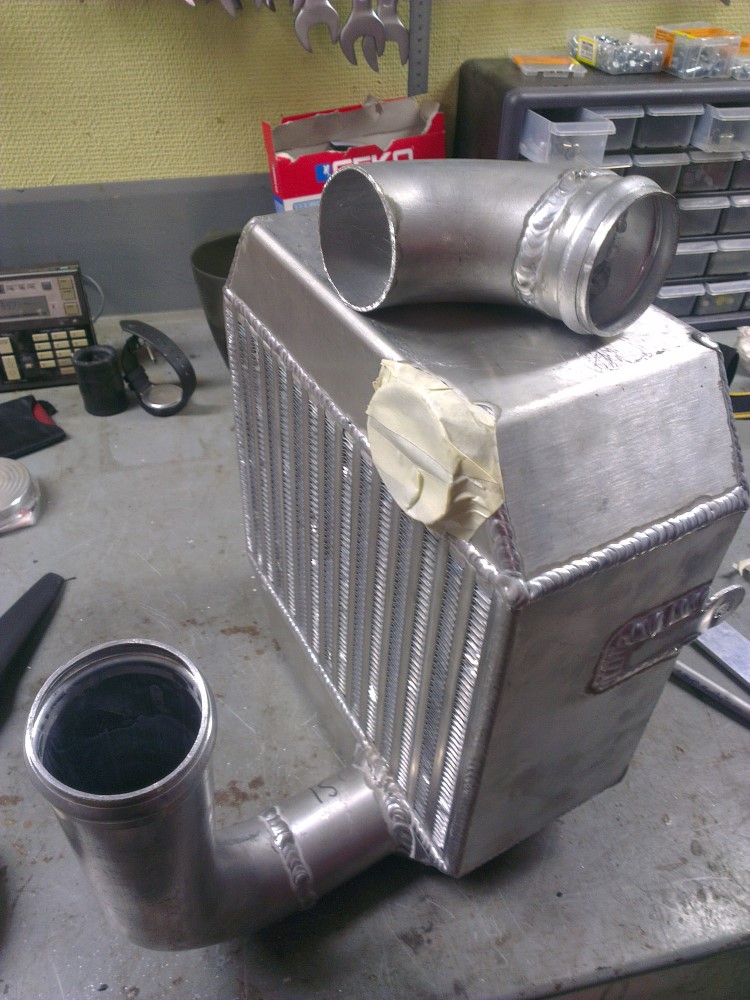
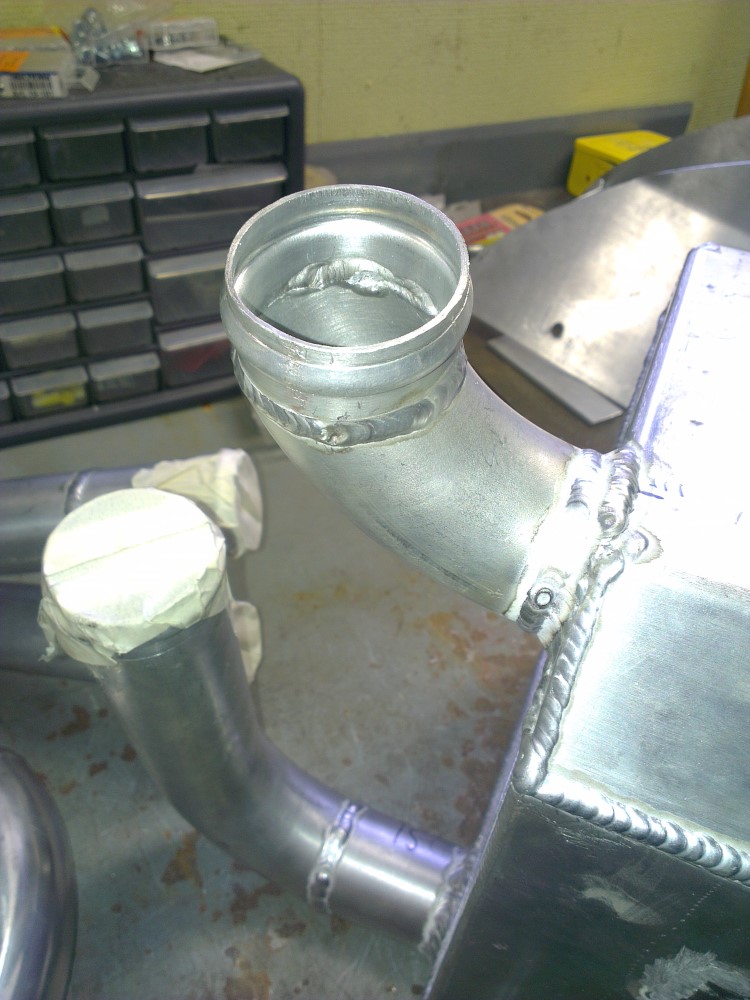
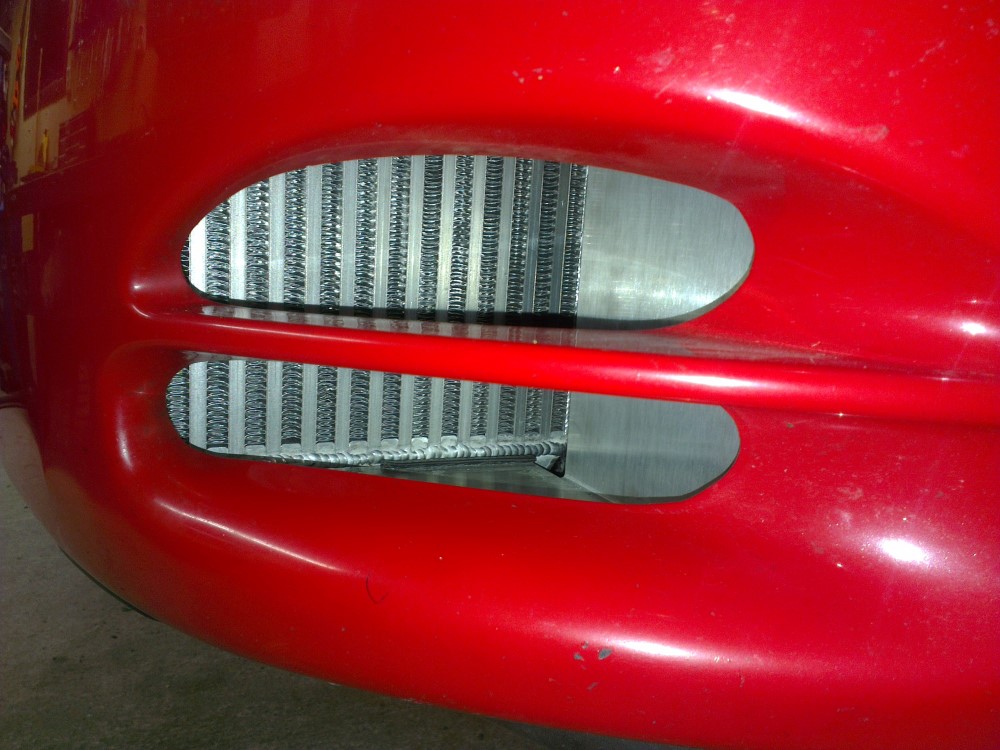
    I had to do some trimming of the car too. This allowed me to place the intercoolers right up against the frame of the car. That however highlighted another problem... one of the pipes was welded on at the wrong angle so it hit the frame.


    I didn't want to get any aluminum shaving inside of the core when I cut the pipe off so I connected a vacuum cleaner. That way no shavings could go into the core as I cut.

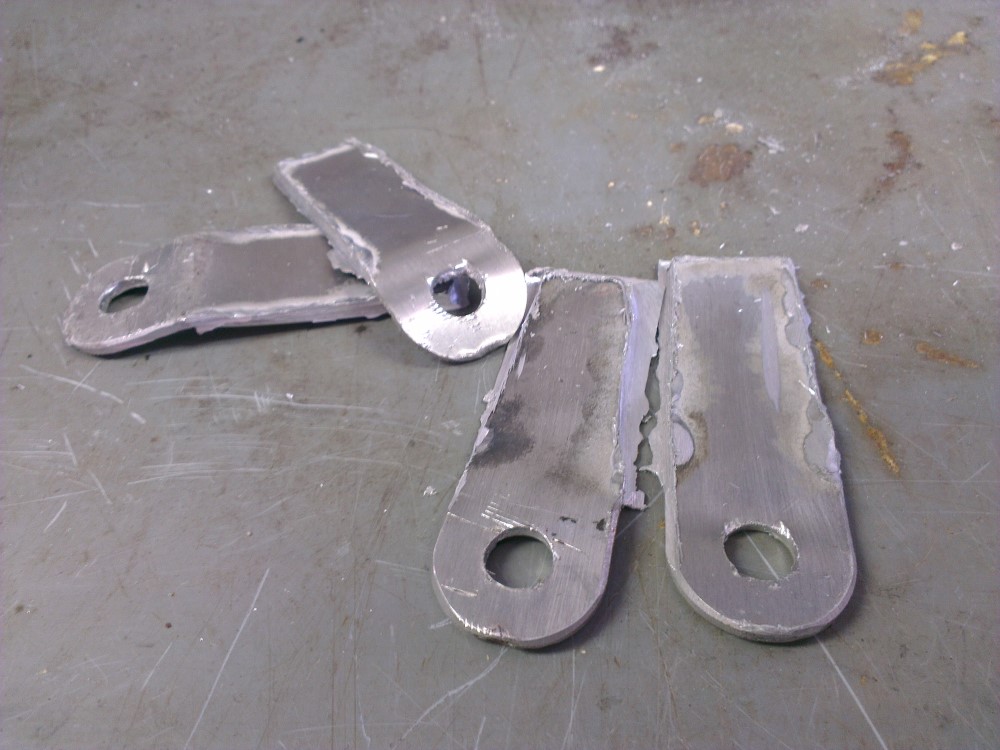
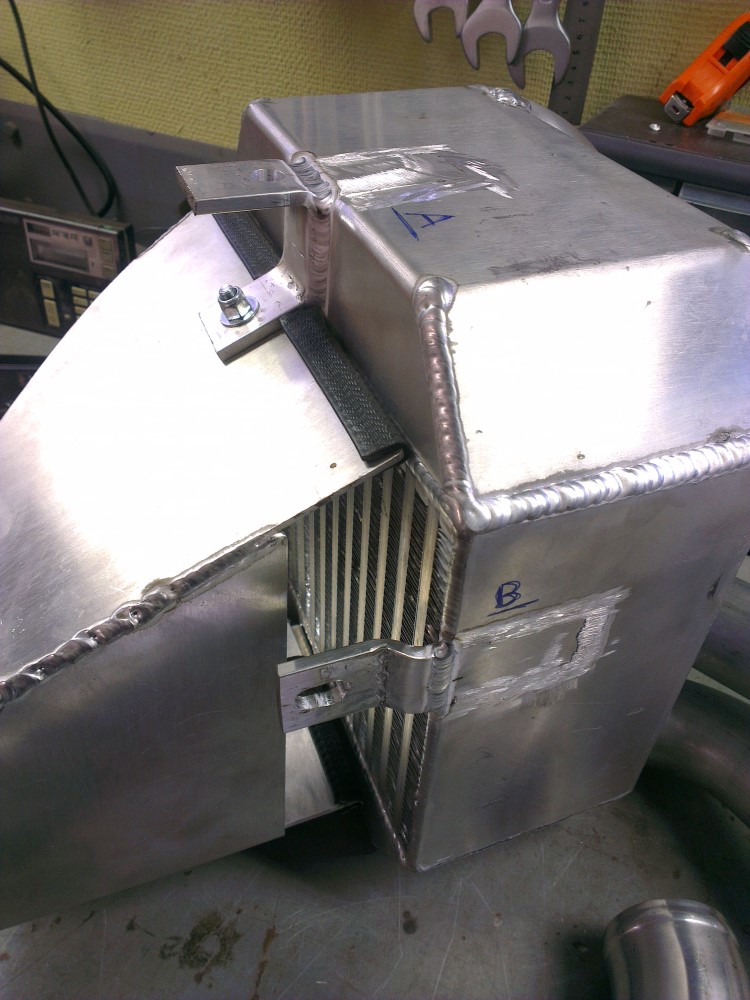
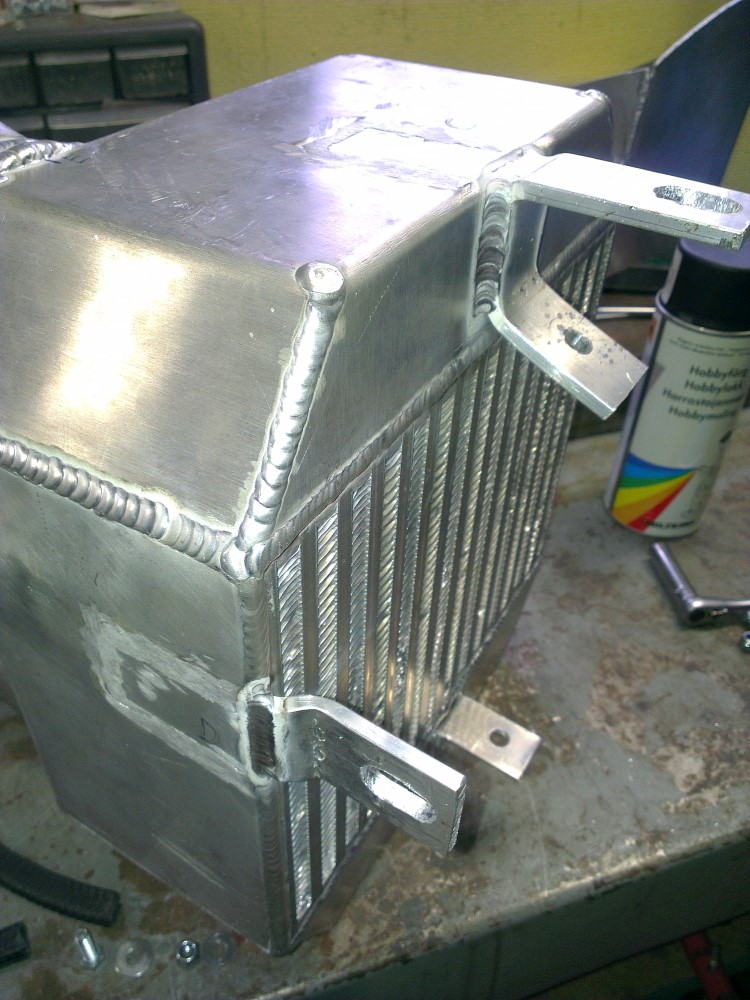
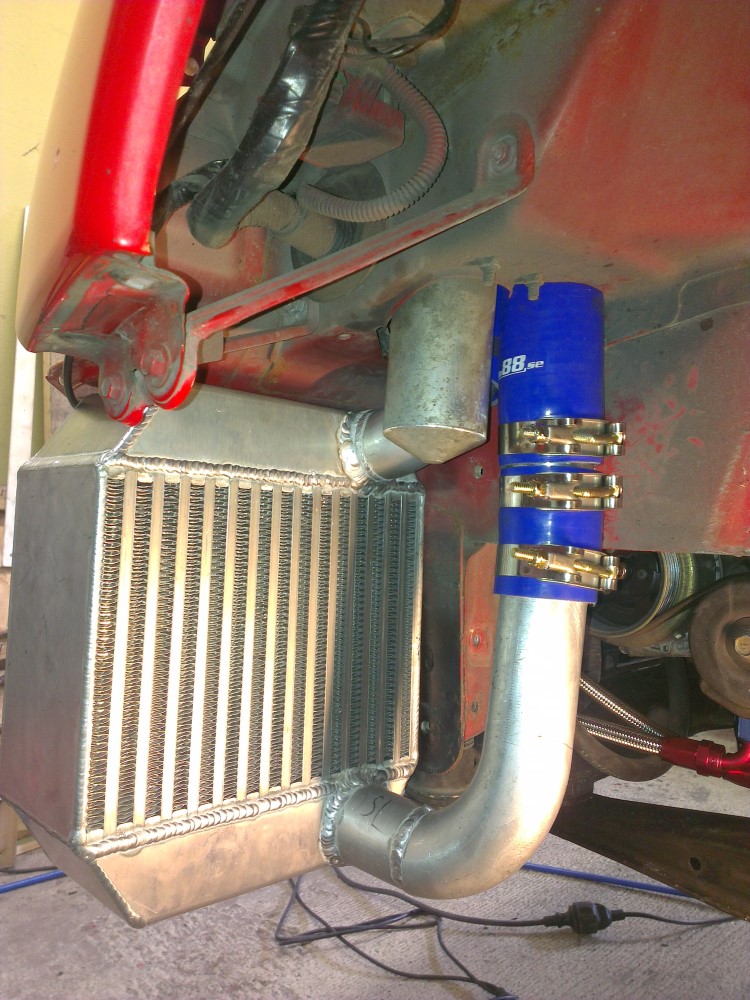
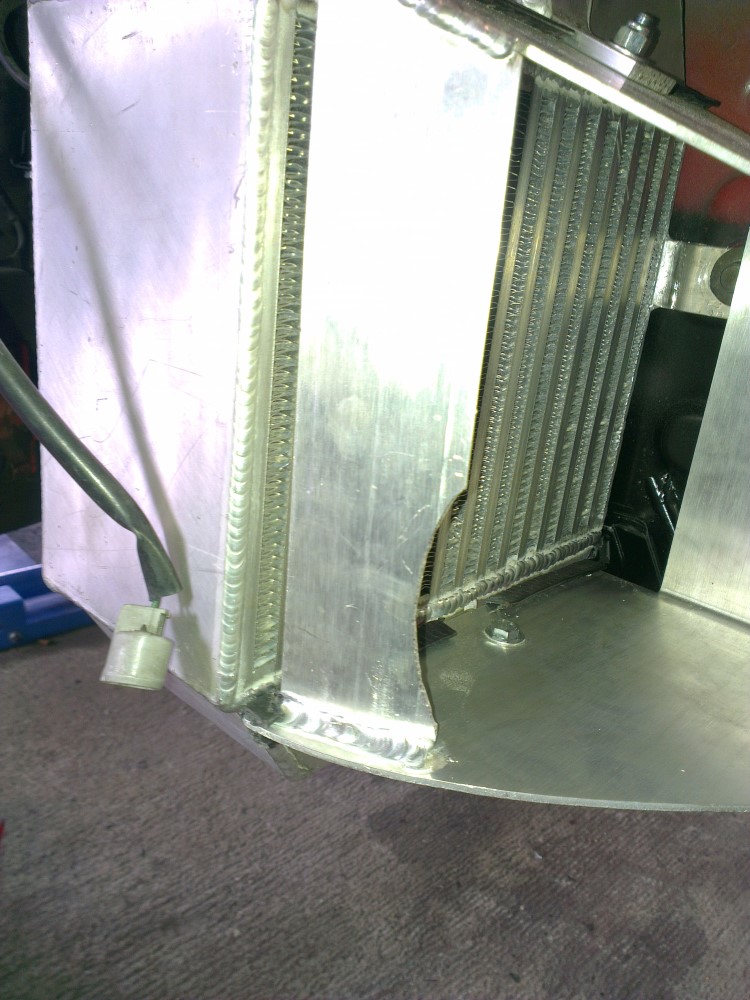
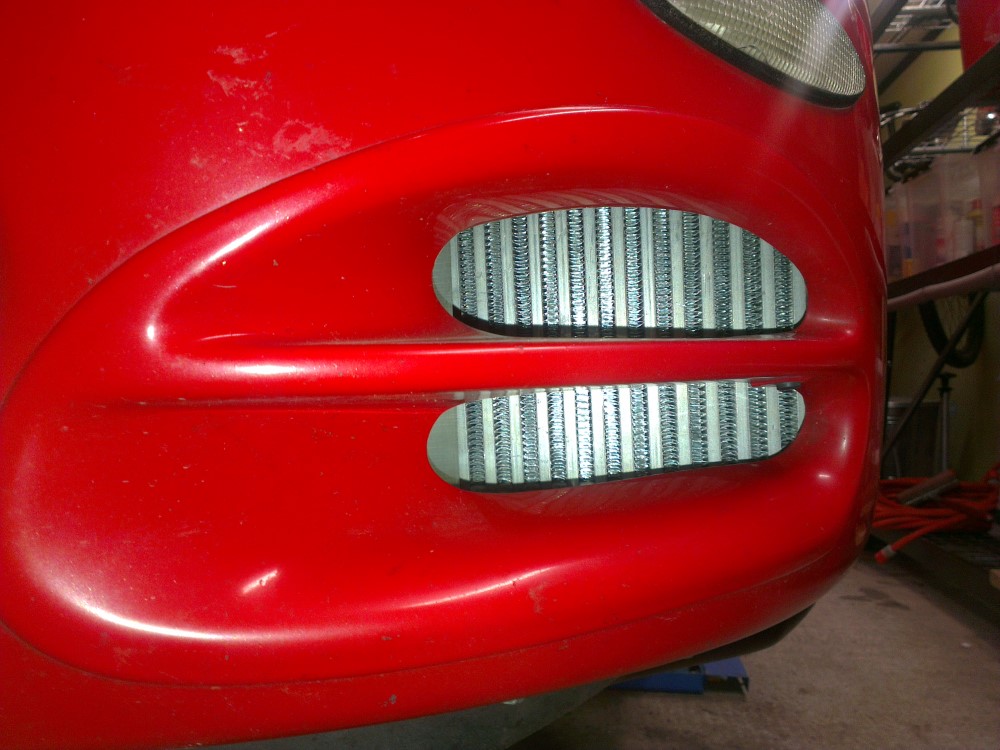
    Next I then handed over the intercooler and a new set of mounting brackets I made out of 4 mm aluminum to a local welding company. This is how they looked when they came back:


    The new mounting brackets worked really well and are also much stronger than the original ones.

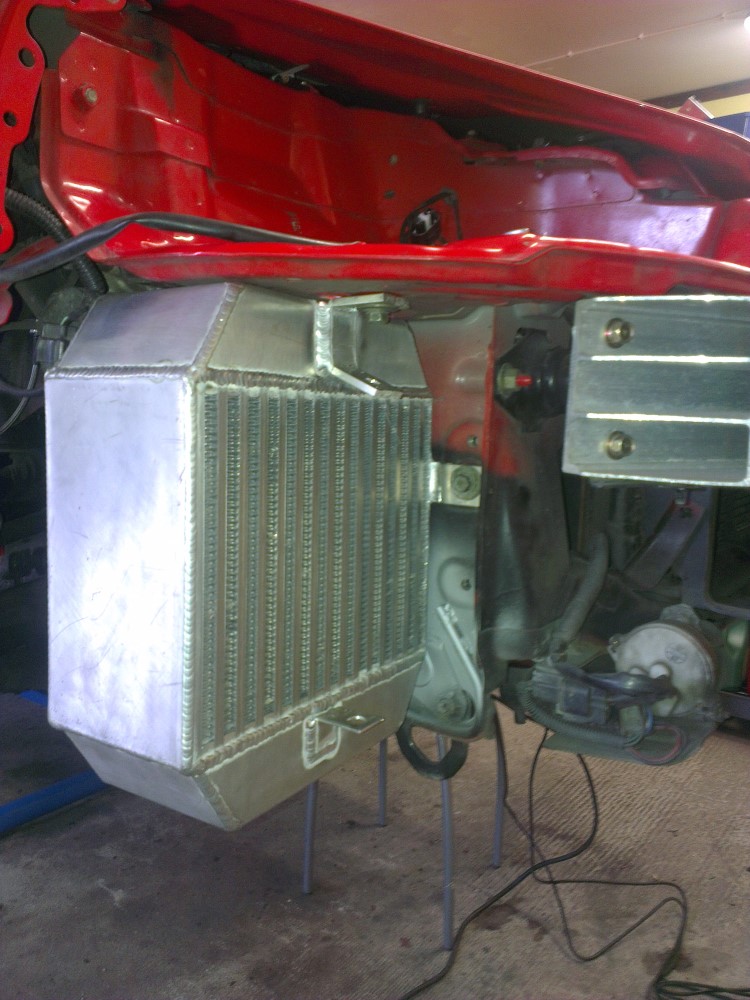
    Here is how the intercoolers look mounted on the car with the new mounting brackets:


  2. #92
    Forum User
    Join Date
    Oct 2011
    Owner Since
    2007

    Location
    Sundsvall, Sweden
    Posts
    928
    Thanks
    330
    Thanked 119 Times in 77 Posts
    As the intercoolers now finally fit properly on the car I brought out my now quite big pile of silicone couplers and started assembling everything.


    However I didn't take long before I hit the next snag. All my T-bolt clamps where from CX Racing and fit their 3 ply silicone couplers nicely. The new silicone couplers I had bought where of a higher grade and used 4 ply which meant that they where slightly thicker.

    I was still able to use the CX Racing T-bolt clamps but it was really tricky to get them on the thicker couplers and it took forever to get them all in place.


    The o-ring for the rear turbo outlet pipe that comes with the CX Racing kit is a very sad looking molded little silicon ring that doesn't do much good. I knew this from reading reading reviews of this pipe kit before hand so I didn't even bother to mount it instead I headed over to local shop specialized in rubber o-rings. They measured the pipe, asked me how high temperature the rubber needed to withstand and then ordered the right one for me. It cost only 20$ and that included a special lube used when fitting the o-ring that the evaporates with heat and leaves no residue.

    Here is how the o-rings compare:


    Next it was time for pressure testing. I bought this very nice CNC machined pressure tester a few years ago. However it has one major flaw once fitted it was really hard to remove since there was nothing to grab on to in order to pull it out. So I drilled and tapped two holes in so that I could fit two bolts.


    Finally everything in place!


    Next I filled up the engine with some fresh oil, removed the ECI fuse and cranked the engine a few seconds at time until I got some oil pressure. Put the ECI fuse back in cranked the engine and to my great relief it started right away

    I let the car run for a few minutes while on the lift to check for any oil or water leaks but it all looked good so next step is mounting the front spoiler, active aero under tray and various other plastic covers before I'll hopefully be back on the road again.

  3. The Following 2 Users Say Thank You to Unlogic For This Useful Post:


  4. #93
    Banned Not Verified Blackmount's Avatar
    Join Date
    Apr 2011
    Owner Since
    Mid-April 2011.

    Location
    Monroe WI
    Posts
    1,466
    Thanks
    78
    Thanked 24 Times in 21 Posts
    coming along nicely i see

  5. #94
    Forum User
    Join Date
    Oct 2011
    Owner Since
    2007

    Location
    Sundsvall, Sweden
    Posts
    928
    Thanks
    330
    Thanked 119 Times in 77 Posts
    Quote Originally Posted by Blackmount View Post
    coming along nicely i see
    Thanks!

    I could probably have cut some of the silicone couplers and hoses a bit shorter to improve the looks but it was such a pain in the ass to get everything bolted together that I left that task for another time.

    The fitment between the T-bolt clamps and the thicker hoses was so tight that I had to use o-ring lube in some places in order to be able to slide the clamps onto the hose.
    Last edited by Unlogic; 04-29-2013 at 05:38 AM.

  6. #95
    Forum User
    Join Date
    Oct 2011
    Owner Since
    2007

    Location
    Sundsvall, Sweden
    Posts
    928
    Thanks
    330
    Thanked 119 Times in 77 Posts
    Decided to remove the clutch pressure reservoir since there wasn't enough space for it with the new intercoolers and pipes. Followed these two guides:

    http://www.3sgto.org/3000gt-stealth-...reservoir.html
    Vacuum Reduction - Clutch Boost - No extra "T" - 3000GT/Stealth International Message Center


    All pipes removed after battling with the AC lines for a while.


    Cut the long pipe as mentioned in the guides and bent it first using a normal pipe bending tool and then using a long 1/4" socket.


    The finished pipe.


    Pipe mounted in the car. I should have done this mod before I installed the intercooler pipes since it frees up some space by the rear turbo.


    Capped left over vacuum port on the plenum using a short hose and a piece of a bolt. First I planed to remove the port altogether and replace it with a bolt but I didn't have any bolt with matching threads.


    Got the front spoiler back on the car after seven tries. Had to trim the intercooler ducting in quite few places...


    The new intercooler with the front spoiler mounted. I wonder if I should install a steel mesh to protect them from small rocks and debris.


    Got my hands on a proper brake light glass for the active aero wing. I modified it to fit with the LED bar I made a few months back. This glass looks way better than the one from my wing which didn't come with a brake light and therefore had the glass painted with some odd reflective paint on the inside.

    All I have left now is to bleed the brakes with the engine on then I should be back on the road!

  7. #96
    Member Not Verified
    Join Date
    Mar 2013
    Owner Since
    SL owner since Jan 2010. VR4 owner since Sep 2012

    Location
    Riverside, Cali
    Posts
    309
    Thanks
    25
    Thanked 28 Times in 15 Posts
    This thread is awesome 
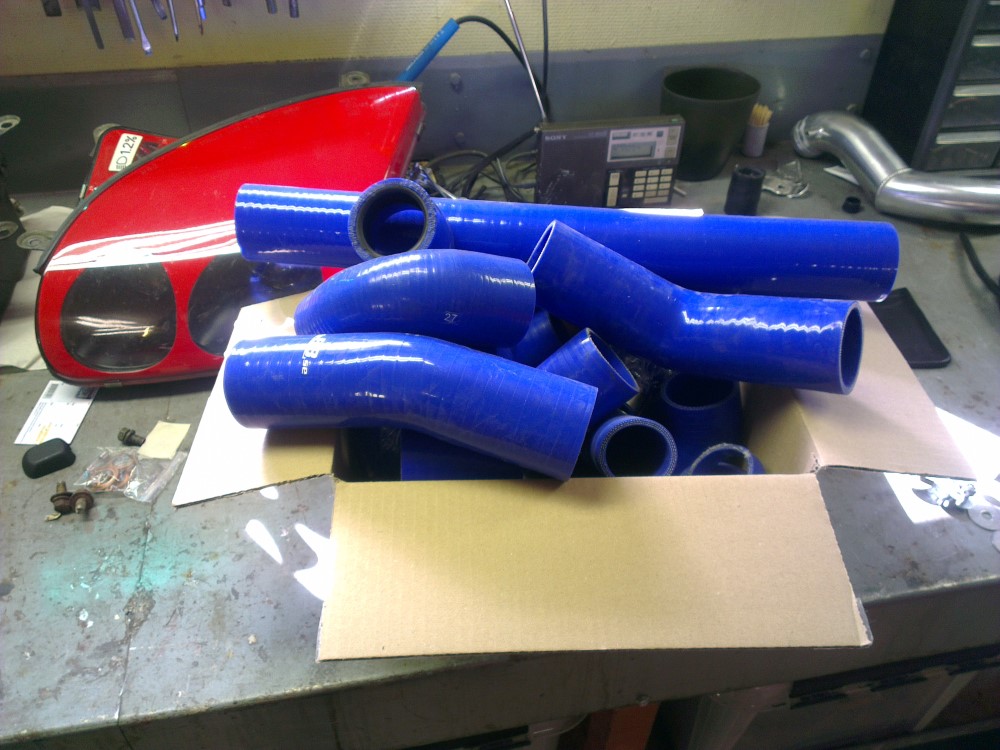
I'm glad I stumbled upon it.

    1991 Monza Red VR4- Weekend ride: Tanabe Super Medallion Hyper exhaust, 0.8 bar WGs, Turbosmart MBC (@1 bar), 3SX turbo pre-pipes, Straight pipe, Greddy Type RS BOV, Godspeed FMIC w/ PPE pipes, Stillin DP, HKS duel filters, RPS stage 2 clutch, 3sx SS clutch line, Custom oil catch can w/ braided lines, Krank vents, Ohhnoo's fuel loop, HW fuel pump, PC'd 2G brake swap w/3sx SS lines, Hawk pads, and Stop Tech rotors; Various deletes, PC'd/polished engine stuff, Koyo rad, Greddy coolant cap, DBest custom oil cap, Pit Road M front strut bar, PRM plug cover, PRM tailights, PRM CF Falcon hood and PRM shift knob, Morgan Motorsports splitter, 19x8.5 +27/19x9.5 +24 Volk GT-Cs wrapped Nitto NT555s, 99' bumper conversion, 99' sail panels, 2G side skirts, Retrofitted 5G Celica mirrors, Retro Spec side splitters, RS rain guards, and RS rear window visor, factory GTO light up visors, Custom fit Top Secret style diffuser for 350z, Robo mod w/halos, 3G rear garnish, Momo steering wheel, Tein Street Flex coilovers, 3SX control arms, Apexi turbo timer, Apexi mechanical boost gauge, Zoom Engineering Penta rear view mirror, Veilside navigators foot rest, Pioneer HU

  8. #97
    Forum User
    Join Date
    Oct 2011
    Owner Since
    2007

    Location
    Sundsvall, Sweden
    Posts
    928
    Thanks
    330
    Thanked 119 Times in 77 Posts
    I got the car back together on Friday night and took it for spin.


    Having replaced, upgraded and messed with some many things this winter I expected my first test drive to involve at least a few hiccups with silicone hoses popping off, oil leaks or incorrectly connected vacuum hoses (our cars must hold some kind of record when it comes to the amount of vacuum hoses one could possibly fit in the engine bay of car).

    However everything went smoothly and the car worked really well.

    I barely got the car off the lift before I realized how big difference polyurethane engine mounts make. All of the drive shaft wobble at low speeds is gone and the play in the drive train has been drastically reduced.

    When the car had heated up and I finally did some WOT pulls I immediately noticed that the car had a new sound. I guess it's caused by my new air filter and maybe resonance in the new hard pre turbo pipes. The car has a more roaring sound now, a very pleasant surprise I must say

    The new intercoolers also seem to be doing their job. The car didn't fade after a few hard pulls like it did before and the temperature difference between the pipes going to and from the intercoolers was noticeable by just putting the hand on the pipes. I'm gonna buy one of those fancy IR-thermometers next week and see if I can get some readings.
    Last edited by Unlogic; 05-05-2013 at 04:27 AM.

  9. #98
    Forum User
    Join Date
    Oct 2011
    Owner Since
    2007

    Location
    Sundsvall, Sweden
    Posts
    928
    Thanks
    330
    Thanked 119 Times in 77 Posts
    since my last update I've driven about 1500 kilometers without any problems. However there was one issue that annoyed me and which have done so for quite some time, the noise level inside the car!

    The sound deadening on our cars is almost non existent especially in rear of the car. I do a lot of highway driving at 120+ km/h and the noise level at those speeds is not very pleasant, especially after a few hours in the car...

    I was inspired by the work Erik Gross did on his car almost ten years ago (1995 3000GT VR-4: Sound Deadening Installation) and I thought I'd do the same thing.

    Went to the local car stereo dealer and bought five big sheets of STP silver sound deadaner. Then I removed the interior (again...):


    It was a bit time consuming to cut the material into to the right sizes and install it without any wrinkles or bubbles. However the difference in noise level is bigger than I expected. I'd say that this mod was really worth it.

  10. #99
    Forum User
    Join Date
    Sep 2010
    Owner Since
    2000

    Posts
    1,241
    Blog Entries
    2
    Thanks
    213
    Thanked 91 Times in 64 Posts
    nice ! how much is a bottle of that redline motor oil ? here its 21€ per bottle ... 23€ a little. stupid expensive oil but I still use it too.

  11. #100
    Forum User
    Join Date
    Oct 2011
    Owner Since
    2007

    Location
    Sundsvall, Sweden
    Posts
    928
    Thanks
    330
    Thanked 119 Times in 77 Posts
    It's just as stupidly expensive here in Sweden. However if your not in a hurry you can order it from Amazon.com for about 15€ using their cheapest shipping option.

Tags for this Thread

Bookmarks

Posting Permissions

  • You may not post new threads
  • You may not post replies
  • You may not post attachments
  • You may not edit your posts
  •  
The 3000GT/Stealth/GTO Web History Project
3000gt.com
3000GT / Stealth International WWWboard Archive
Jim's (RED3KGT) Reststop
3000GT/Stealth/GTO Information and Resources
Team 3S
3000GT / Stealth / GTO Information
daveblack.net
3000GT/Stealth/GTO Clubs and Groups
Michigan 3S
MInnesota 3S
Wisconsin 3S
Iowa, Nebraska, Kansas 3S
North California 3000GT/Stealth
United Society of 3S Owners
3000GT/Stealth/GTO Forums
3000GT/Stealth International
3000GT/Stealth/GTO Event Pages
3S National Gathering
East Coast Gathering
Upper Mid-West Gathering
Blue Ridge Gathering