
Hoping my Ek2mfg poly mounts that I bought way back in the day don't have this problem!

Hoping my Ek2mfg poly mounts that I bought way back in the day don't have this problem!
Good thread, thanks for posting. That blau punkt system was pretty ridiculous haha.
Pearl White 1999 VR-4 #164
Finally got time to do some more work on the car.
Installed a spacer (just a stainless steel exhaust flange) between my rear pre-cat eliminator and the downpipe to prevent my front exhaust manifold from cracking again due to the rear pre-cat eliminator being a bit too short.
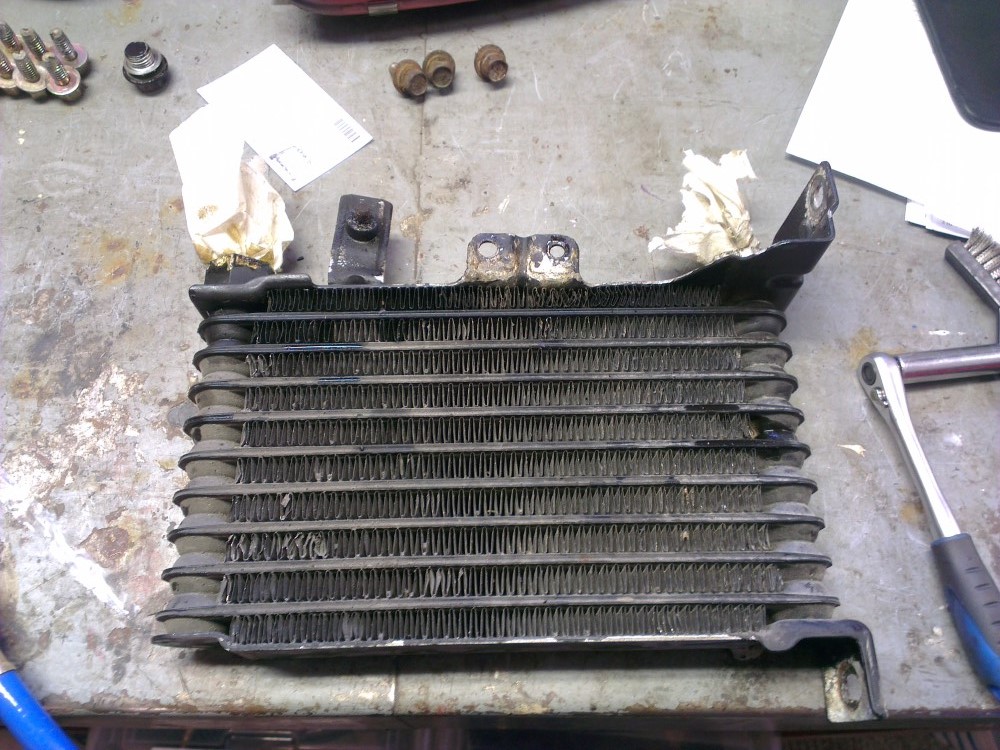
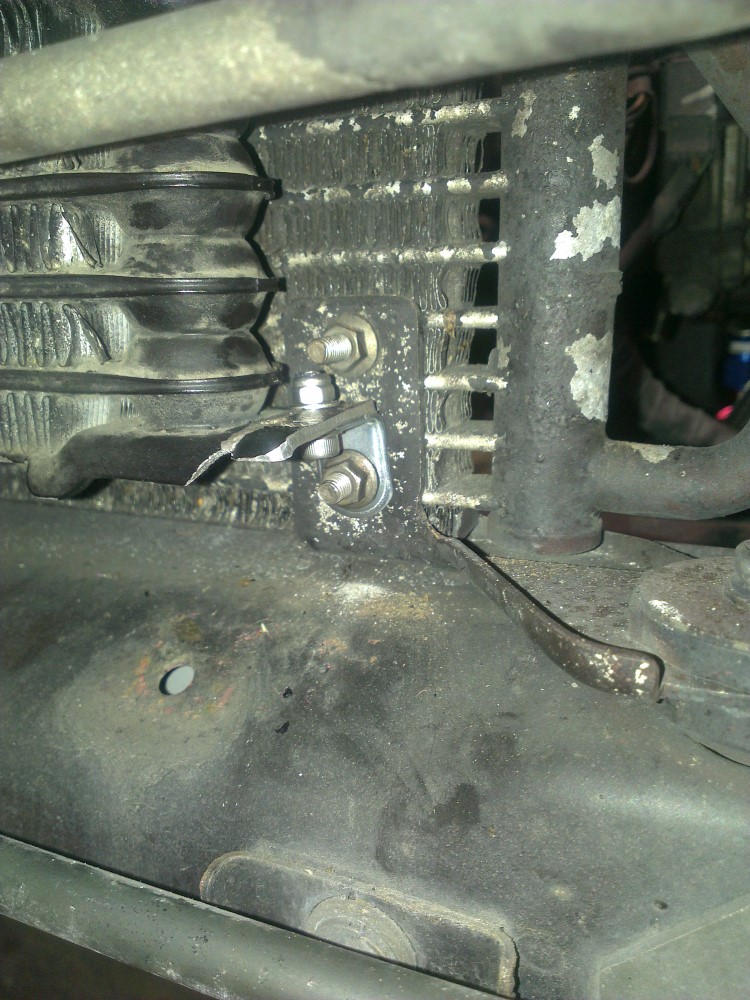
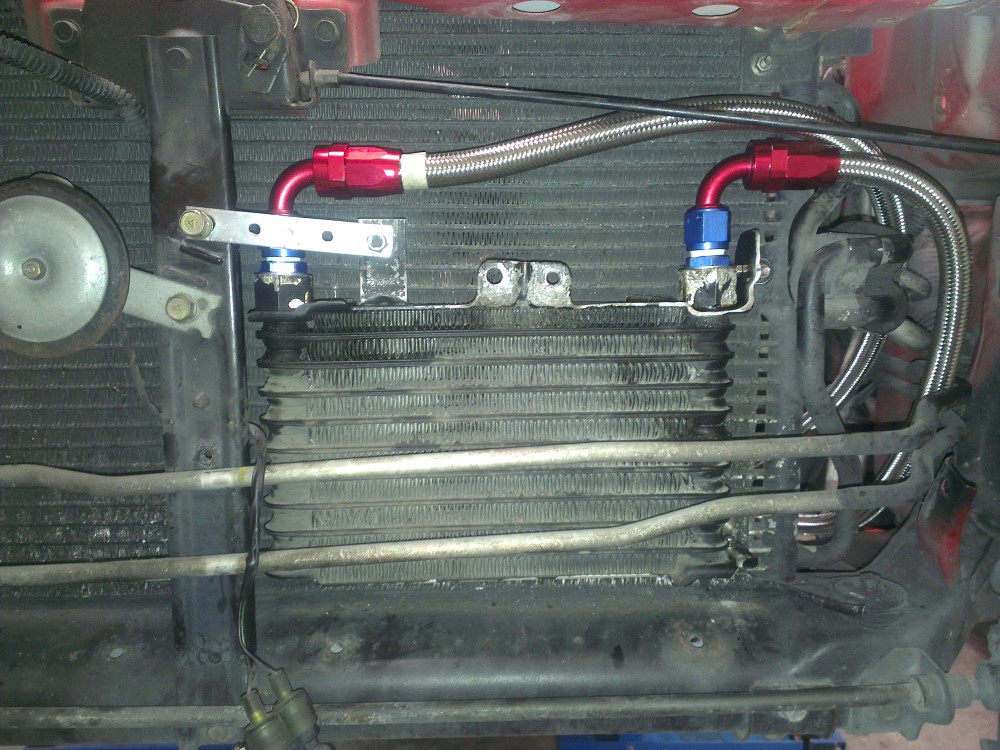
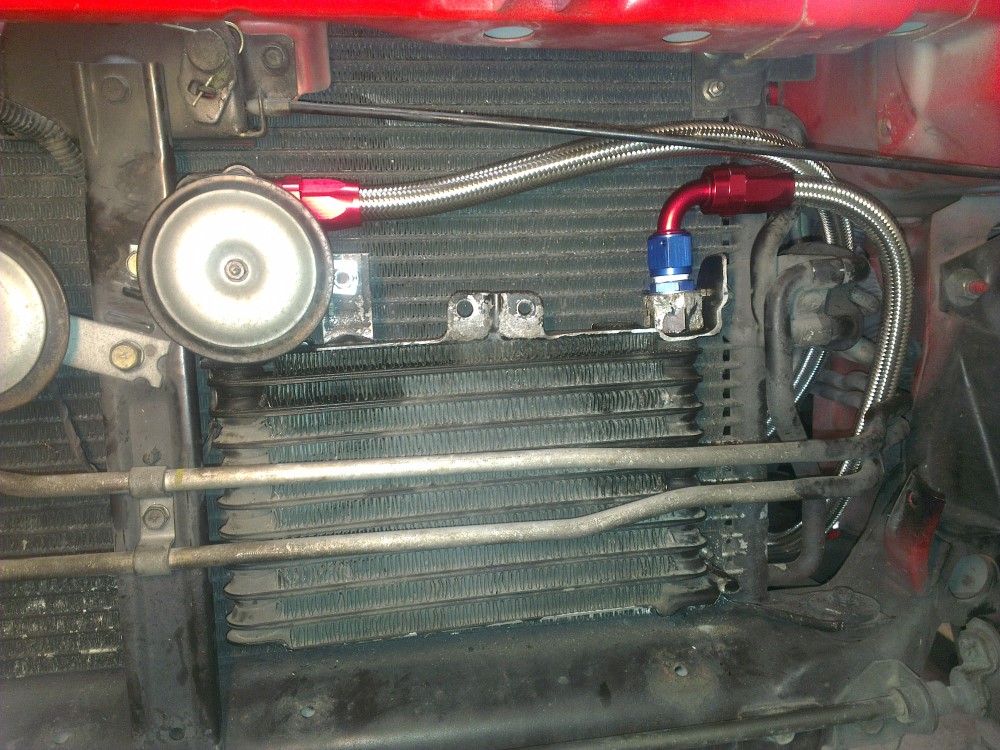
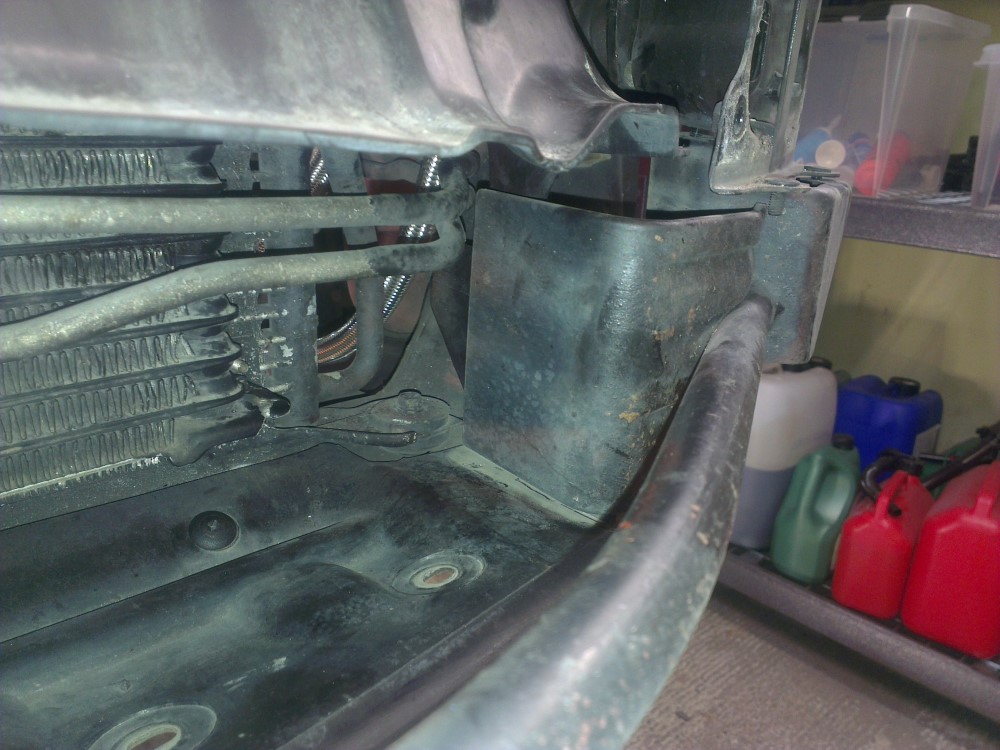
Removed the oil cooler in order to relocate it to the front.
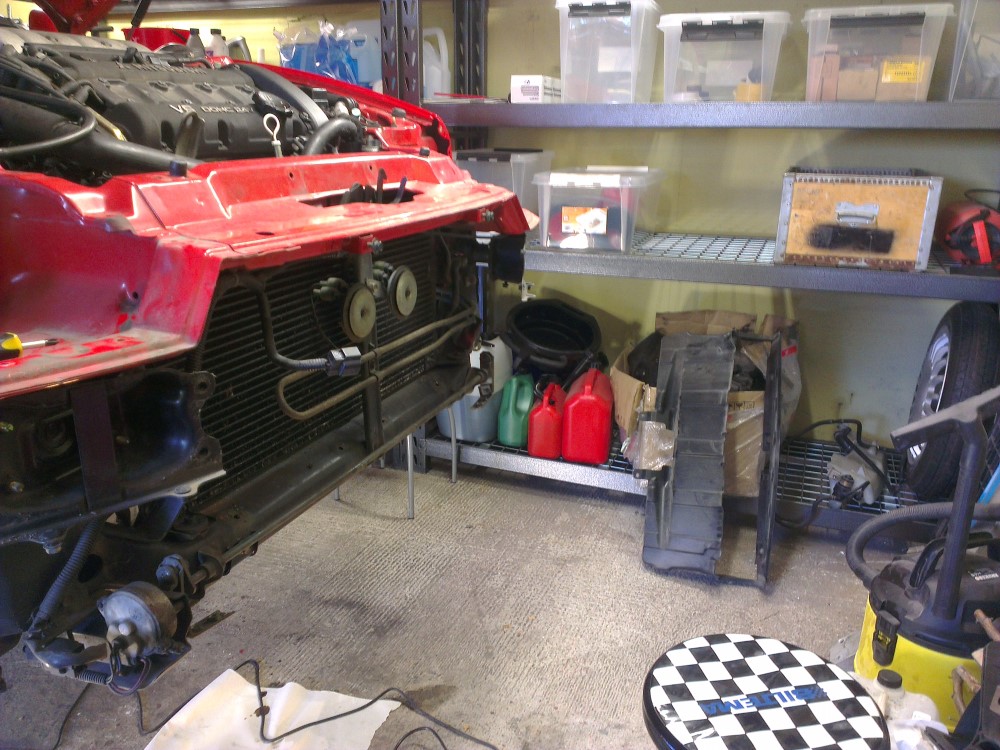
I must say that I'm surprised by how well designed the plastic ducting behind the crash bar is on our cars. On most cars the ducting is just a joke but on our cars I think it does a great job of preventing the air from escaping around the sides of the condenser and radiator.
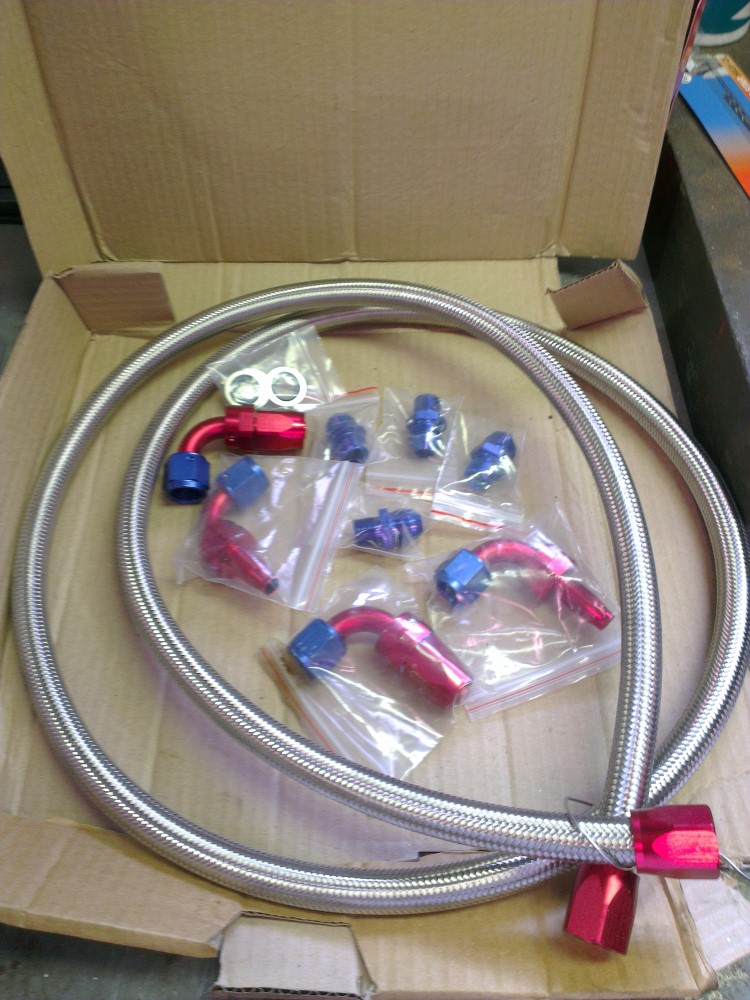
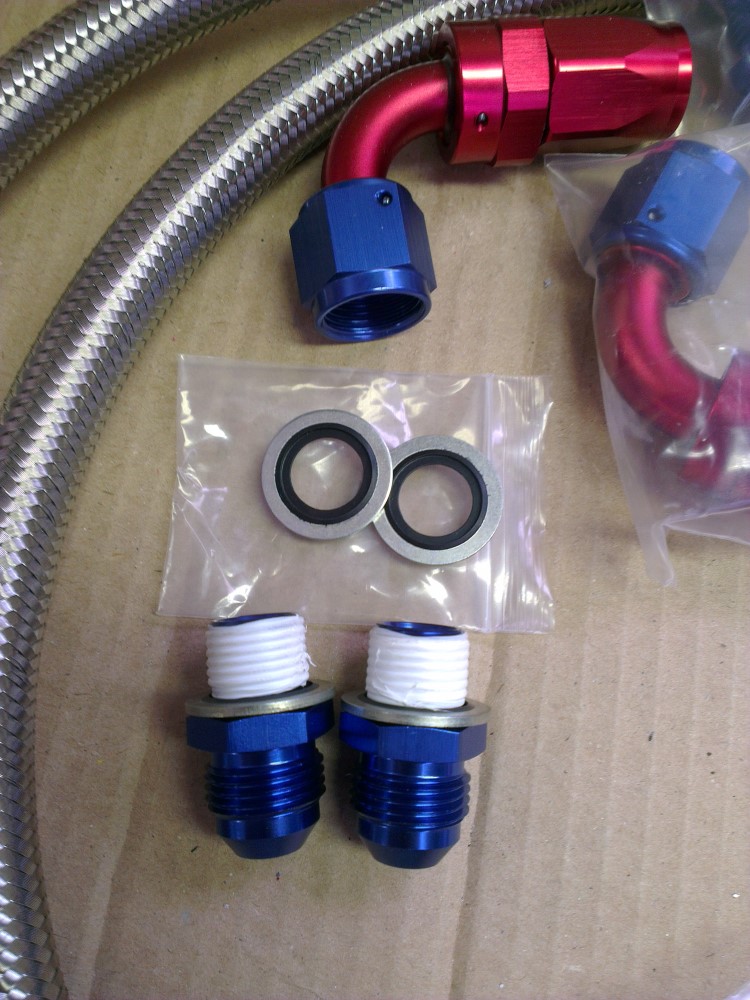
Time for some "fancy" AN fittings from Torques UK.
I've heard that thread sealant tape isn't necessary for AN fitting but I thought better safe than sorry and put some on anyway.
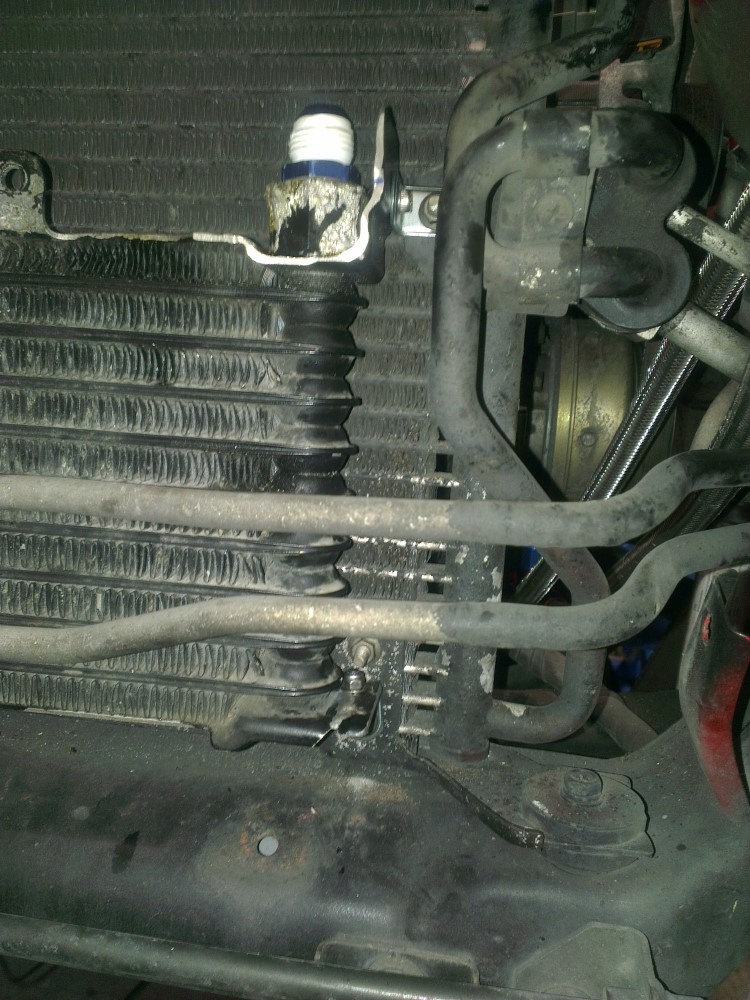
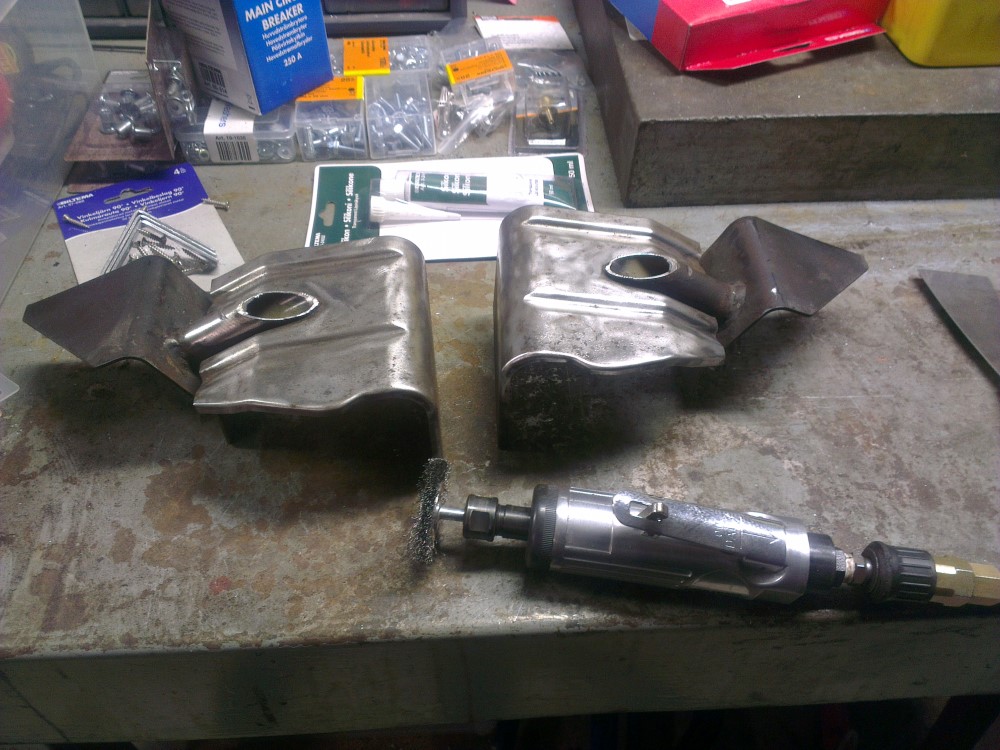
Next I modified the mounting points on the oil cooler just slightly in order to able to attach 90° brackets to the AC condenser bolts.
Test fitting the bracket on the other side which uses the bolt hole from the upper horn.
Horn mounted again just a few centimeters from it's stock location.
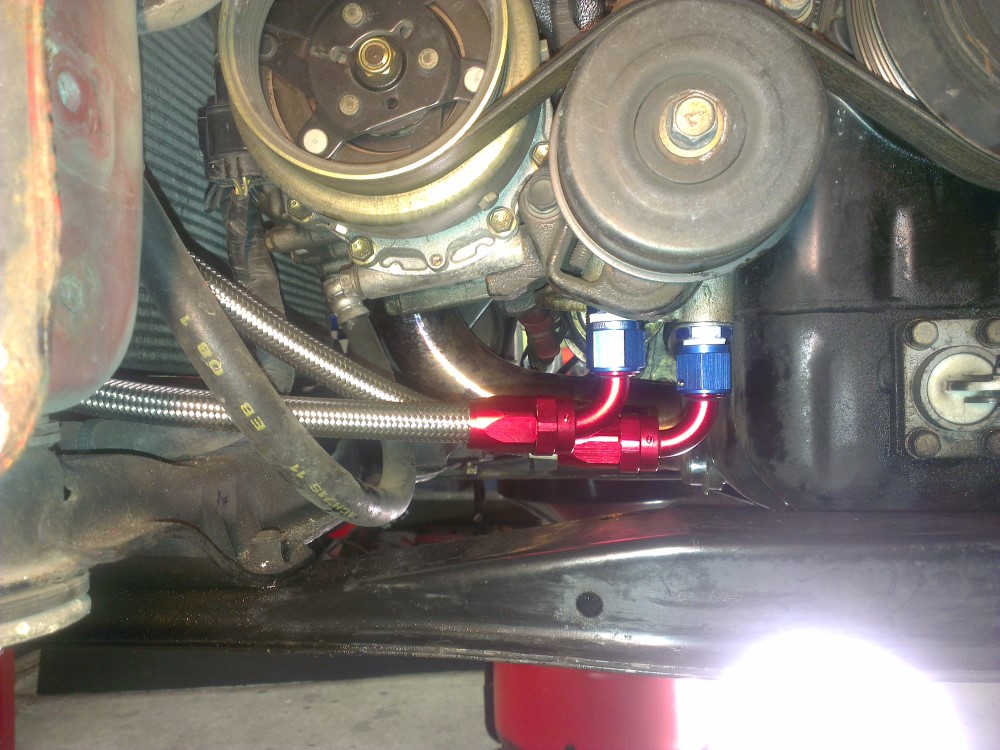
AN fittings by the oil filter. The guides I read regarding relocation of the oil cooler mentioned that the cross member below the oil filter would have to be removed in order to access these fittings but I found that it wasn't necessary at all.
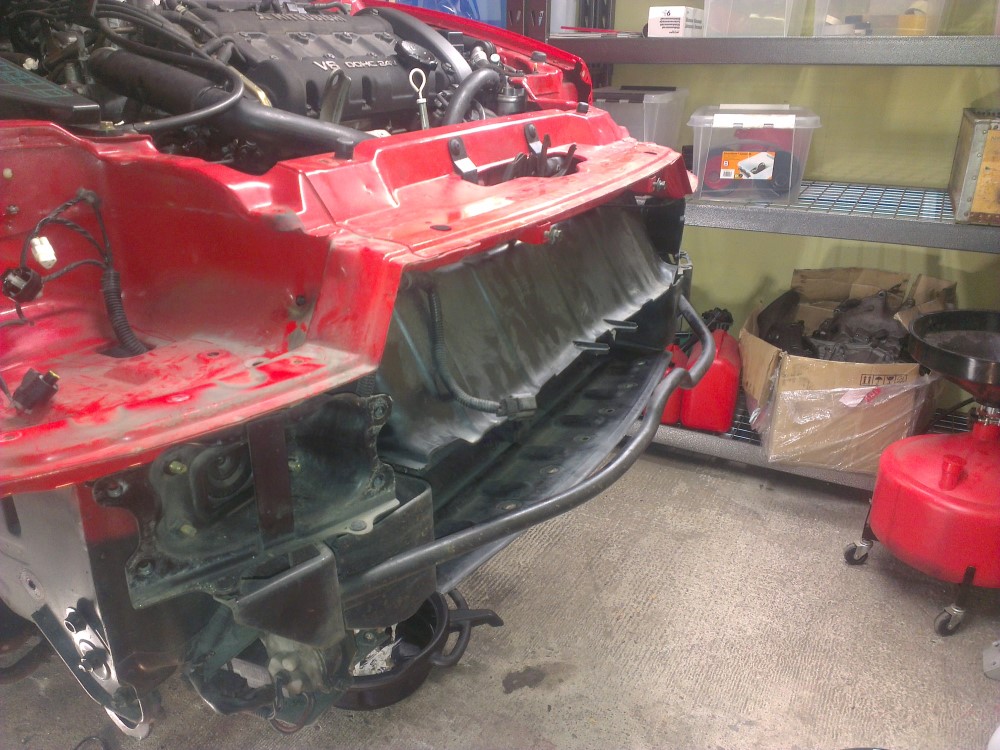
Had to make an extra opening in the plastic ducting for the oil lines.
Plastic ducting back on along with the ugly extra front crash bar present on euro spec cars.
This extra crash bar has steel plates on each side which fit into big holes in the plastic ducting. Removing the hole crash bar without covering these holes is not a good ides since it allows lots of air to bypass the condenser and radiator.
I ended up cutting off the bar itself and just leaving the steel plates. They have always been a bit rusty on my car so I'll see if I can get some new paint on them tomorrow.
Feels like most of the planned work on the car for this winter/spring is done now. Only waiting for a few more parts then I can start putting the car back together again (hopefully in time for when the snow has melted away).

teflon tape on straight thread and AN fittings can actually CAUSE leaks by interfering with the sealing surfaces.
Thanks for the info, I had no idea about that.Originally Posted by anyonebutme

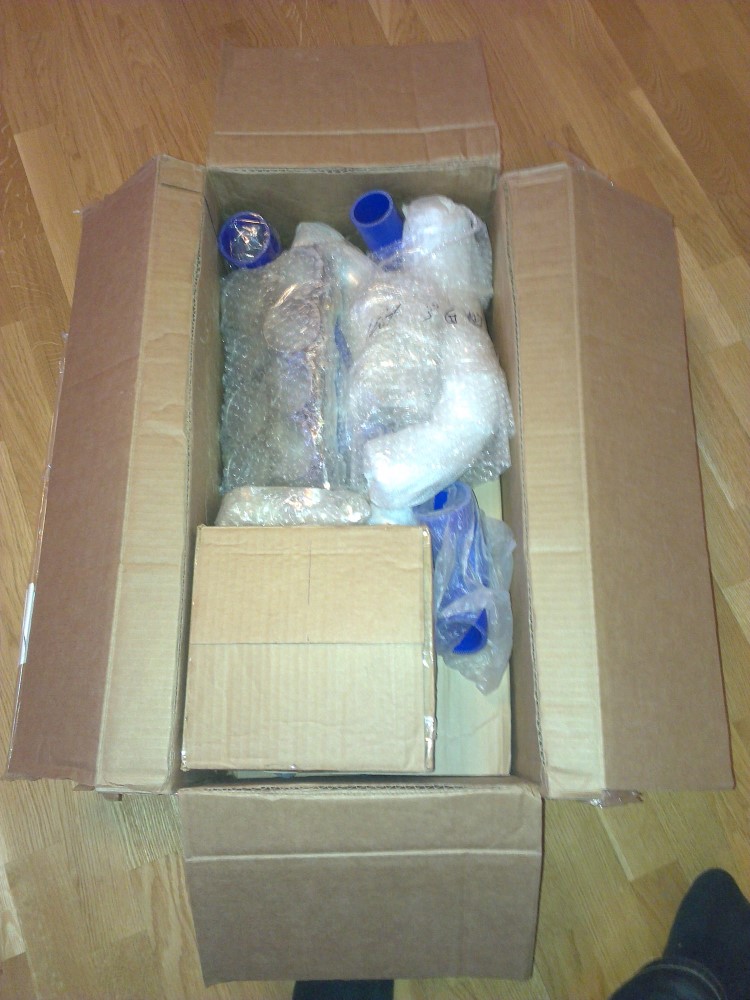
I got some long awaited stuff in the mail yesterday.
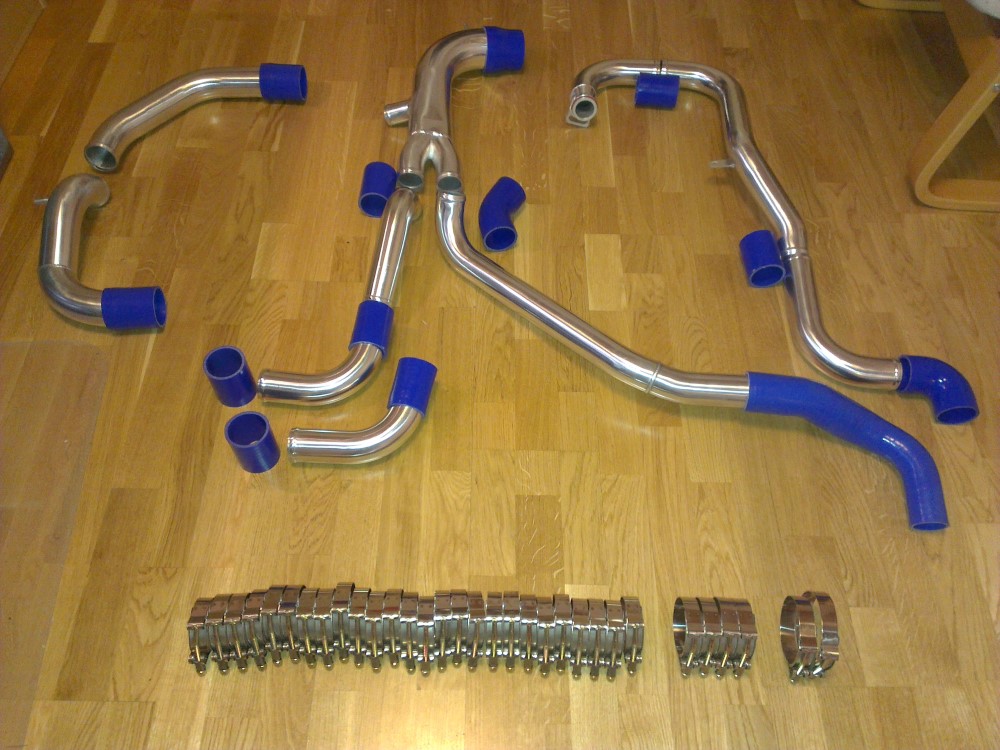
The newer revision CX Racing hard pipe kit and intake pipe kit. The quality of the pipes and silicone coupler is actually quite good but we'll see how it fits.
This kit is so cheap that I figured that it was cheaper buying it and making some modifications I if necessary than it was to make my own pipe kit from scratch.
Instead of the tapered 2" to 1.75" silicone couplers that come with the kit for connecting to the intercoolers I ordered some straight 2" couples since my Gene SMIC use 2" pipes. The "snorkel" the connects to the drivers side intercooler is gonna be a challenge to replace but I ordered some extra coupler in various shapes so hopefully I'll be to come up with a solution.
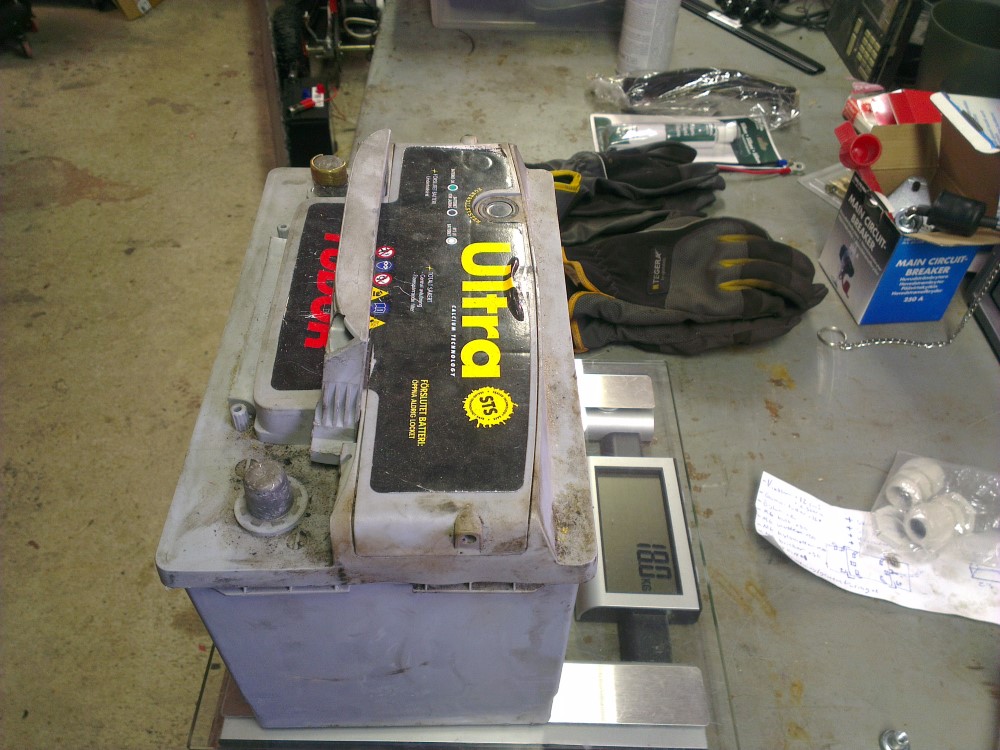
It took almost a month for my intercooler pipes to arrive so while I waited for them I decided to relocate my battery in order to free up some space under the hood.
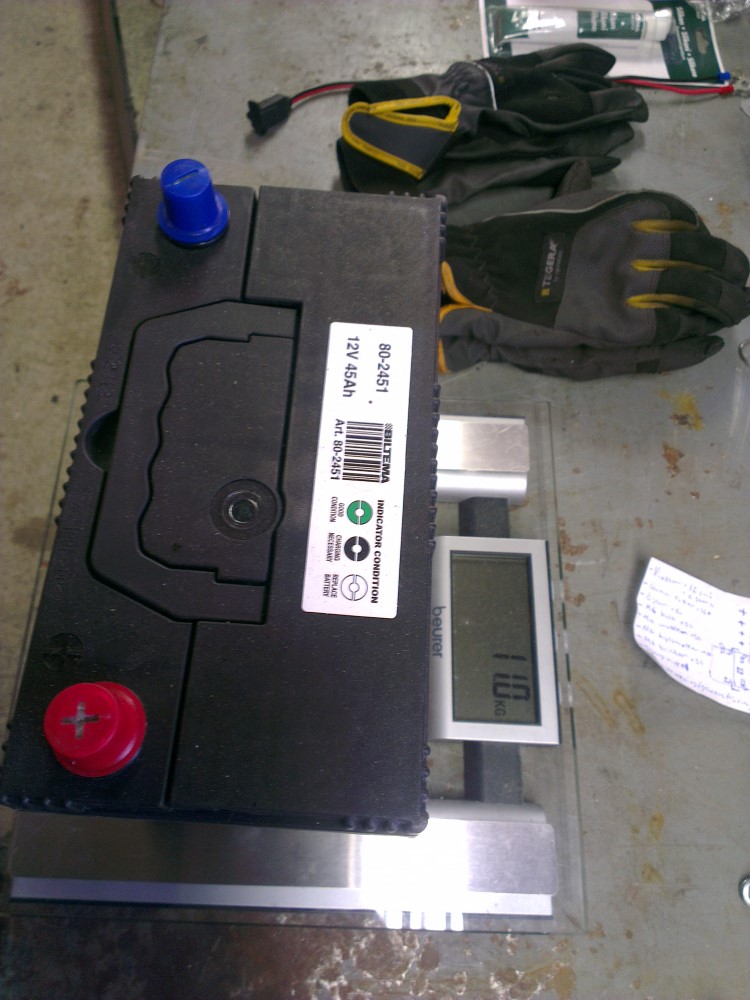
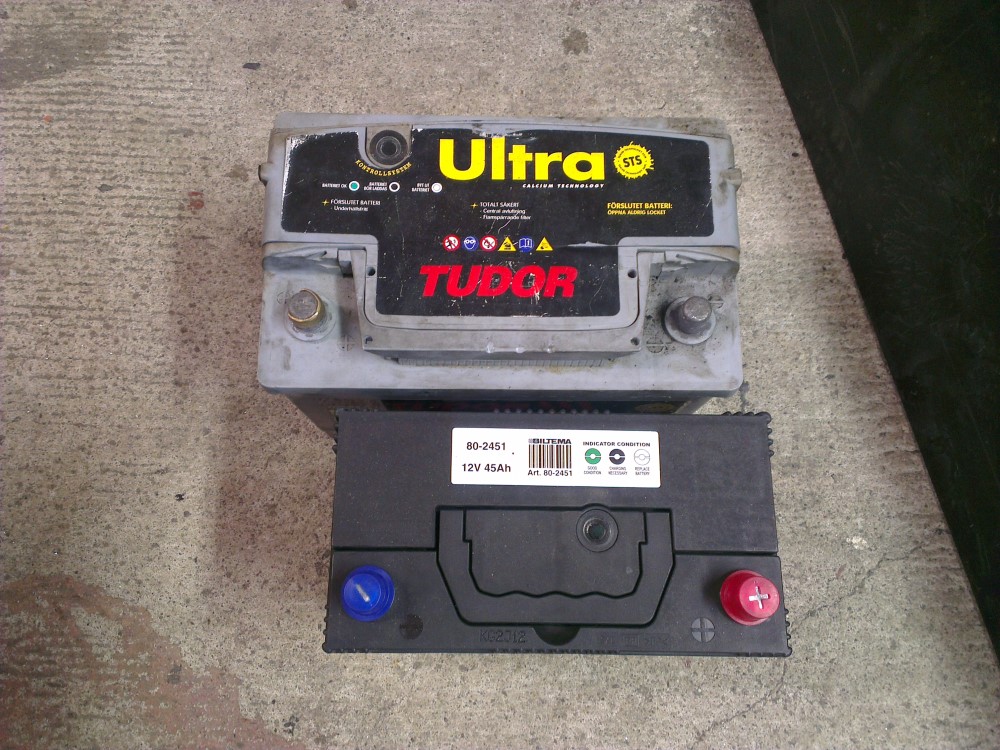
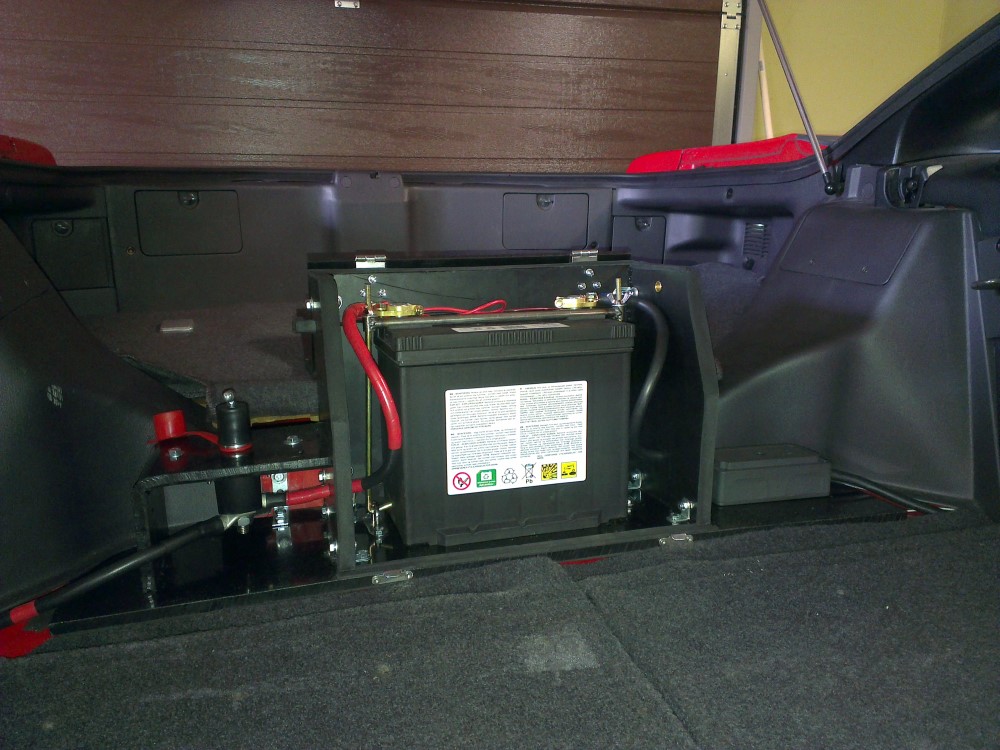
I started by replacing my huge 70 amp Tudor ultra with a smaller and much lighter 45 amp battery.
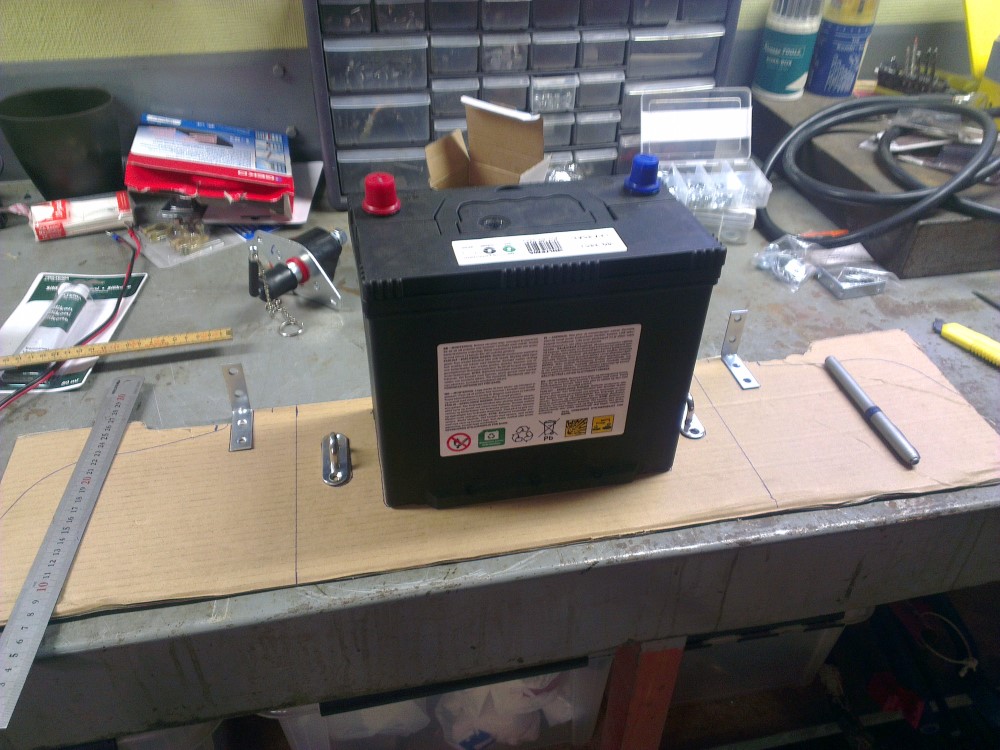
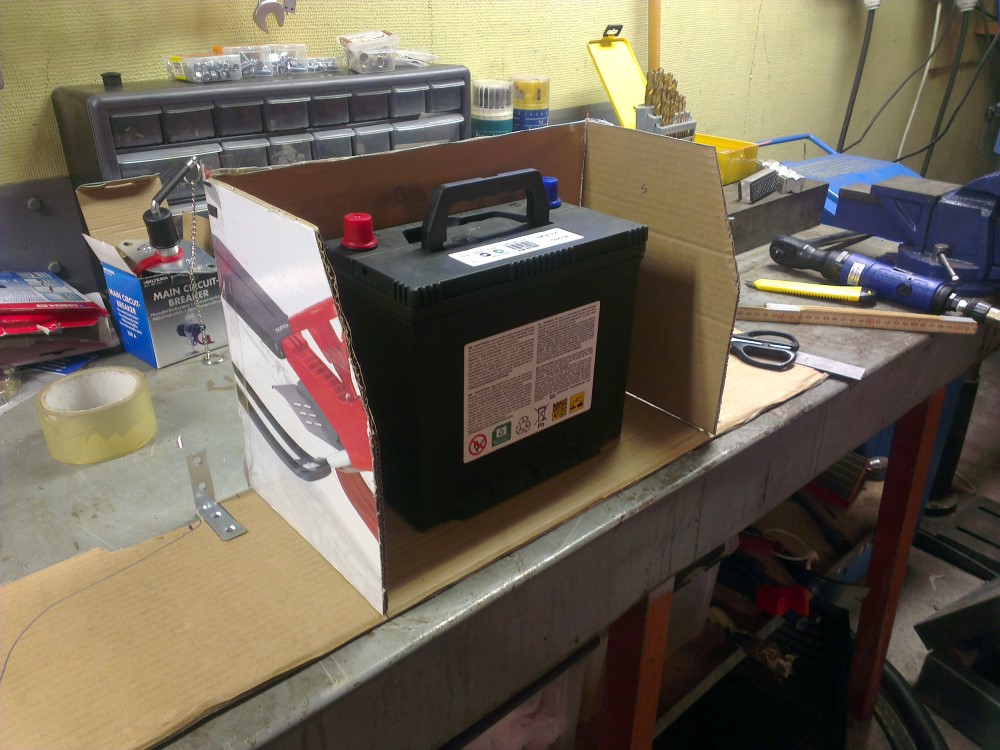
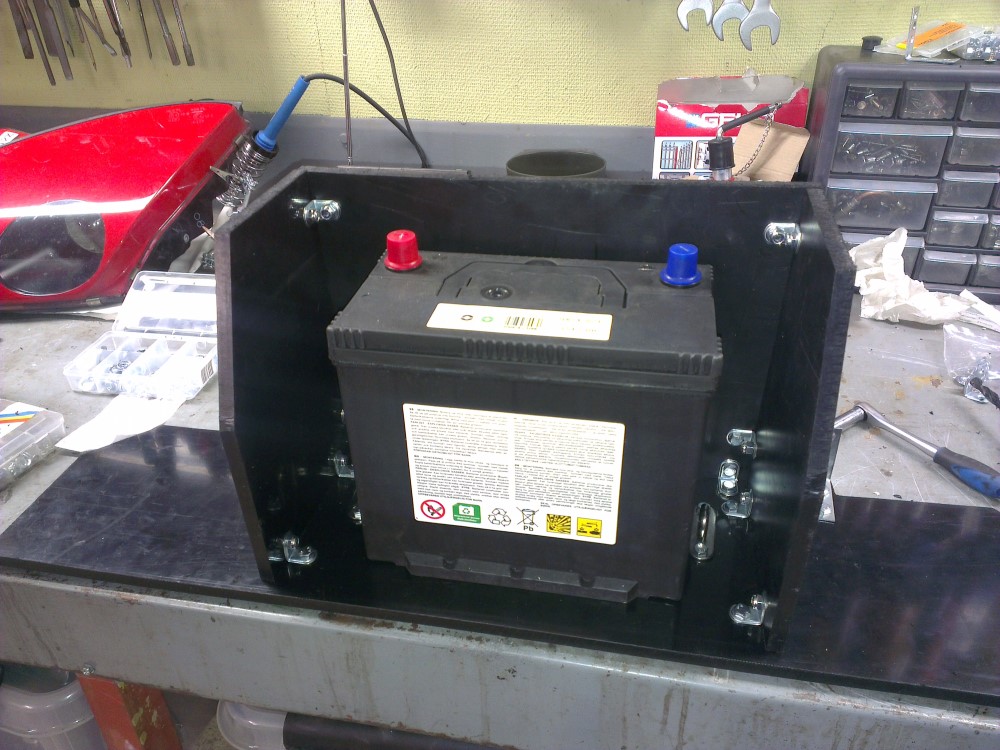
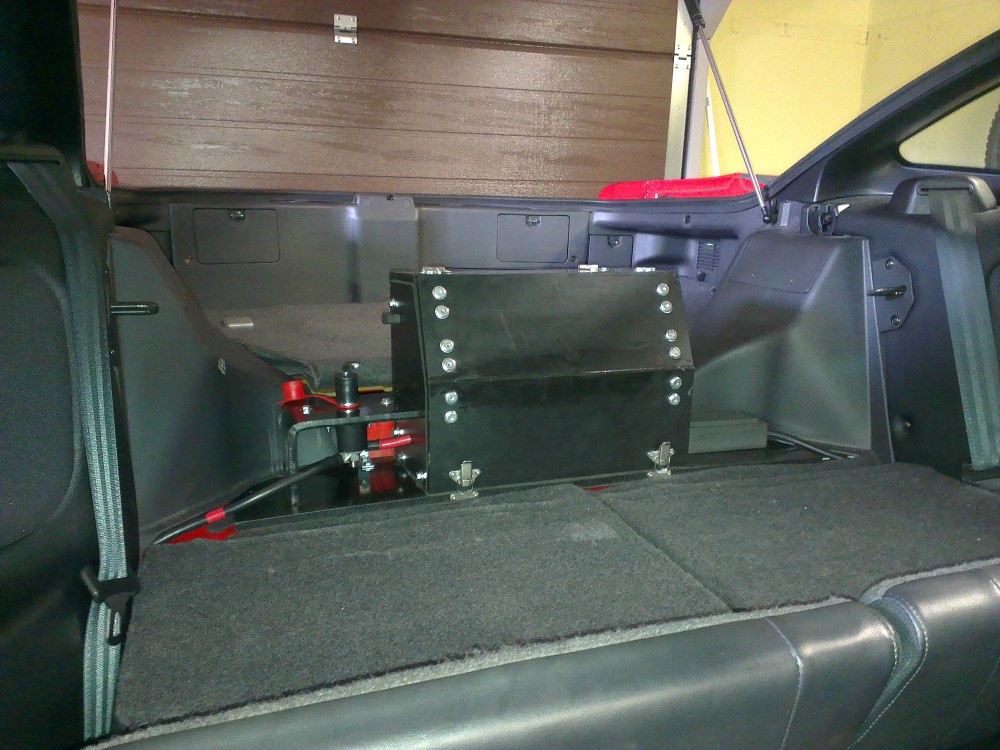
Since I enjoy going to various track days during the summer months I knew that the battery would have to be in a sealed enclosure if I wanted to have inside of the car. I spent days looking for a suitable sealed battery box that would fit behind the rear seats but all boxes I found were to big to fit properly.
No finding what I was looking for I decided to build my own so I started by creating a mock-up from cardboard.
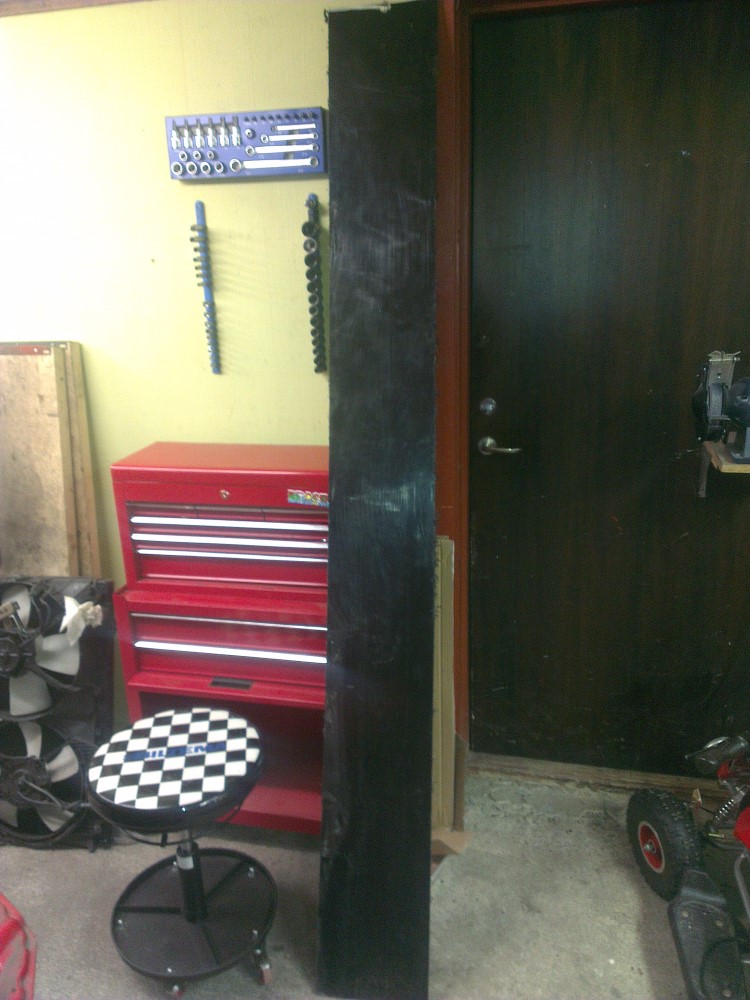
Once I had a the mock-up in place I bought some 11 mm thick and very durable plastic of the poly-something kind (those weird plastic names are hard to remeber).
I wanted a plastic that didn't crack and the could take a beating. This plastic I could hit with a hammer as hard as I could with it breaking I could also fold it (using great force) without it cracking. The downside was the this type of "fatty" plastic could not be glued I was told by the reseller where I bought it. It could either by melted (plastic welding) or be put together mechanically, I opted for the latter approach.
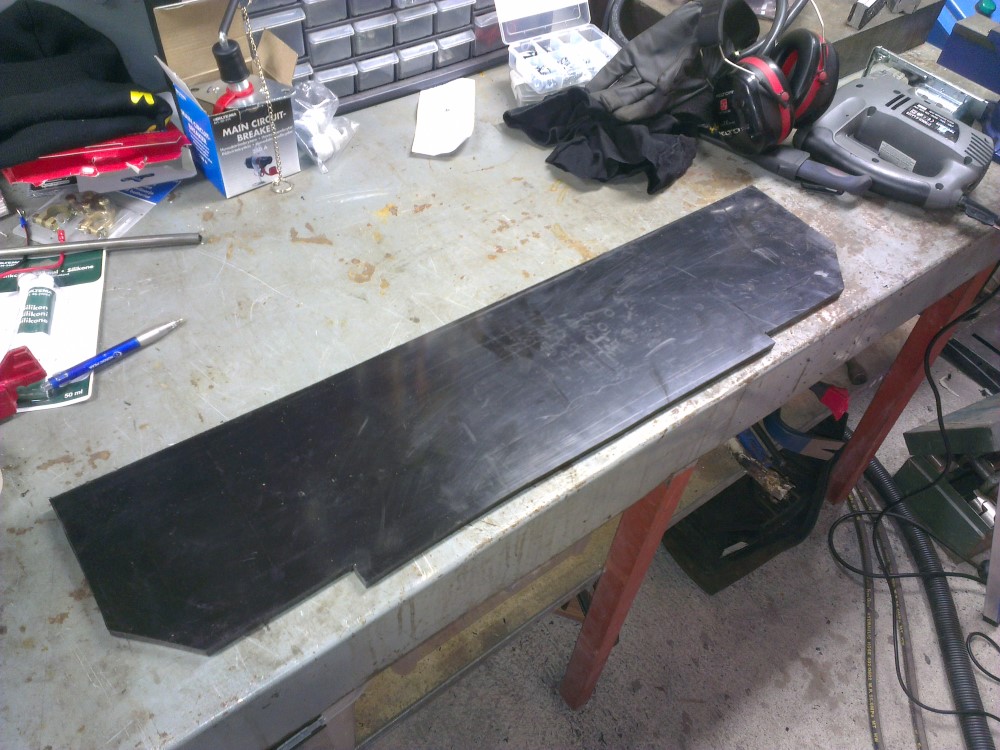
First piece cut out.
Test fitting it in the car
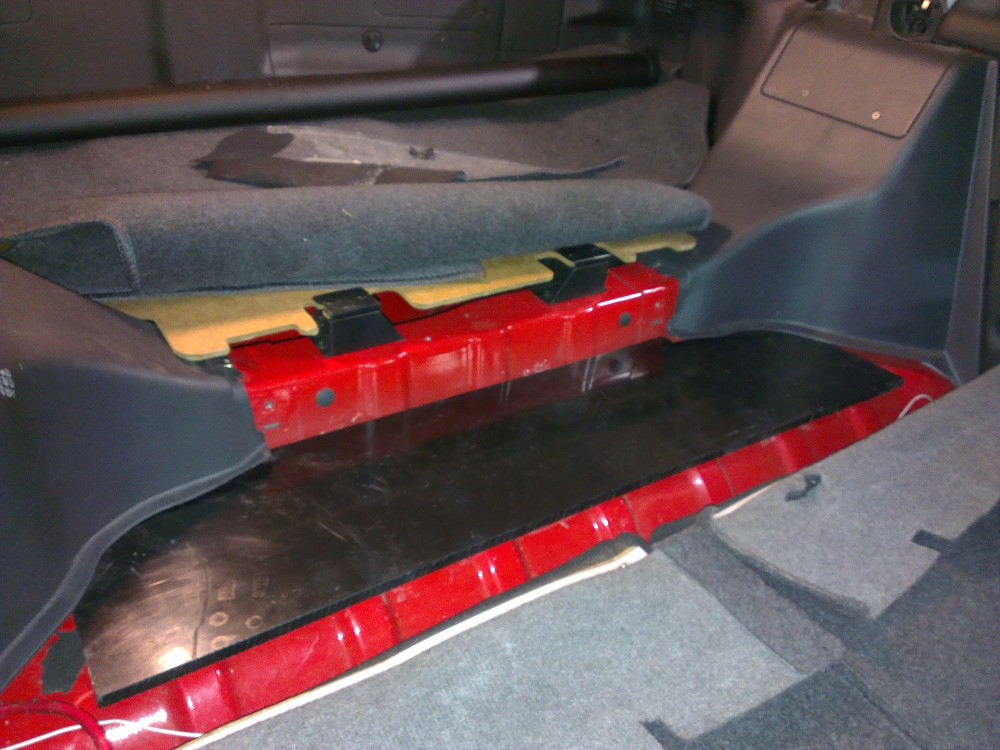
Assembly in progress...
Another test fit in the car to make sure that the box didn't interfere with the rear seats.
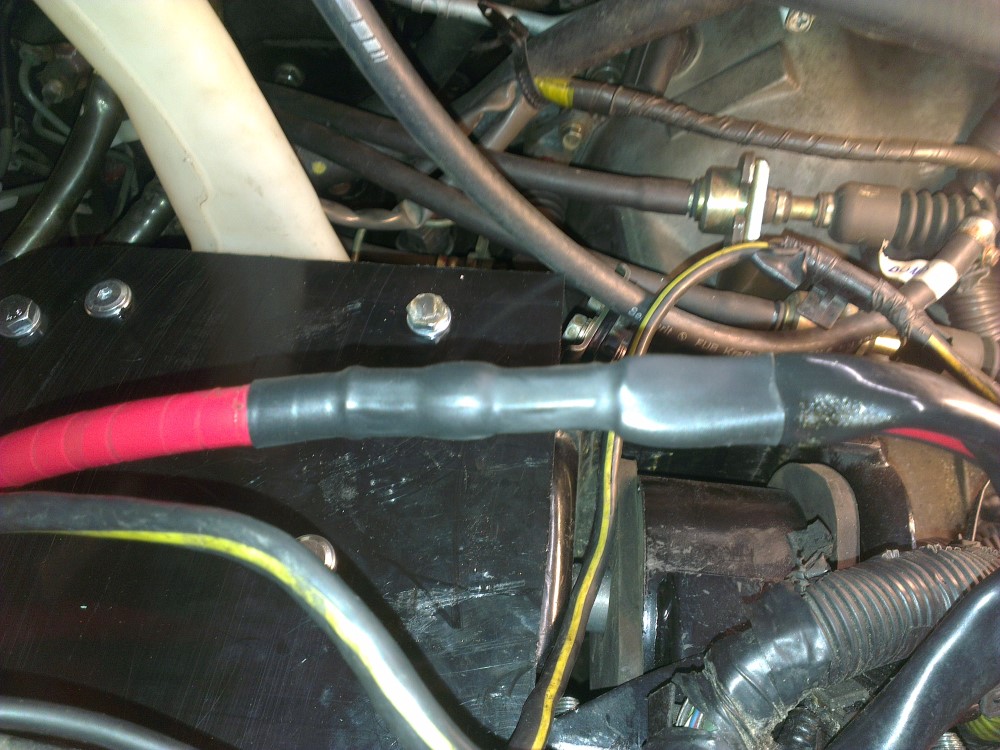
In order to join the new 50 mm2 cable (similar in size to 0 gauge) running from the back of the car to the old cable engine bay I enlisted a friend of mine who is an electrician. He brought over a massive tool for crimping cables of this size. The tool was hydraulically actuated and it took considerable force to crimp the cables.
Here is the finished result of the joined plus cable with heat shrink on.
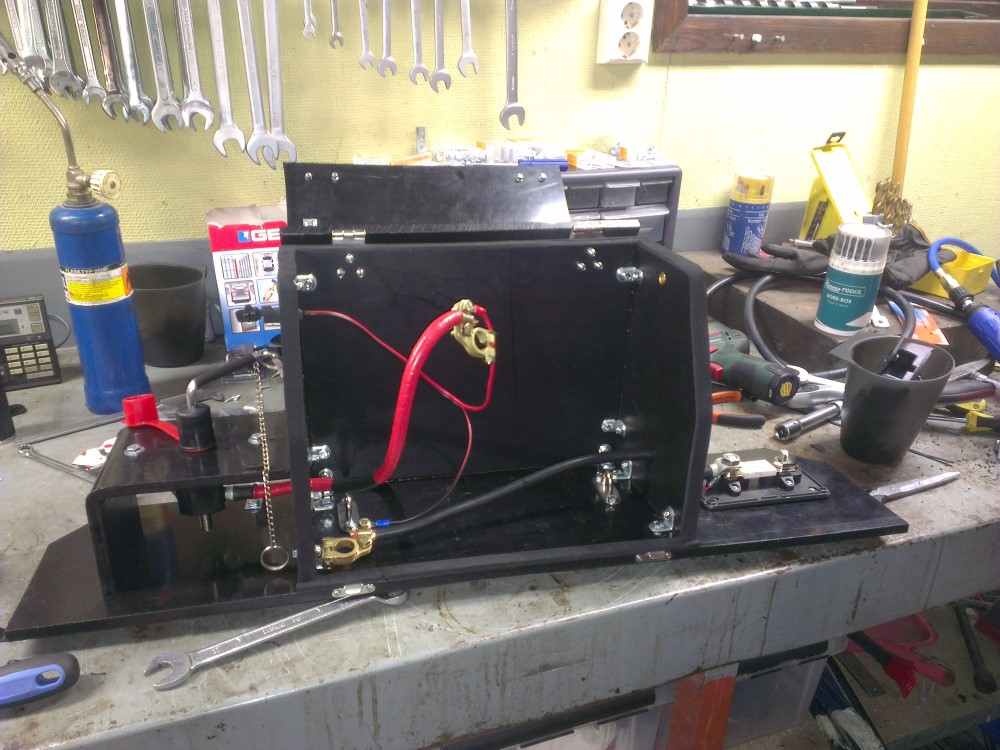
The box slowly coming together piece by piece. On the left I added a cutoff switch rated at 250 amps continuous 2500 amps peak. On the right I added a fuse holder just to be on the safe side.
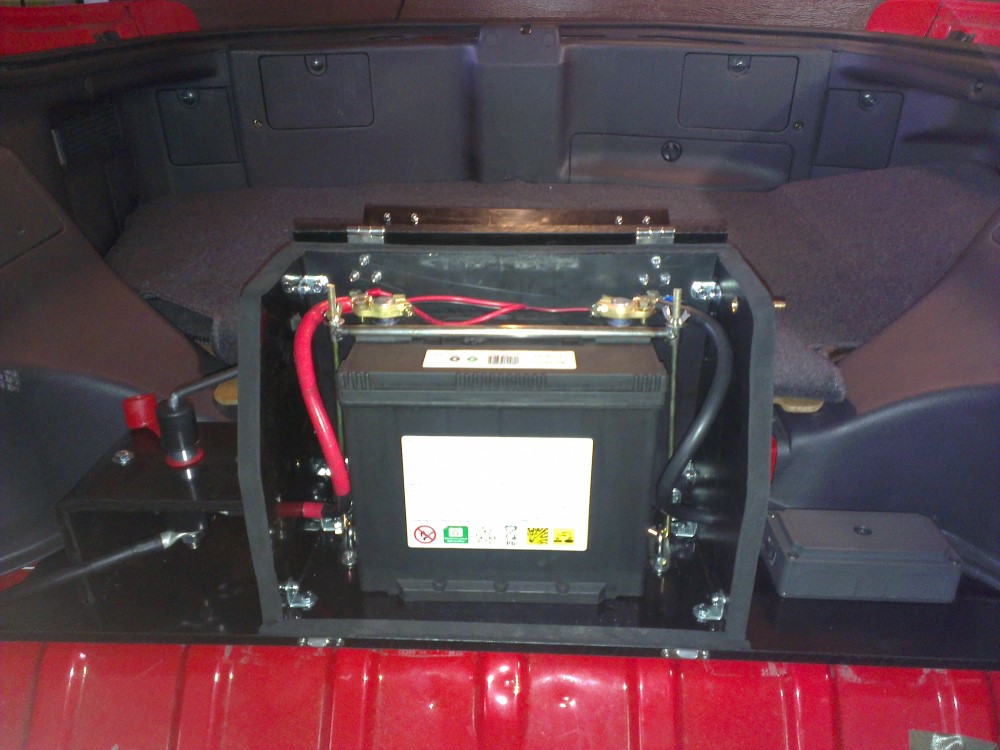
Box mounted in the car. I sealed the whole box with black silicon and I used a self adhesive foam gasket around the opening to seal the box. A small hose for venting will be connected to the gold colored connector visible on the right side of the box.
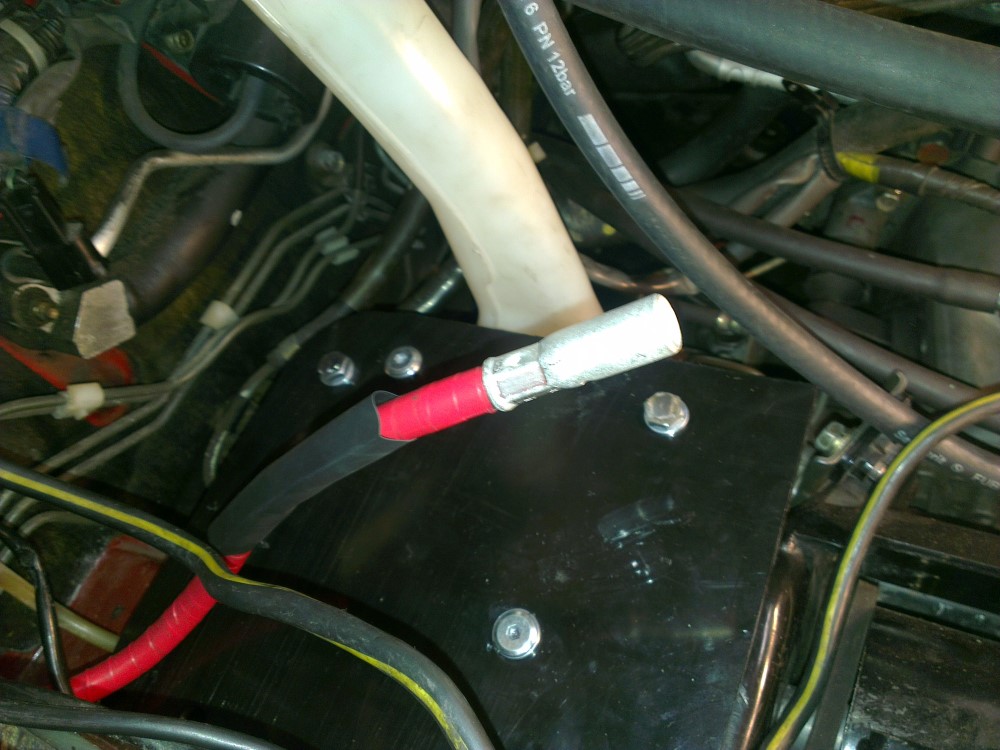
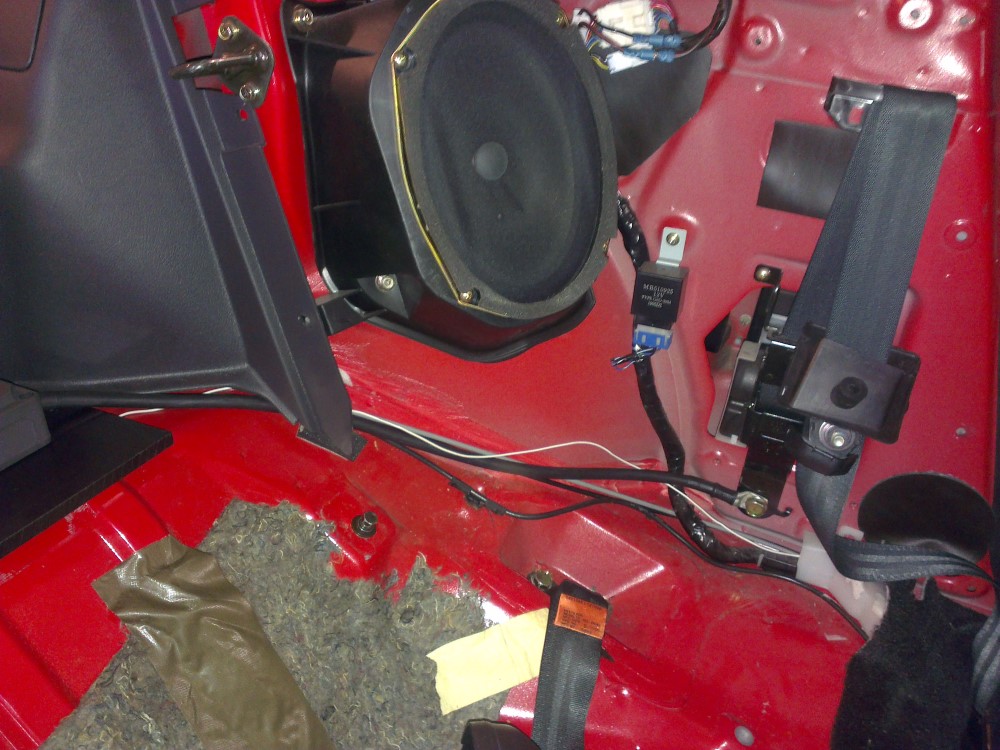
This is where I connected the ground cable. I first grinded away the paint on both sides of the belt bracket and then the car itself to ensure a good connection.
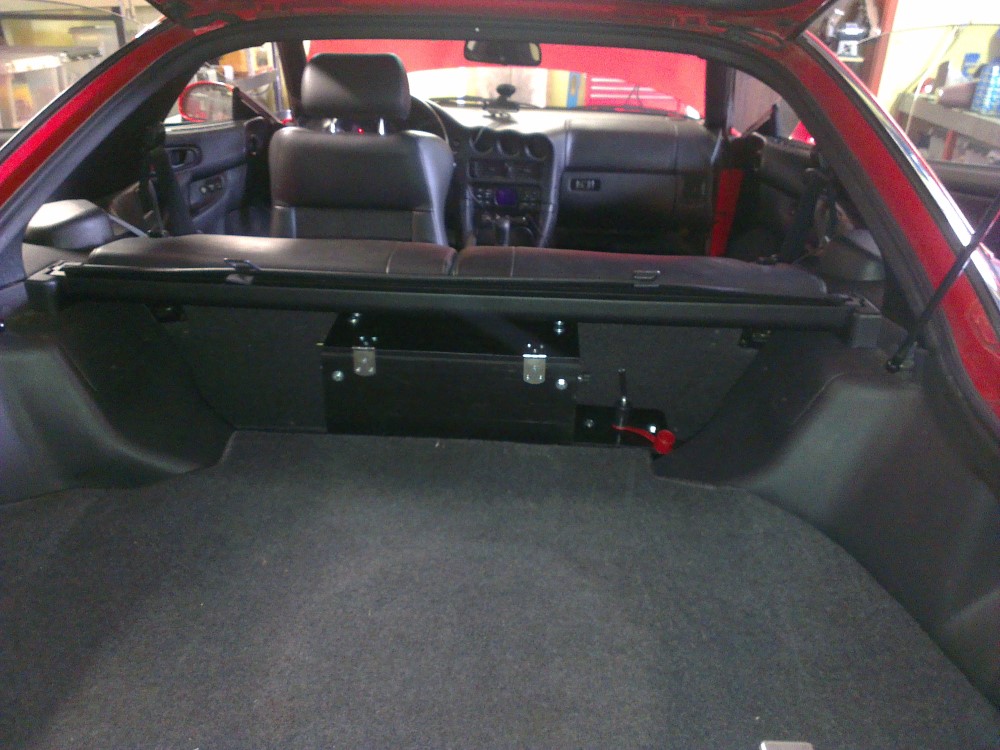
The interior is back in the car again and with the seats up the box is completely hidden from view.
Seats down
Box opened.
Box as seen from the trunk.
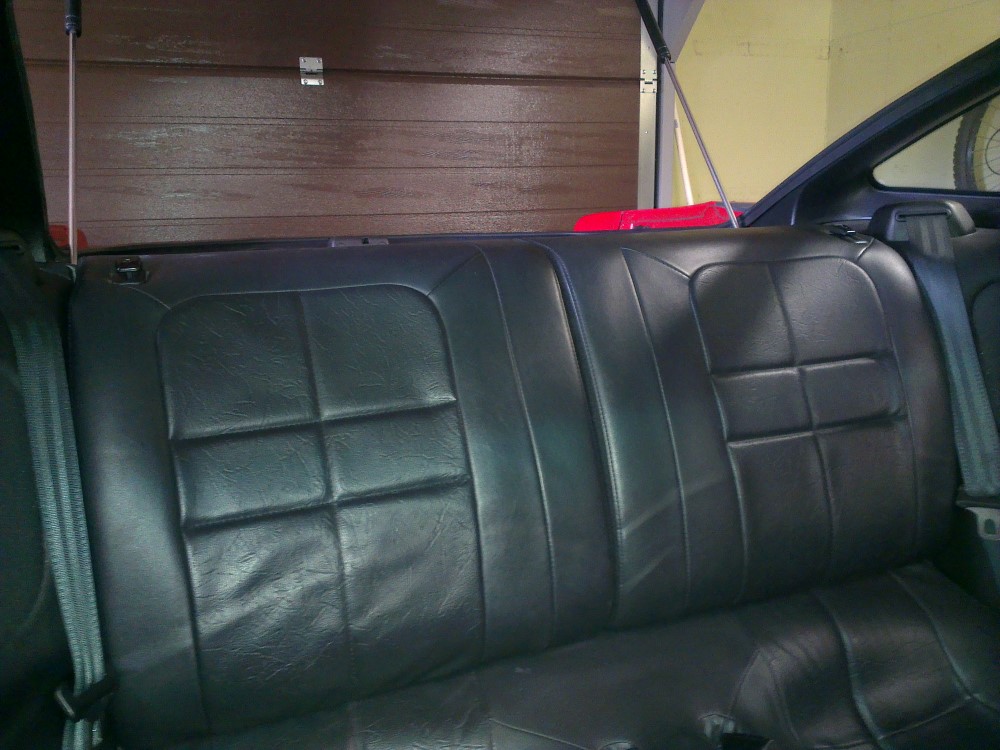
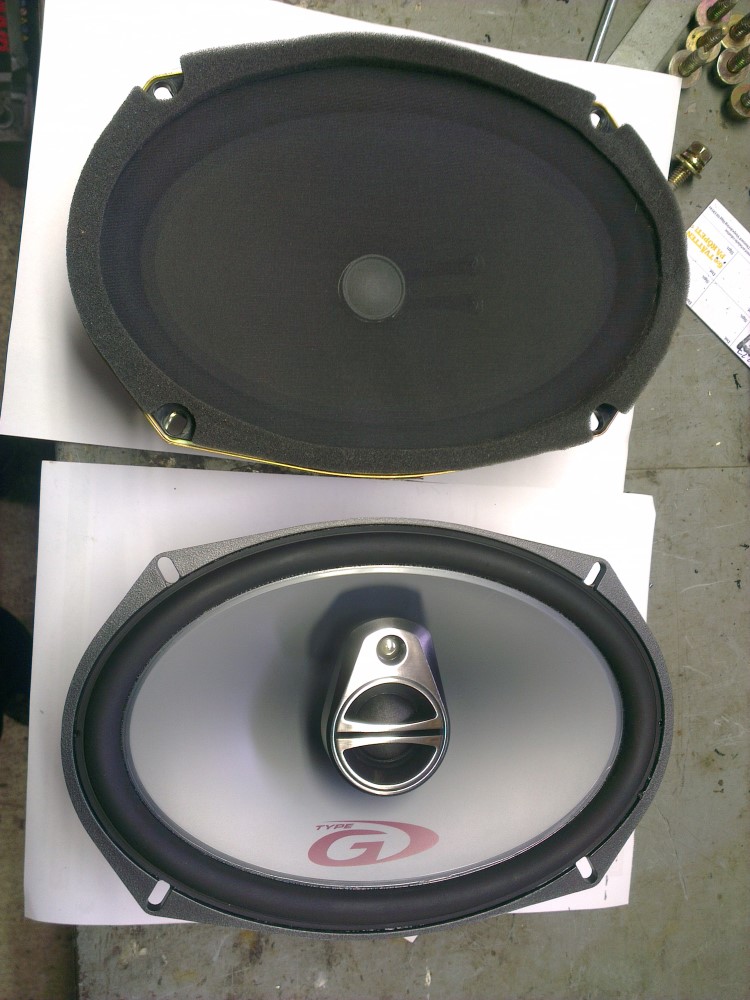
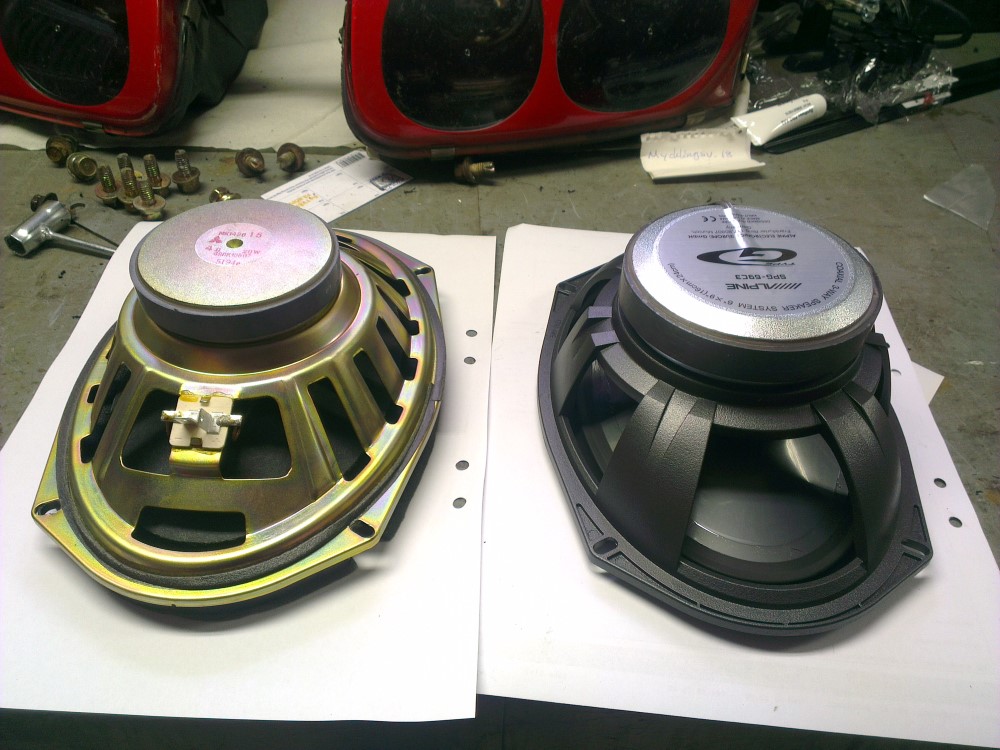
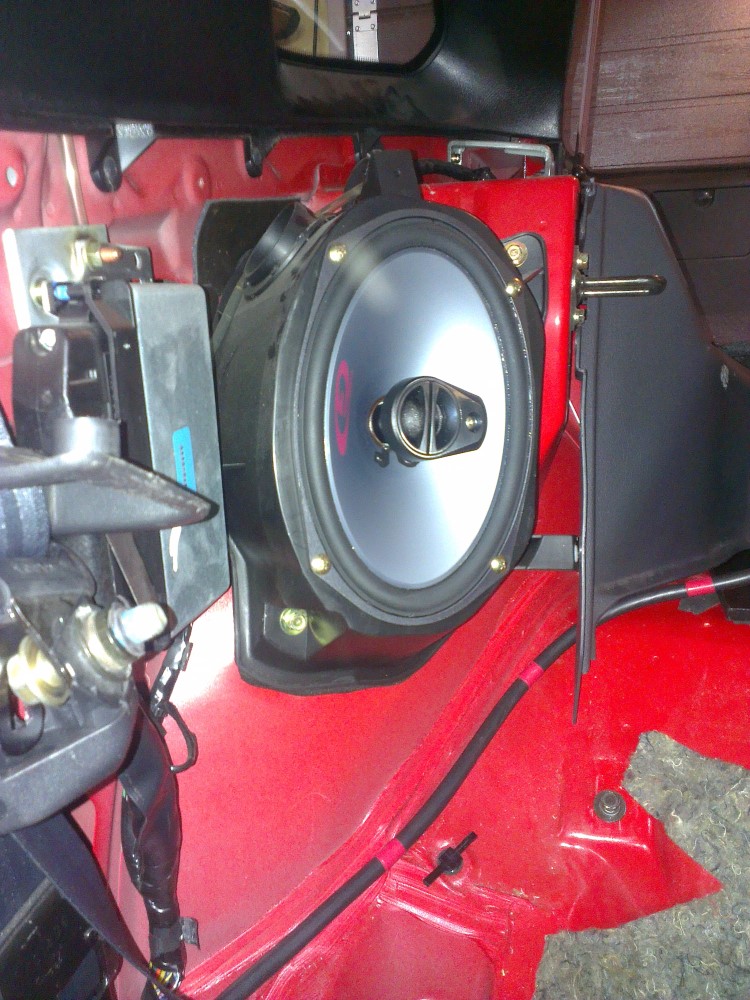
While I had the rear interior out of the car I decided to replace the stock speakers since I've always thought they've had a very muffled sound.
Since the depth is really limited in the stock rear speaker enclosures I took one of the old speaker with me to the local car stereo shop and went through their stock until I found a suitable set that had comparable dimensions.
I'm well past the age where I need my cars full of high powered amps and subwoofers so I opted for a set of simple Alpine coaxial 3-way speakers which provide much clearer sound than the old stock rear speakers.
I can't stop wondering how they could take my whole car apart in the nineties to install that Blaupunkt system which used to be in my car and then not replace the stock speakers...
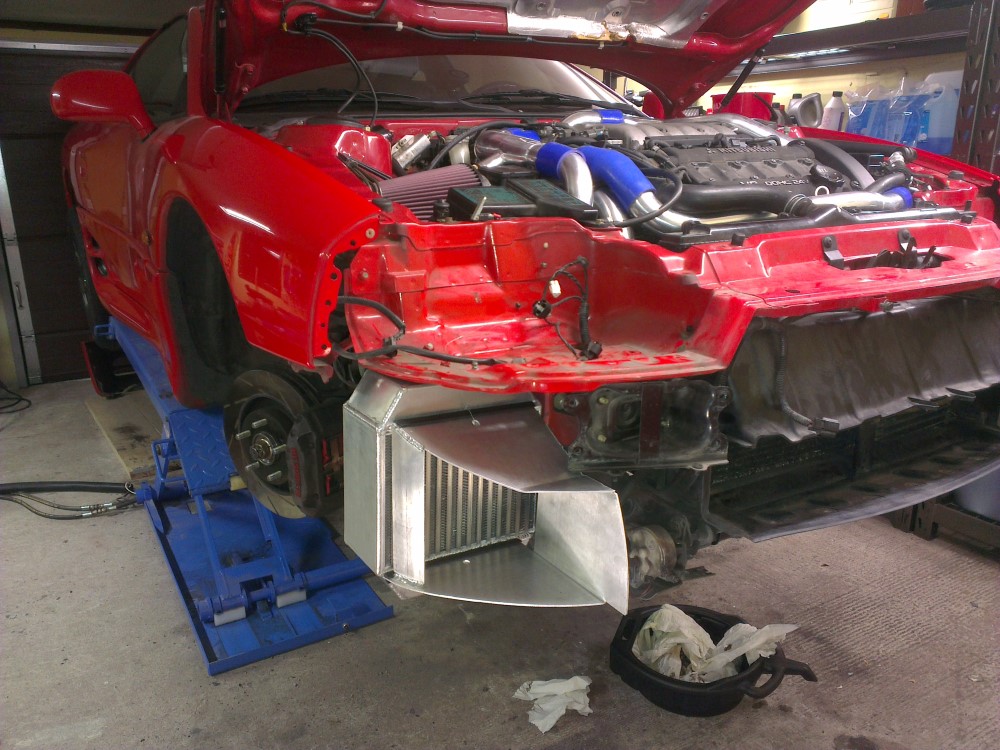
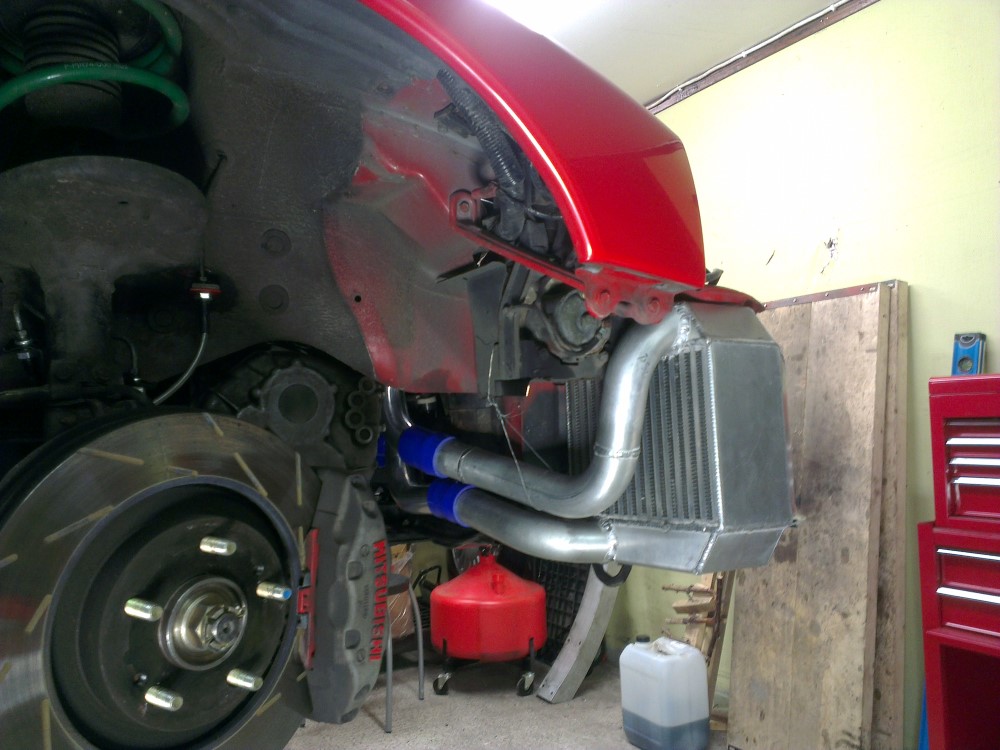
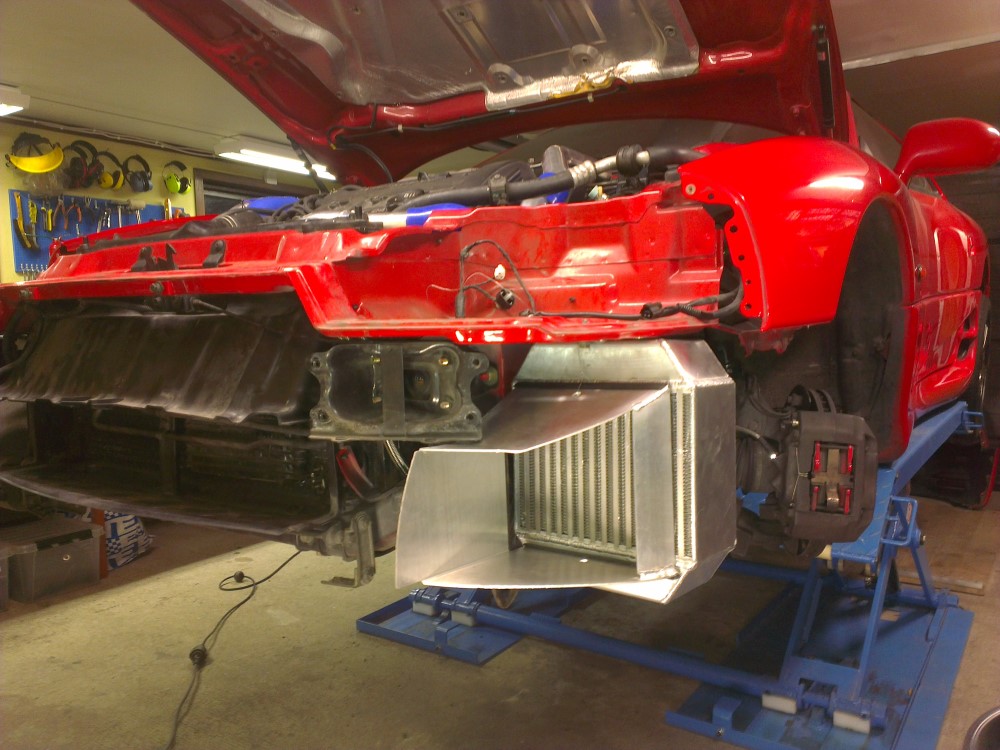
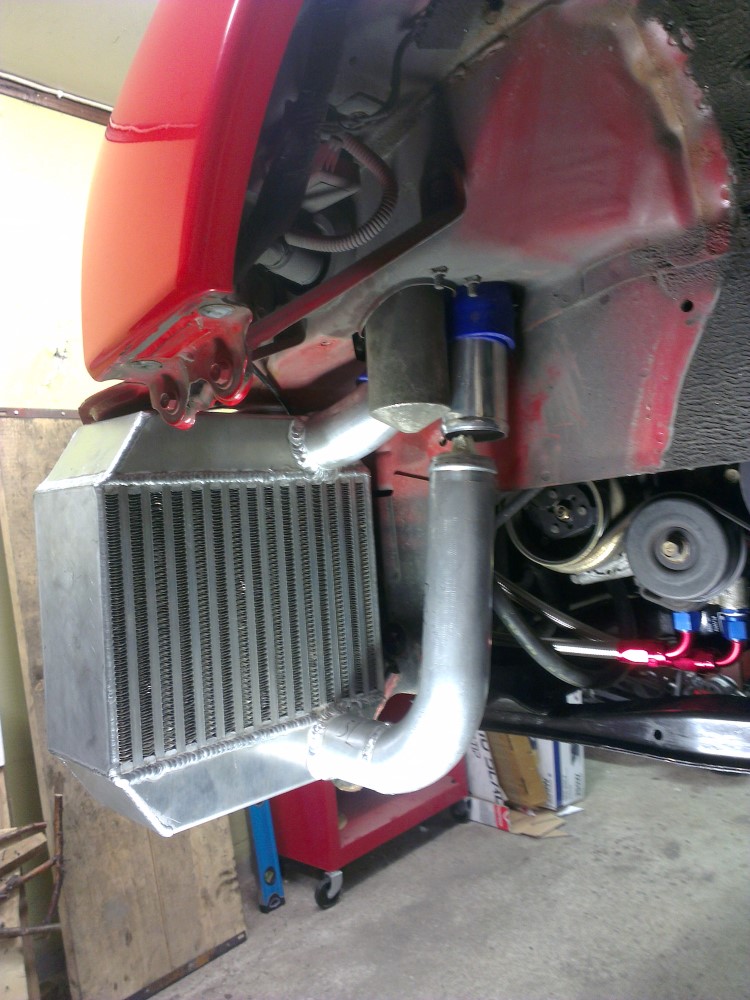
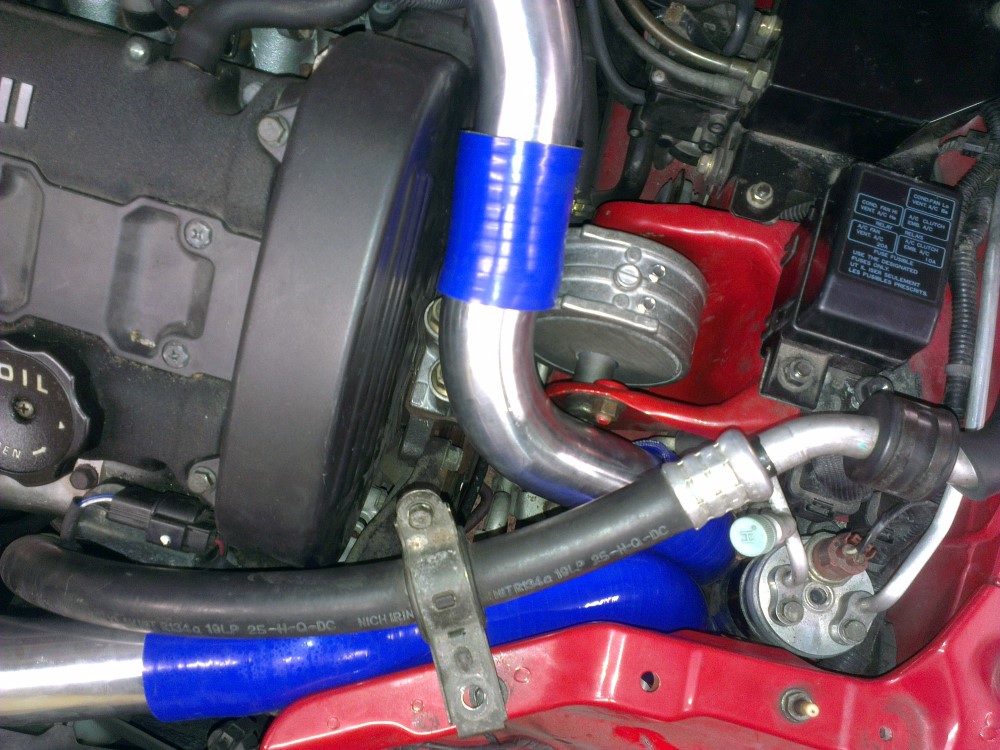
Since the intercooler pipes had finally arrived I decided to test fit them this weekend. I was expecting this kit to require quite a lot of "mending" as Jeremy Clarksson would have said.
However I'm quite surprised by how well made the pipes are, none of them needed any modification to fit. The silicon couplers is another story however. I ended up replacing quite a few of them due to some of the being too short and others too wide (especially the ones that came with the pre-turbo pipes). Since the pipes on the Gene SMIC intercoolers I'm using don't match the stock pipes in either lengths or size I'm going to have to replace even more couplers but here are pictures of the test fitting I did tonight using the couplers I had available.
I had been a bit worried on how I would replace the silicon "snorkel" that this kit comes with. But a short 45° bend, a long 60° bend and a short aluminum pipe between them did the trick.
|
3000gt.com 3000GT / Stealth International WWWboard Archive Jim's (RED3KGT) Reststop |
|
Team 3S 3000GT / Stealth / GTO Information daveblack.net |
|
Michigan 3S MInnesota 3S Wisconsin 3S Iowa, Nebraska, Kansas 3S |
North California 3000GT/Stealth United Society of 3S Owners 3000GT/Stealth/GTO Forums 3000GT/Stealth International |
|
3S National Gathering East Coast Gathering Upper Mid-West Gathering Blue Ridge Gathering |

 Reply With Quote
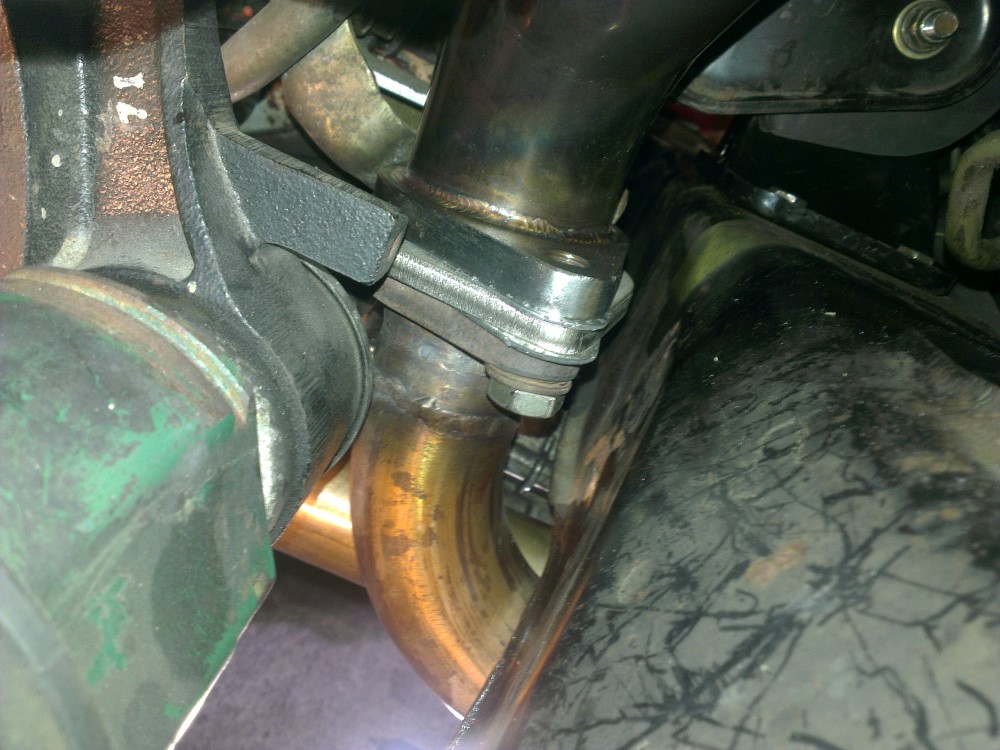


Bookmarks