Page 3 of 12 FirstFirst 12345 ... LastLast
Results 21 to 30 of 113

Thread: Saved From The Crusher - 93 Stealth TT Rebuild/Restore

  1. #21
    Never finishes any verified

    Join Date
    Sep 2010
    Owner Since
    2001

    Location
    Wake Forest, NC
    Posts
    2,518
    Thanks
    51
    Thanked 197 Times in 140 Posts
    So I have not been able to do much work on the car lately. I finally landed a job with a local software company! Yeah... With me not getting home till 6pm during the week the only time I get to work on the car now is the weekends.

    I spent Friday getting the body prepped for paint. I need to get the main body painted before it gets to cold. I removed everything down to the main body itself. Since the car was originally black I wasn't to concerned about painting the door jambs and all that. The original gloss black makes a good contrast to the flat black. Plus the paint in the door jambs is in good enough condition that a little wet sanding will bring back the shine nicely!

    After sanding down the body I spent a few hours with glazing putty filling in all the little rock chips and so forth. Got everything sanded down smooth with a 200 grit. I then proceeded to tape up all the glass and the roof.

    Hint: 3M blue painters tape sucks! Since I taped everything up the night before, the morning dew the next day soaked into the tape and it started pulling up! Luckily I used lots of tape so I was still good to paint.

    Click for larger image!


    Click for larger image!


    Click for larger image!


    I debated for so time as to painting the roof flat black but with the glass sunroof being black I didn't think it would look right. I decided instead to paint the roof gloss black. That way I sort of keep the stock blacktop look and it will blend better with the sunroof!

    Today I went out and cleaned all the panels up and sprayed the first coat. I though the first coat went on smooth but once it dried I noticed that it had orange peeled on me! SHIT.... Well it seems I didn't thin out the paint enough on the first batch. Luckily the hardener I am using allows me to wet sand after the first hour. I hit all the fresh paint with a 400 grit to smooth it out but still keep it rough enough for the next coat to have something to stick to.

    Once I got everything sanded and wiped down I hit it with the next coat. I made sure that I reduced the paint enough this time. Second coat went on really nice! There are a few spots of the car that have some light over spray "like the hatch" but I intend to wet sand the whole car down with 1500-2000 grit anyway. Since I painted outside I have some dust particles in the paint. That is the reasoning for needing to wet sand. Overall the paint is nice and smooth. After the wet sanding and a good polishing with a dull compound it will be perfect.

    Click for larger image!


    Click for larger image!


    Click for larger image!


    If anyone is wondering this is the paint I am using:

    http://www.martinsenour-autopaint.co...ights/PCC.aspx

    It is Sherwin-Williams commercial coating sold by NAPA. It is made for industrial equipment so it should hold up really well.

    I still have the drivers fender, rear bumper and a few other small items like mirrors to paint. Hopefully if the weather holds out I can knock them all out next weekend. "Supposed to rain here tomorrow".

    Check it out on Youtube!!


    93 Stealth TT - The Stealth Project

    Renegade Tech Works ECS Controller on Intrax Springs
    Chrome ECU
    Hybrid 13g's
    EVO 560cc Injectors
    Spec Stage 3 clutch
    Ninja Performance Output shaft & Input spool
    Ninja Performance Solid Tensioner & Gates racing T-Belt
    CX Racing Dual Core FMIC
    Megan SS Exhaust
    Fidanza Cam Gears and Clear Covers
    3rd Gen Lifters
    HKS BOV
    K&N FIPK
    Maximal High flow converter
    Walbro FP & FuelLab FPR
    Maximal and Seattle Solid Mounts
    All -6an Lines
    Custom -6AN coolant neck lines
    AWS/ABS/Cruise Delete
    MP Rear Control Arms
    SS Brake Lines
    99 Front Conversion
    2nd gen Rear Bumper
    99 Combat Wing
    Complete interior LED Swap
    Skillard Fuel channel
    Oohnoo FPR Bracket
    .
    .
    More to Come......

  2. #22
    Here for the party Not Verified
    Join Date
    Sep 2010
    Owner Since
    2006

    Location
    Canaan NH
    Posts
    1,710
    Thanks
    364
    Thanked 106 Times in 87 Posts
    It looks good, however its just my opinion that you go with a high gloss paint job. You have done so much work restoring this car that it should look like it was restored properly. Not trying to be a dick its just mt opinion. You have done excellent work thus far.

  3. #23
    Forum User verified
    Join Date
    Sep 2010
    Owner Since
    2008

    Location
    N.C.
    Posts
    78
    Thanks
    4
    Thanked 5 Times in 5 Posts
    I am kinda liking the flat black look,may give it a shot on next go round.You did a fine job on that back drivers side bumper. When I painted outside,I would hose the area around the car down so it would cut down on the dust ,seems to help trap some of it.
    All in all,helluva good job you are doing..Keep it up!
    BH

  4. #24
    Never finishes any verified

    Join Date
    Sep 2010
    Owner Since
    2001

    Location
    Wake Forest, NC
    Posts
    2,518
    Thanks
    51
    Thanked 197 Times in 140 Posts
    I read about hosing down the ground to lower the dust. I heard it is not good to do when it's really hot out like it was yesterday. Seems that wetting the ground when it's hot can effect the paint as when it evaporates, the water vapor can get inside the paint stream when your shooting the paint and mess up the paint. I think I read that on CarCraft.com. I didn't want to take the chance of messing up all of the paint with it being 95 here yesterday.

    @CoreyB: The restore part of the car is mainly the reconditioning and restoring of all componets, Suspension, Drivetrain, ETC. I love the look of the flat black ever since I saw Ryan's "Lawdogg" old car painted that color. I think the color is unique for this platform and will make for a nice aggressive looking Stealth, especially when I get the evil eye mod done to the hood.

  5. #25
    Never finishes any verified

    Join Date
    Sep 2010
    Owner Since
    2001

    Location
    Wake Forest, NC
    Posts
    2,518
    Thanks
    51
    Thanked 197 Times in 140 Posts
    So I was able to get some more painting done today. I got the roof painted, The drivers fender and both door handle assemblies. I started assembling things also and I am really liking the way the car is looking.


    I am most likely going to have to respray the drivers side door. I did some wet sanding on it the other day and well, flat black is not something that can be wet sanded.... After about an hour of wet sanding through the different grits the paint was smooth but had a somewhat glossy look to it that I don't like. So looks like I am not going to be doing any wet sanding on this paint. I'll have to figure something out to smooth it out without glossing the paint. I might try and dry sand it. I have some painted panels to try a few things out on.

  6. #26
    Forum User verified
    Join Date
    Sep 2010
    Owner Since
    2008

    Location
    N.C.
    Posts
    78
    Thanks
    4
    Thanked 5 Times in 5 Posts
    That front end is going to look awesome..

  7. #27
    Great work! I've got a 91 TT shell sitting in my garage that needs the same treatment, but I'm ashamed to say it's been there for a couple of years now and I've managed to do jack crap with it. Those pesky other hobbies keep getting in the way.

    That'll be a beautiful car when you finish with it. Drive her well!

  8. #28
    94 3500gt vr2? verified
    Join Date
    Sep 2010
    Owner Since
    2007

    Location
    NC
    Posts
    1,074
    Blog Entries
    4
    Thanks
    103
    Thanked 29 Times in 17 Posts
    wow, that thing has come a long way
    you should have your own tv show or something, lol

  9. #29
    94 3500gt vr2? verified
    Join Date
    Sep 2010
    Owner Since
    2007

    Location
    NC
    Posts
    1,074
    Blog Entries
    4
    Thanks
    103
    Thanked 29 Times in 17 Posts
    oh, and congrats on finding a new job, hope it's going well for you

  10. #30
    94 3500gt vr2? verified
    Join Date
    Sep 2010
    Owner Since
    2007

    Location
    NC
    Posts
    1,074
    Blog Entries
    4
    Thanks
    103
    Thanked 29 Times in 17 Posts
    Quote Originally Posted by DrGonzo View Post
    08-31-2010, 09:17 PM


    I got the Heim joints in today from SpeedwayMotors.com. Really fast shipping and the quality is great.


    I am only missing the sway bar end links now and the rear end will be complete. I am still going to install it tomorrow as I have brake work that needs to be completed and the sway end links are easy to install.


    I also as able to get some of the engine bay items re-installed. Non-ABS prop valve and lines where installed along with the clutch and some of the A/C lines.


    Next on the list is repairing any issues with the body wiring harness and re-wrapping it with new electrical tape as the old tape is brittle and cracks easily.


    09-01-2010, 03:42 PM

    I used the same parts as are listed in this thread:

    http://www.3si.org/forum/f116/aws-de...-i-did-367862/

    Parts came out to like $95.00 including shipping. I picked up the bolts at a local hardware store. The joints are really nice and self lubricating from what I can tell. Shipping took like 2-3 days.

    I didn't drill out and retap the holes though. I used metric grade 8 for the x-member side and 1/2 grade 8 for the control arm side. You will need to open up the hole a little on the control arm as the 12mm bolt hole is just a tad to small for the 1/2 bolt.

    09-02-2010, 09:20 PM

    So I didn't get to much accomplished today. I finished off the front body wring harness. The mailman brought me a gift today so I was actually able to install the harness. When I removed the harness I cut all of the old zip ties holding it to the frame. I had to order new ones and it took some time to hunt down. I finally found some that would work from a company called clipsandfasteners.com.


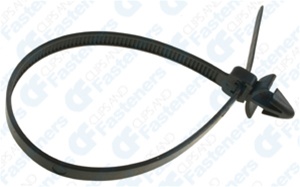
    Push Mount Cable Tie For Imports 200mm Length

    They hold pretty good in the think metal like the side frame by the wheels. Thinner metal they pop out if to much stress is applied. They are still the best fasteners I could find. After getting the harness attached I noticed the main power wire from the engine fuse box had oxidation pretty bad so I have to pick up some good power wire to replace the corroded one.

    Tomorrow I am going to try and remove the front steering rack so I can finish removing the AWS lines and plug up the holes. I may replace it with the N/A rack I have depending on it's condition.

    Once that is complete I need to start prepping the engine for removal from the other car and start pulling the interior as I need to wire in the new gauges and electronics into the new car.

    think a few of these would be helpful for some of the wiring? i'm probably going to order a few sets, they look like they will be useful.

    http://www.harborfreight.com/33-piec...ent-98559.html

    also, those gauges look awesome.

    any more updates on this project yet?

Bookmarks

Posting Permissions

  • You may not post new threads
  • You may not post replies
  • You may not post attachments
  • You may not edit your posts
  •  
The 3000GT/Stealth/GTO Web History Project
3000gt.com
3000GT / Stealth International WWWboard Archive
Jim's (RED3KGT) Reststop
3000GT/Stealth/GTO Information and Resources
Team 3S
3000GT / Stealth / GTO Information
daveblack.net
3000GT/Stealth/GTO Clubs and Groups
Michigan 3S
MInnesota 3S
Wisconsin 3S
Iowa, Nebraska, Kansas 3S
North California 3000GT/Stealth
United Society of 3S Owners
3000GT/Stealth/GTO Forums
3000GT/Stealth International
3000GT/Stealth/GTO Event Pages
3S National Gathering
East Coast Gathering
Upper Mid-West Gathering
Blue Ridge Gathering