

R135
╚╬╬╝
- 24
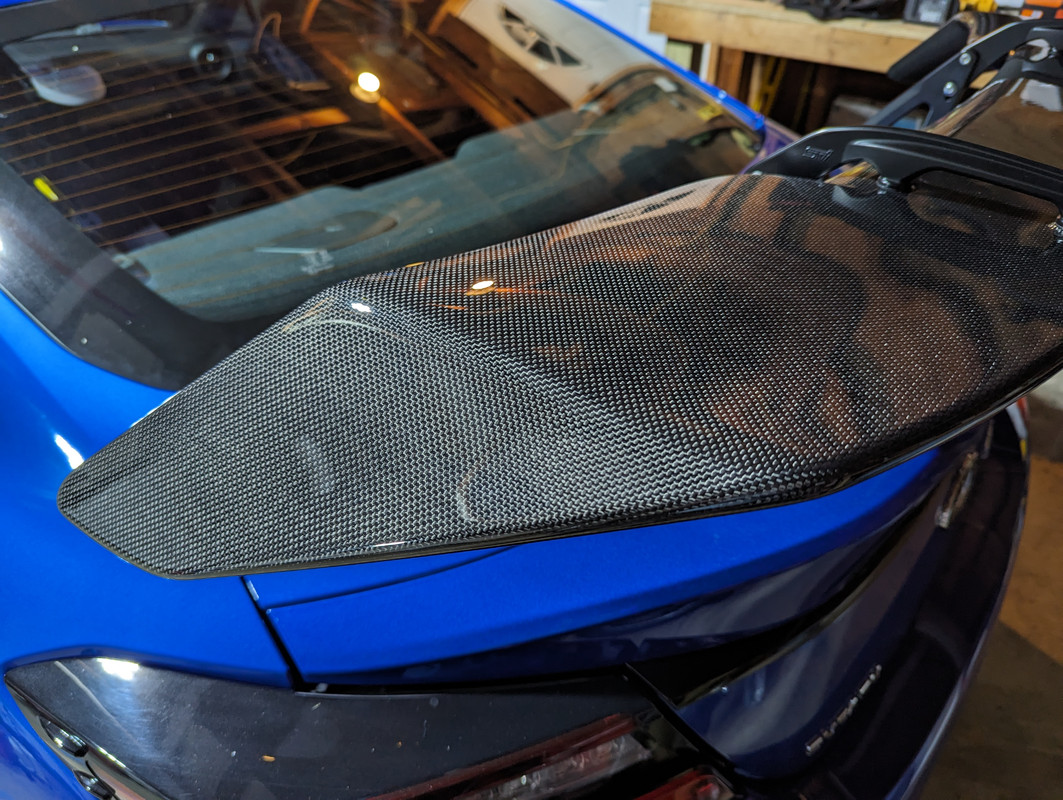
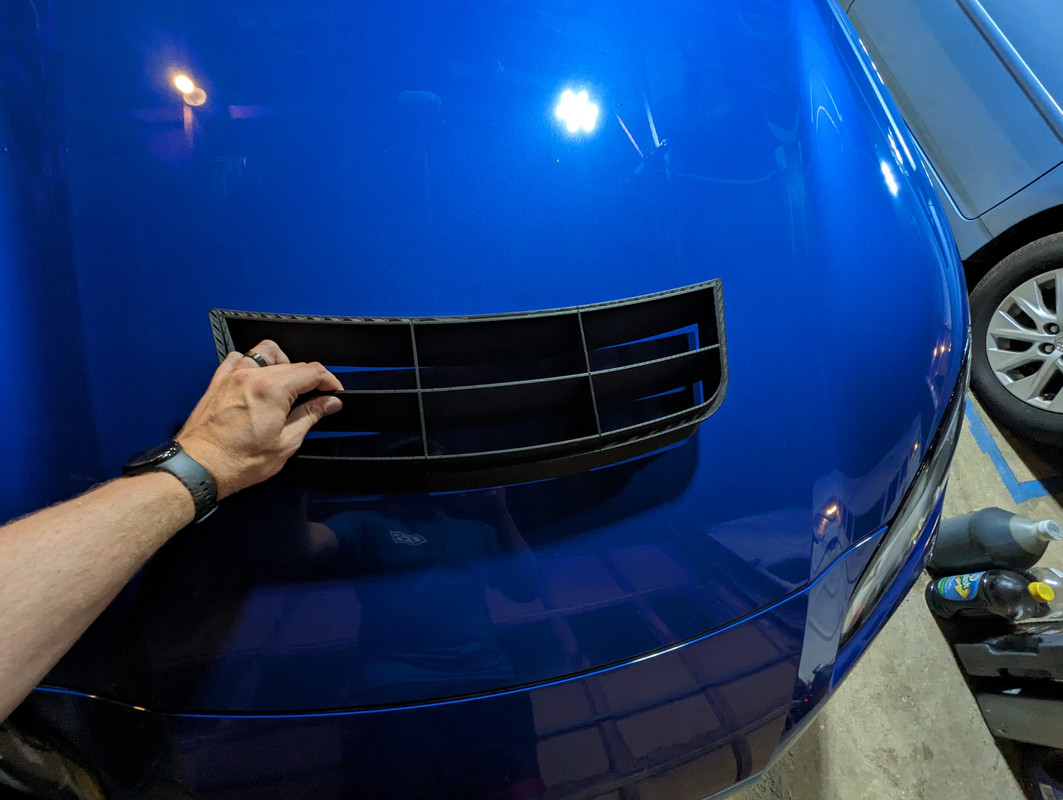
Over the winter I had designed a replica of the GR Cup hood vent and slowly worked on making it a reality (mostly sitting around not doing anything about it after moving, if I'm honest)
I finally got around to setting up my oldest 3D printer, an Ender 3 Pro, to handle Nylon 12 CF and printed the hood vent. I wasted a bunch of material testing various setups, so that was neat... Sadly you need to test with the material you're printing!
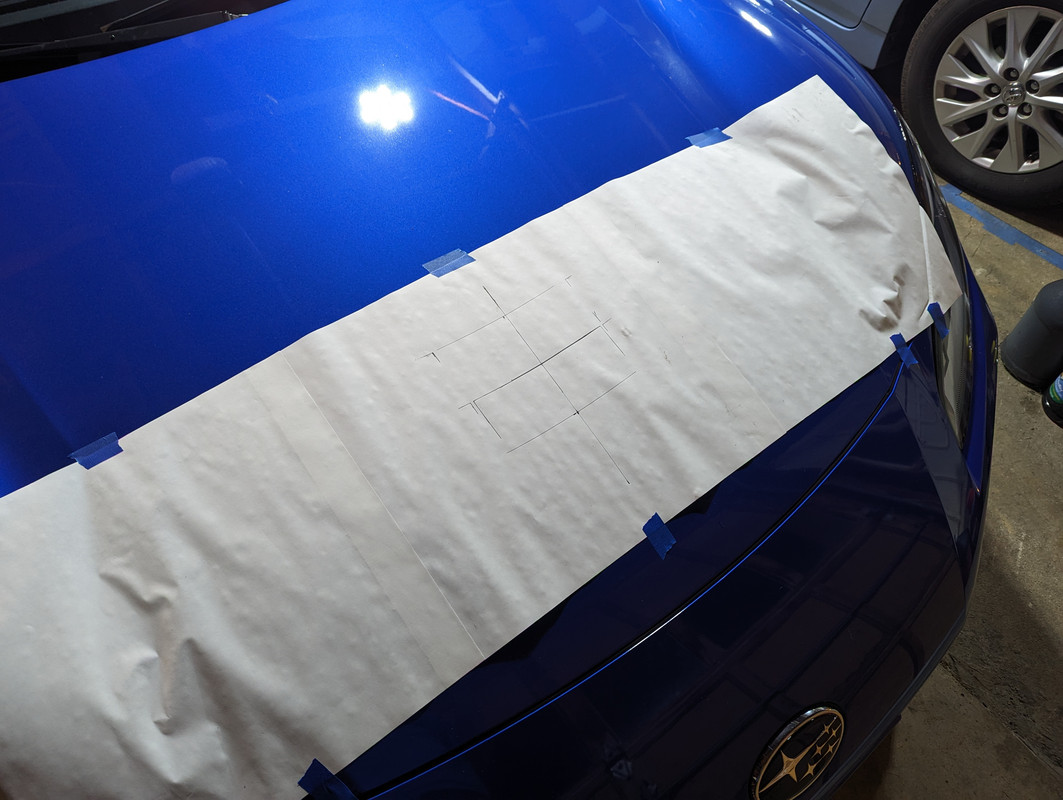
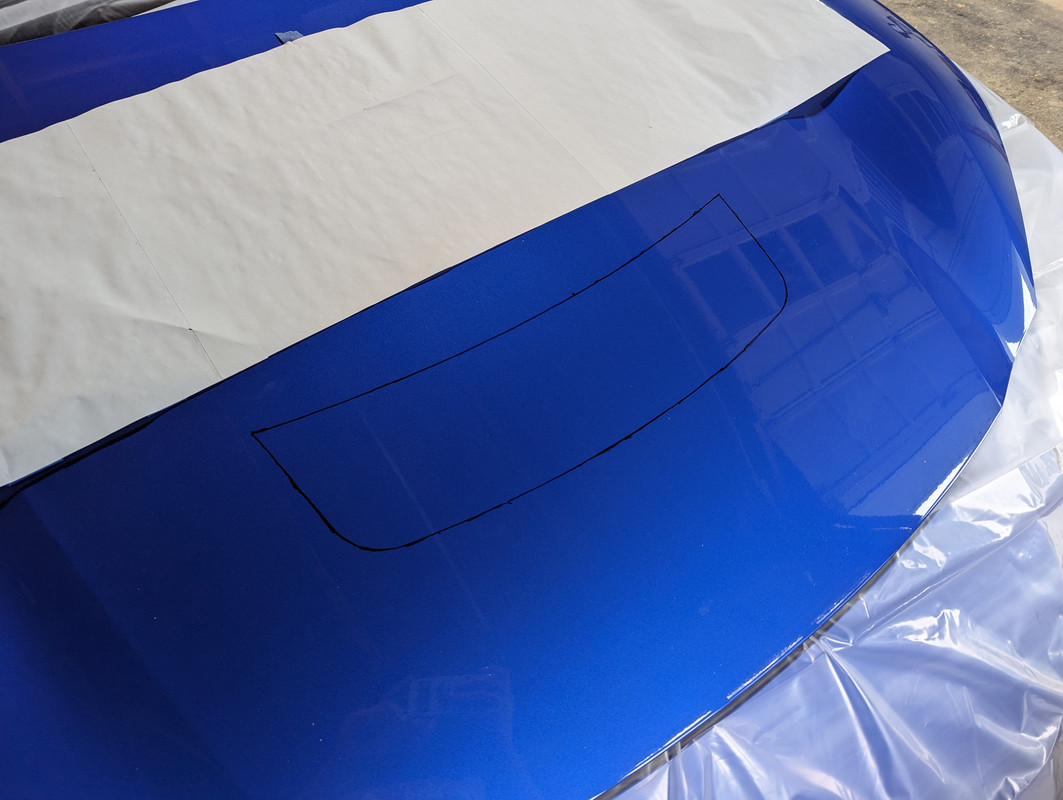
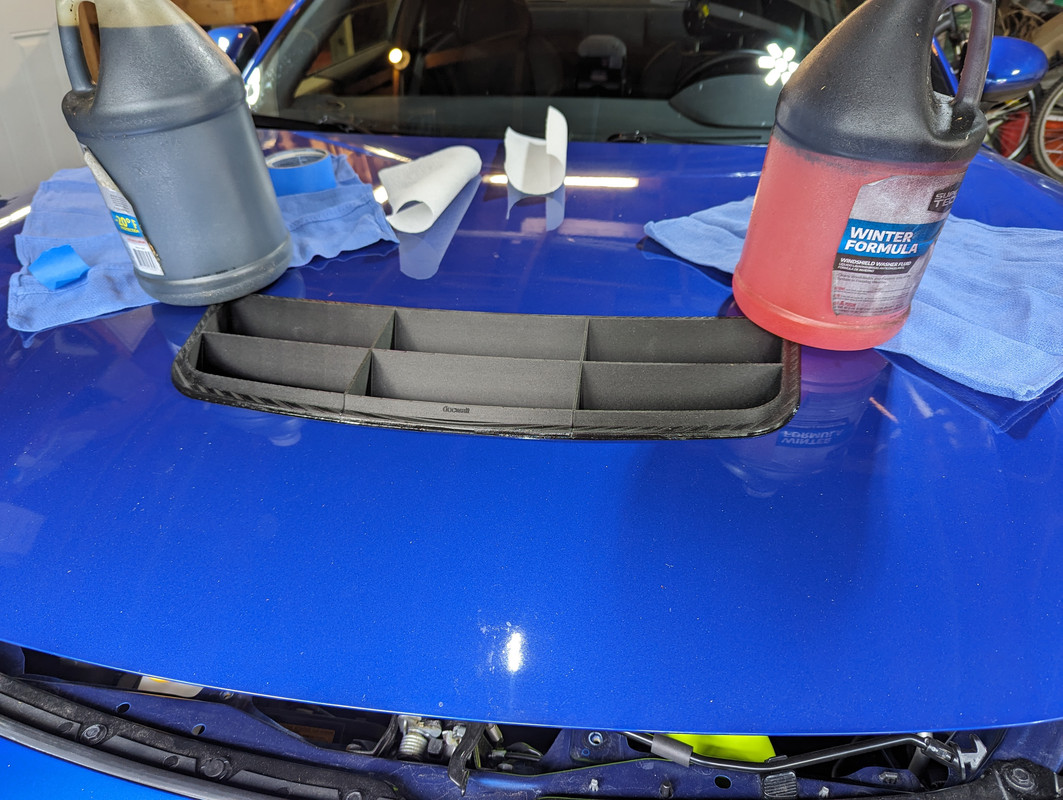
I glued the parts of the hood vent together on Friday and set up a template to mark up the hood for cutting.
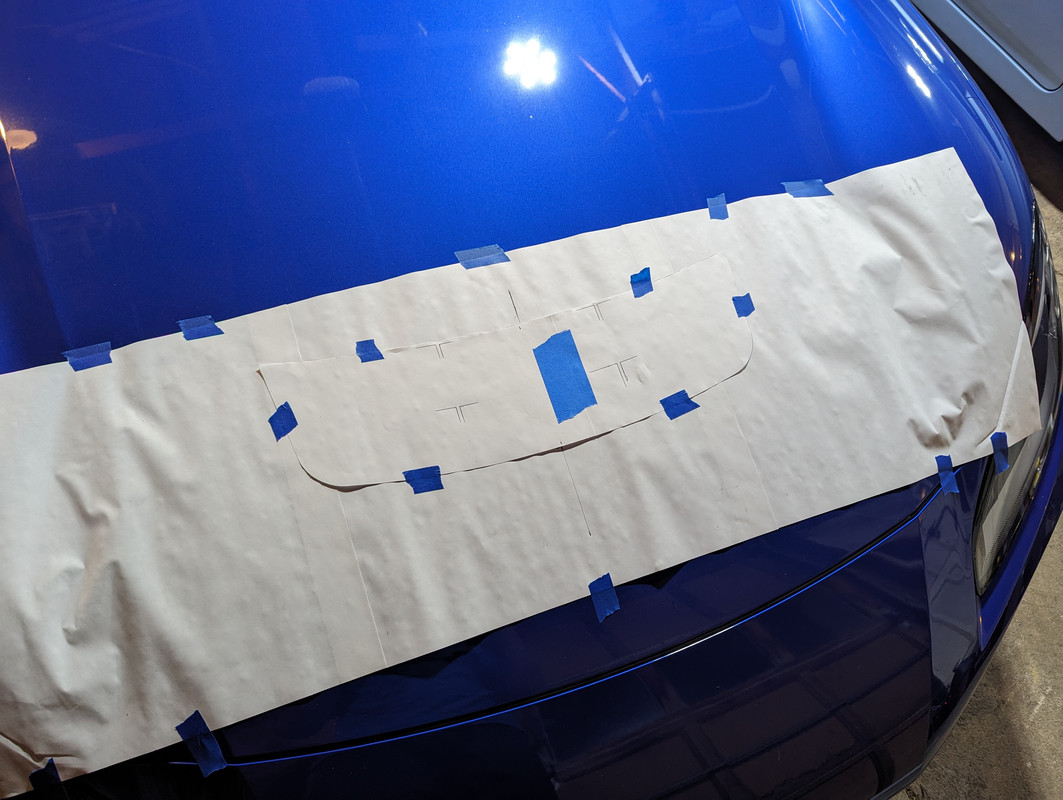
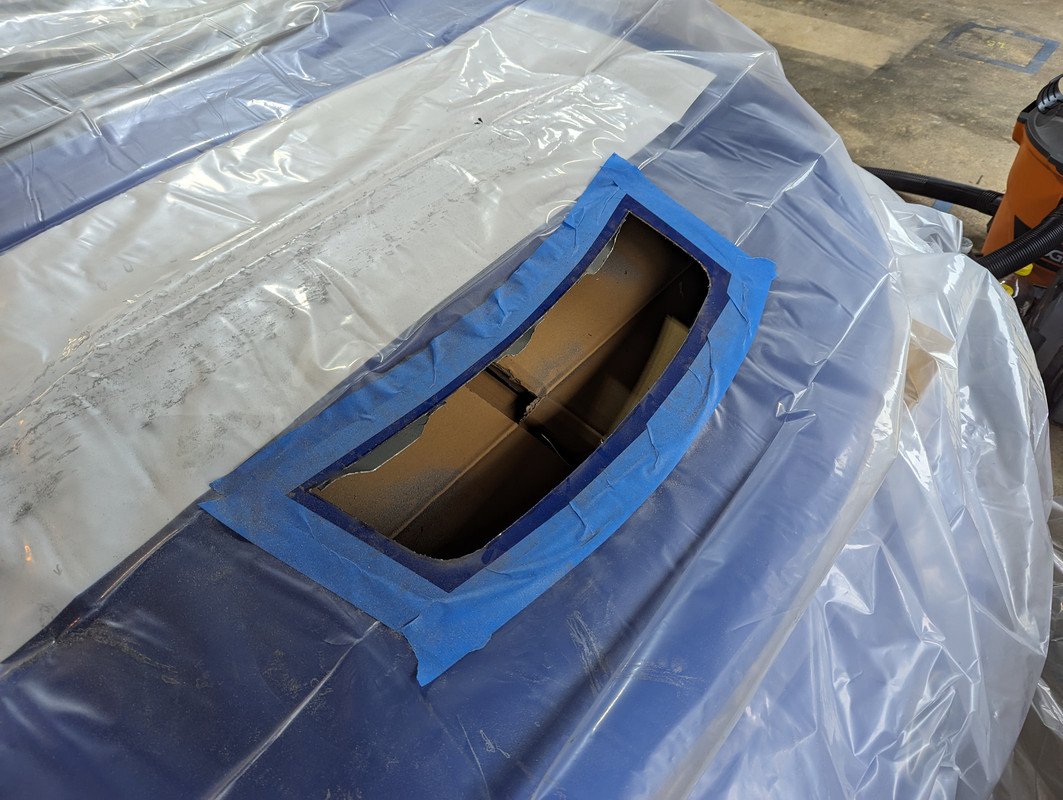
Saturday started off with transferring the template location to the hood, carefully centering it and positioning it in the right spot to hit the support structure where Toyota has theirs.
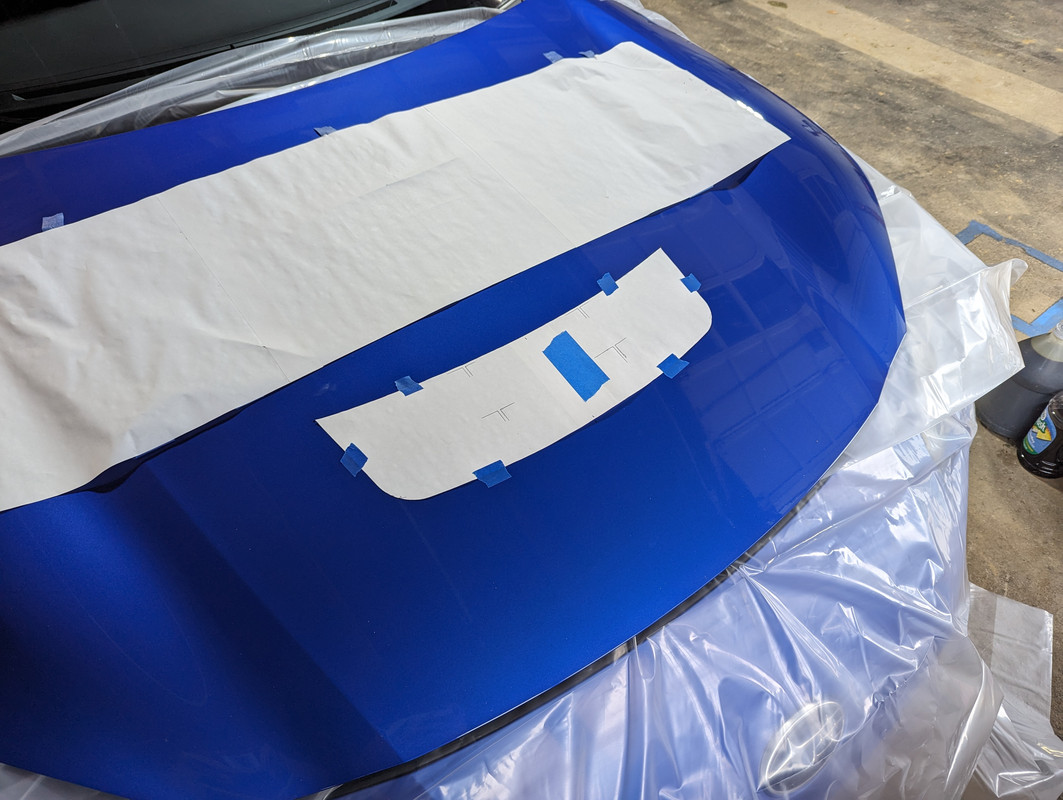
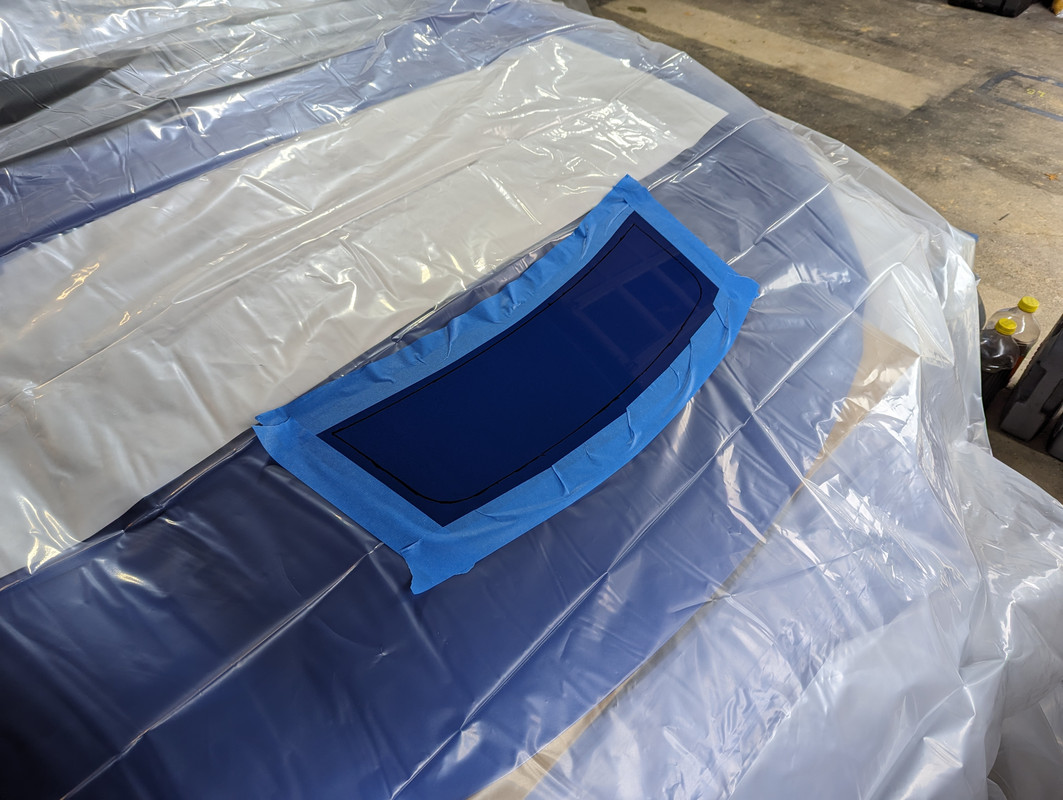
Masking off and protecting the car for the cutting process. Tedious but much easier clean up. The car is still filthy, but no aluminum shavings everywhere.
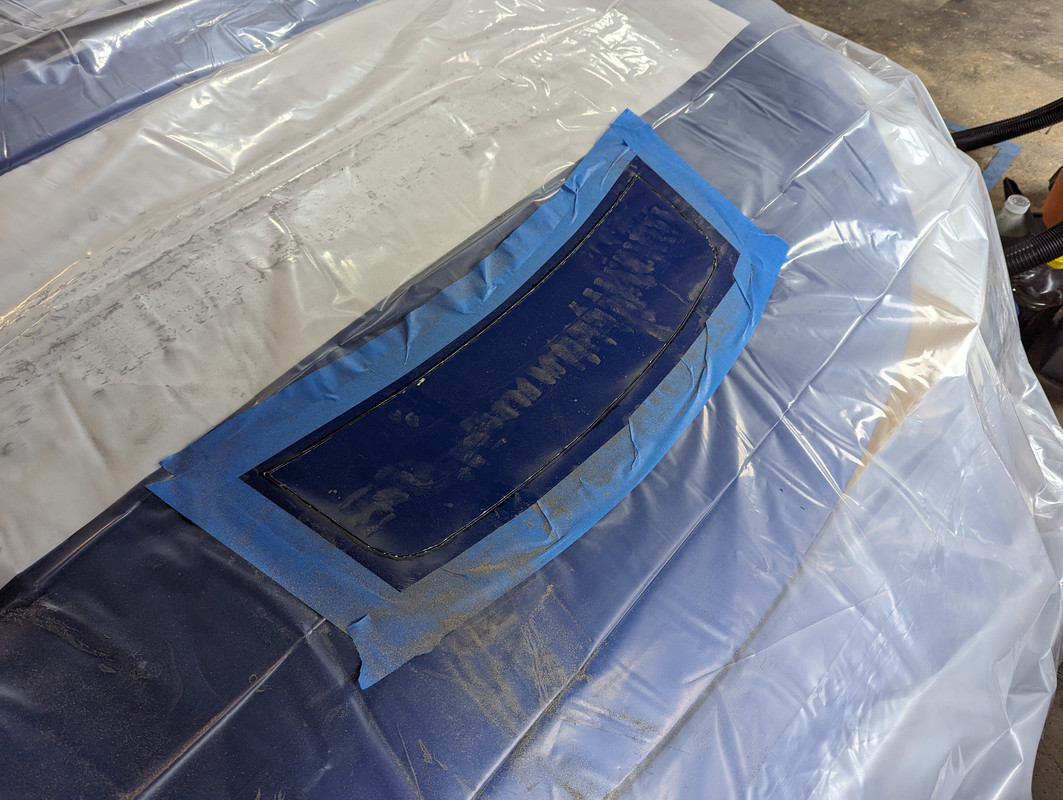
Nothing to it but to do it, right? Took some guts to start the cutting, haha
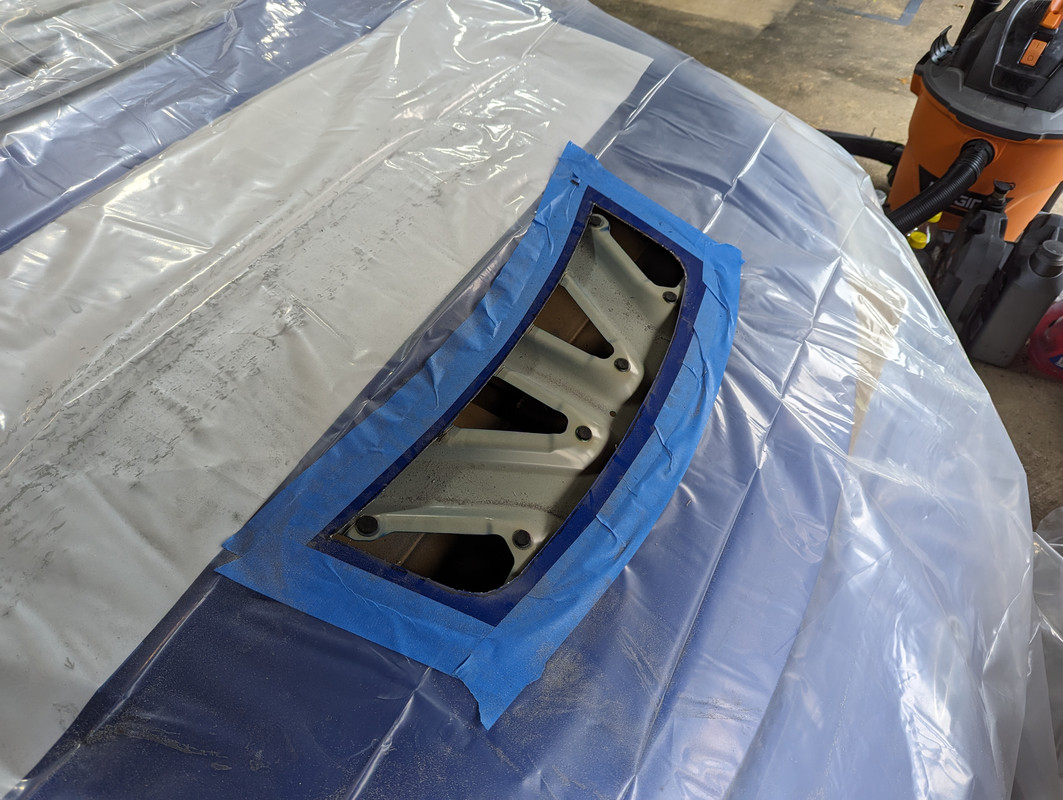
Cutting the support structure chewed up the cutting disks quickly, the skin was easy though!
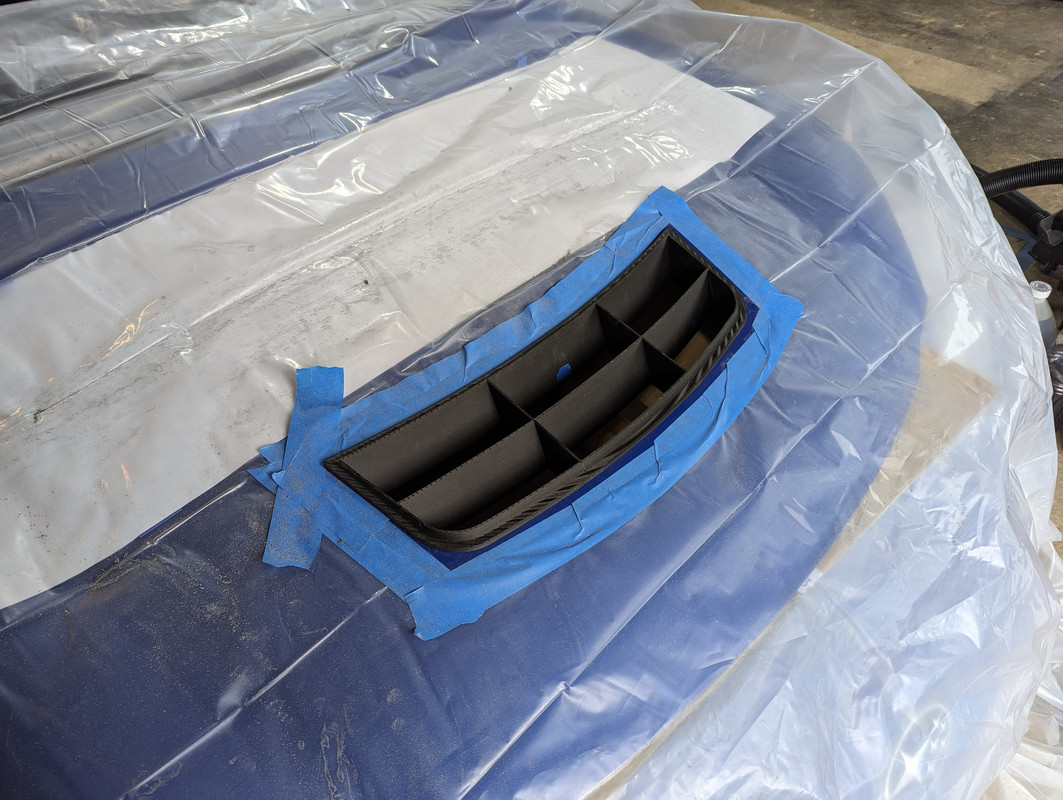
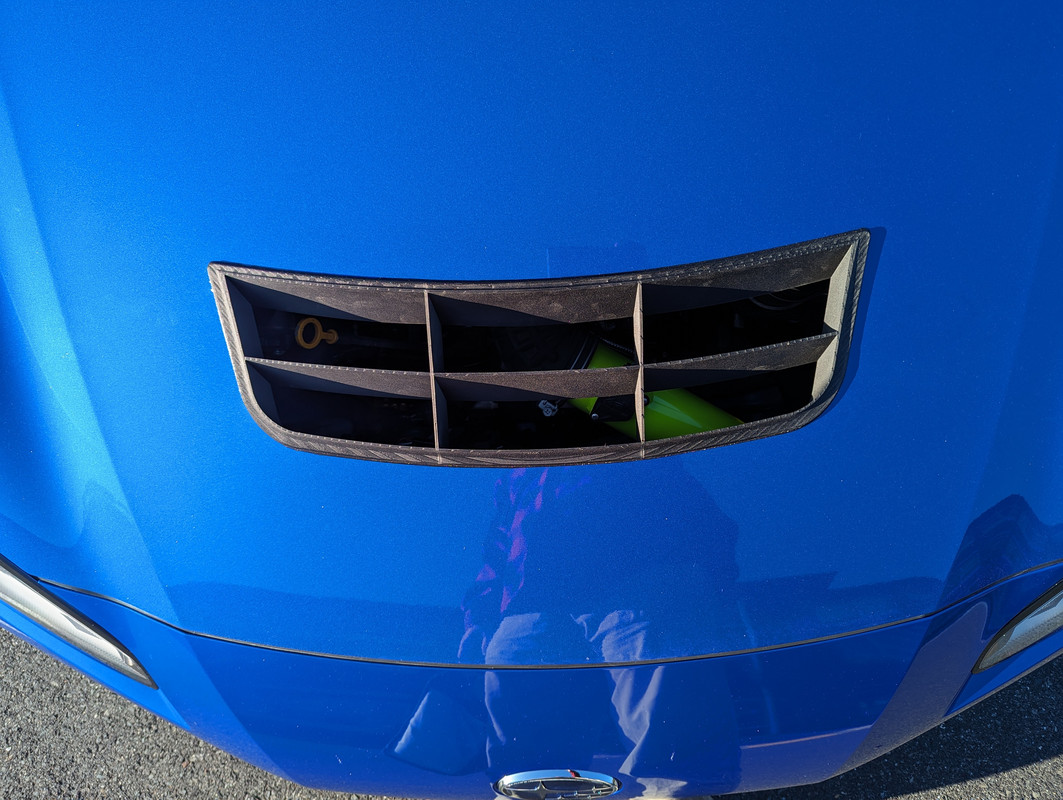
After many hours of messing around test fitting and cutting more material, the hood vent fits nearly perfectly! The rear corners are about a millimeter too proud of the surface so I'll tweak the design, but for now the hood vent fits well enough and with a bit of care nobody will ever know the difference.
Test fitted on Sunday after some clean up and painting the edges of the bare metal. This is before gluing the vent down, you can't even tell that it's not millimeter perfect.
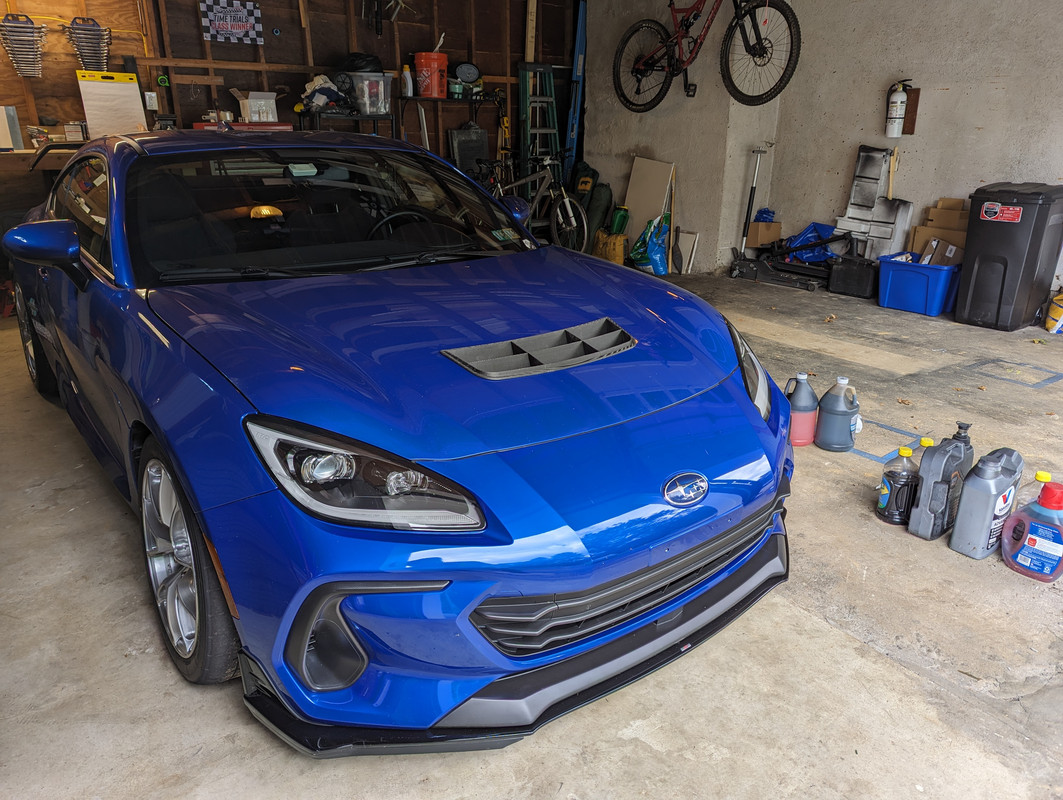
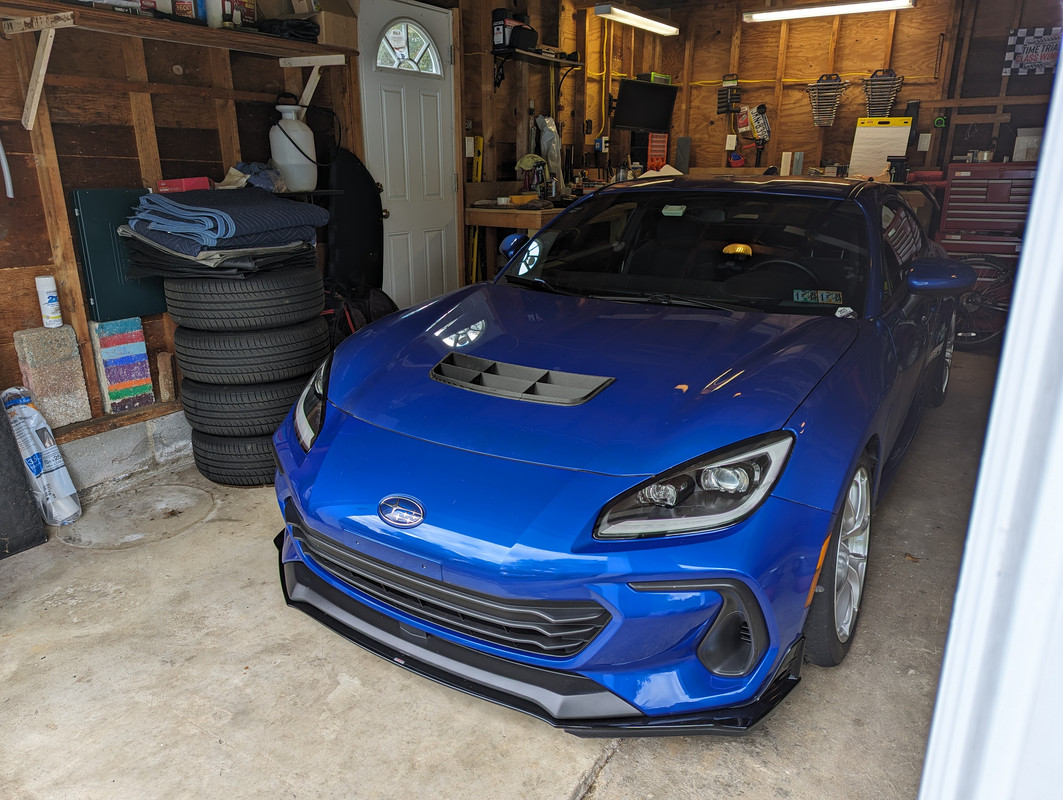
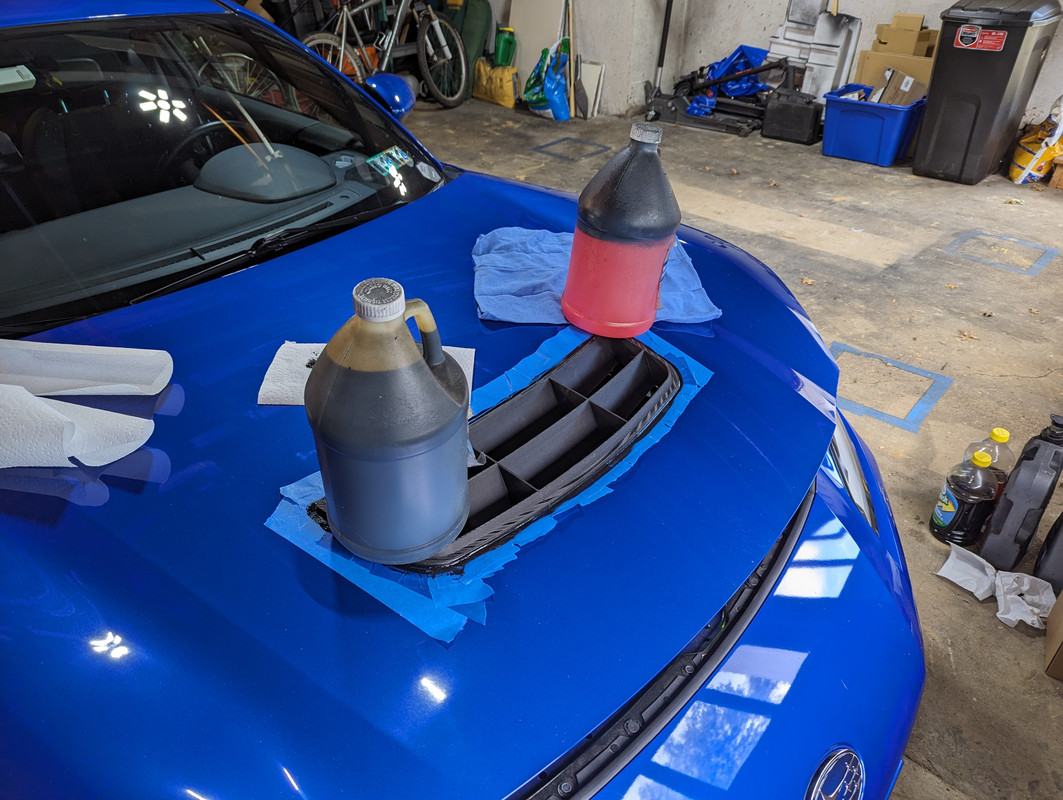
Bonded the vent to the hood with outdoor rated silicone adhesive and prettied up the edges with the tape. Using junk fluid containers that AutoZone wouldn't take...
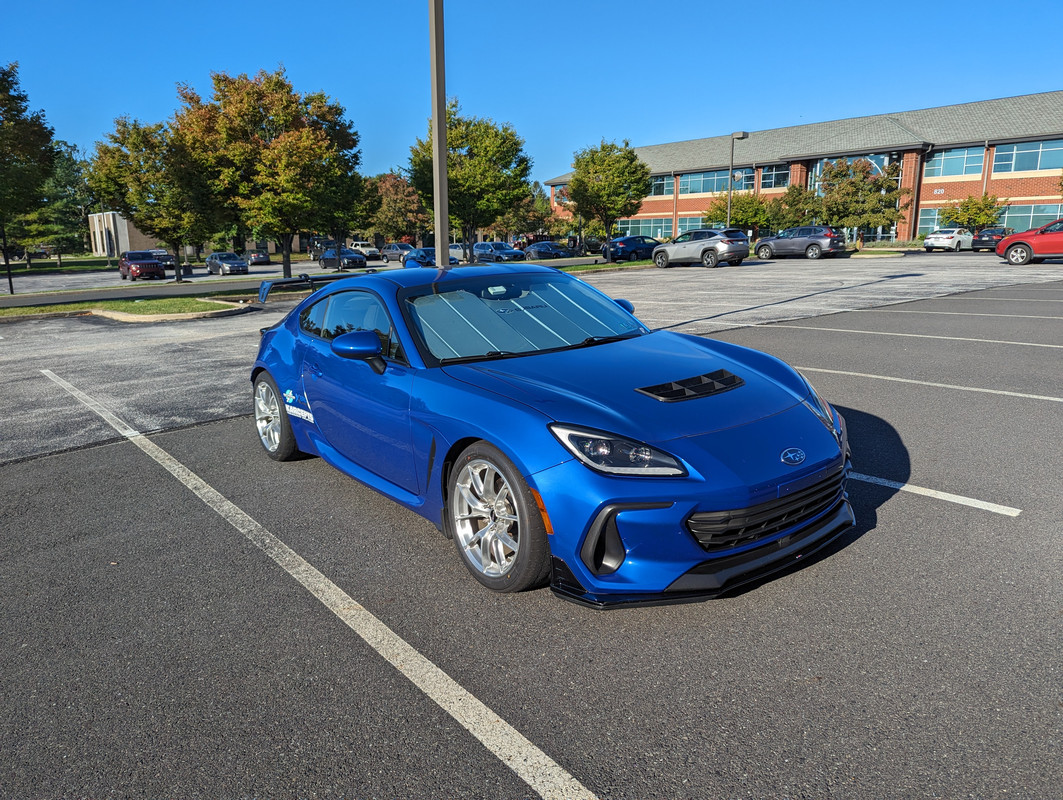
and done! Drove to work today. No more hood flutter on the highway at 80 mph and when I stop in traffic there's a pretty massive amount of heat pouring out of the hood vent. I still want to block the vent and test some before/after temps, plus I need to trim and reinstall the hood insulation.
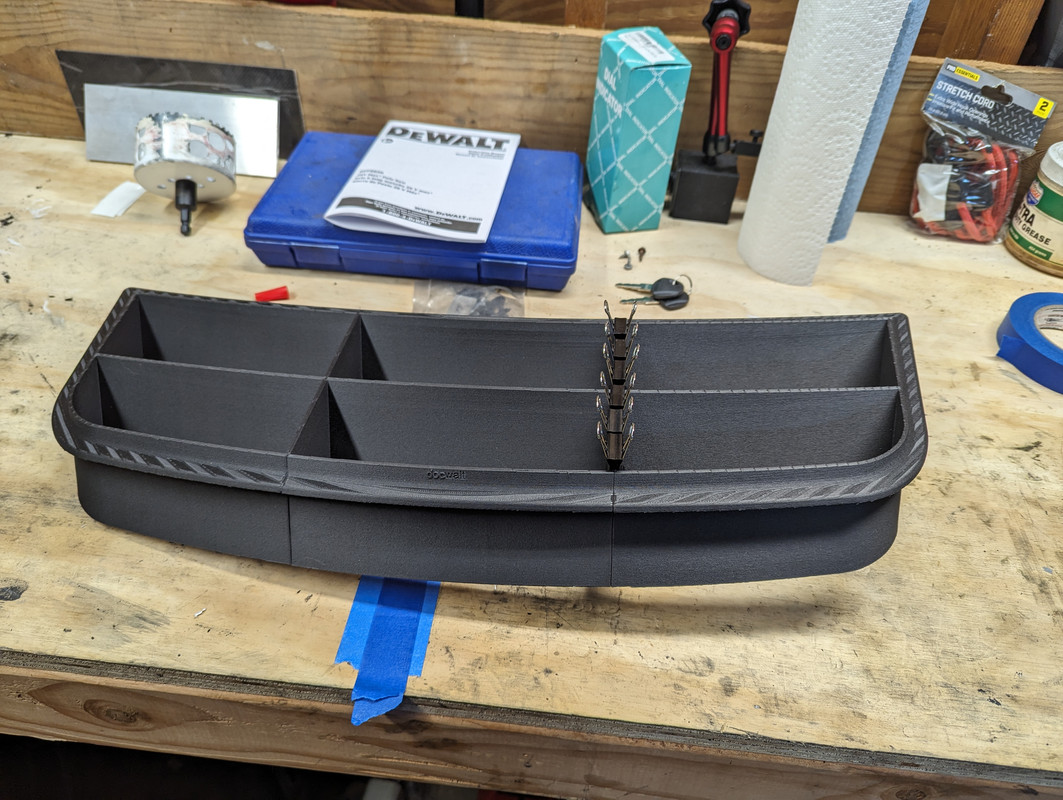
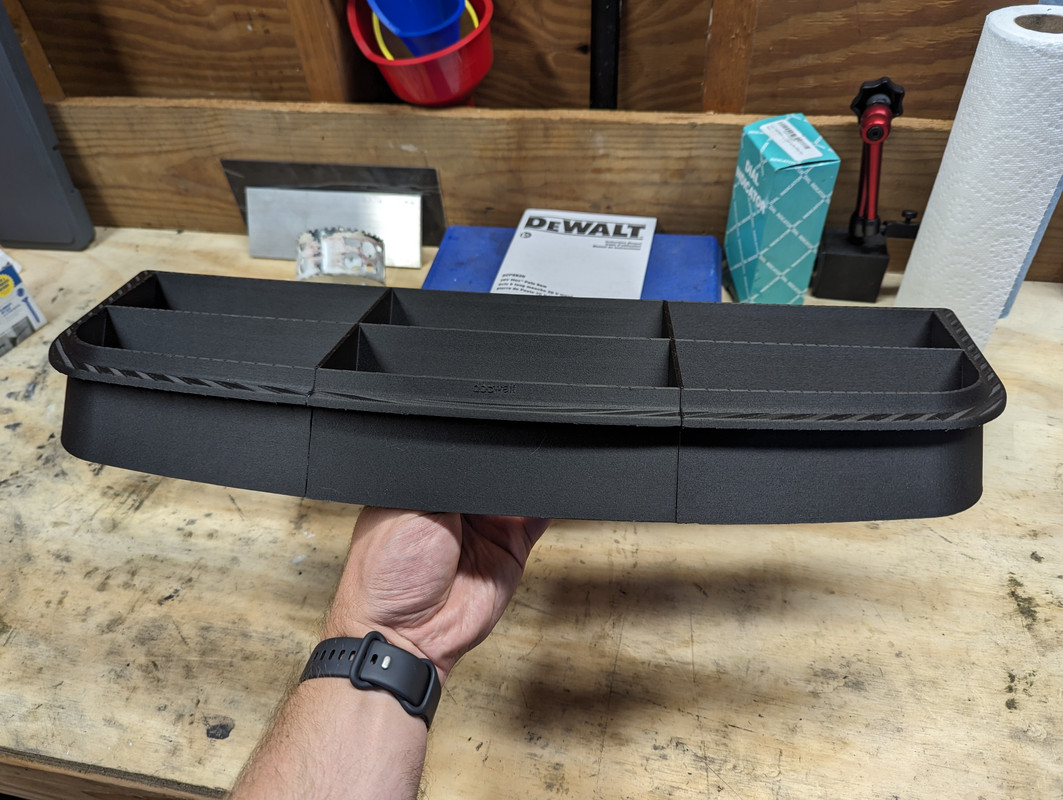
Next up I need to design a rain tray/debris guard that clips onto the bottom of the vent so I can daily drive this in all weather and not be concerned since it's just a gaping hole now.
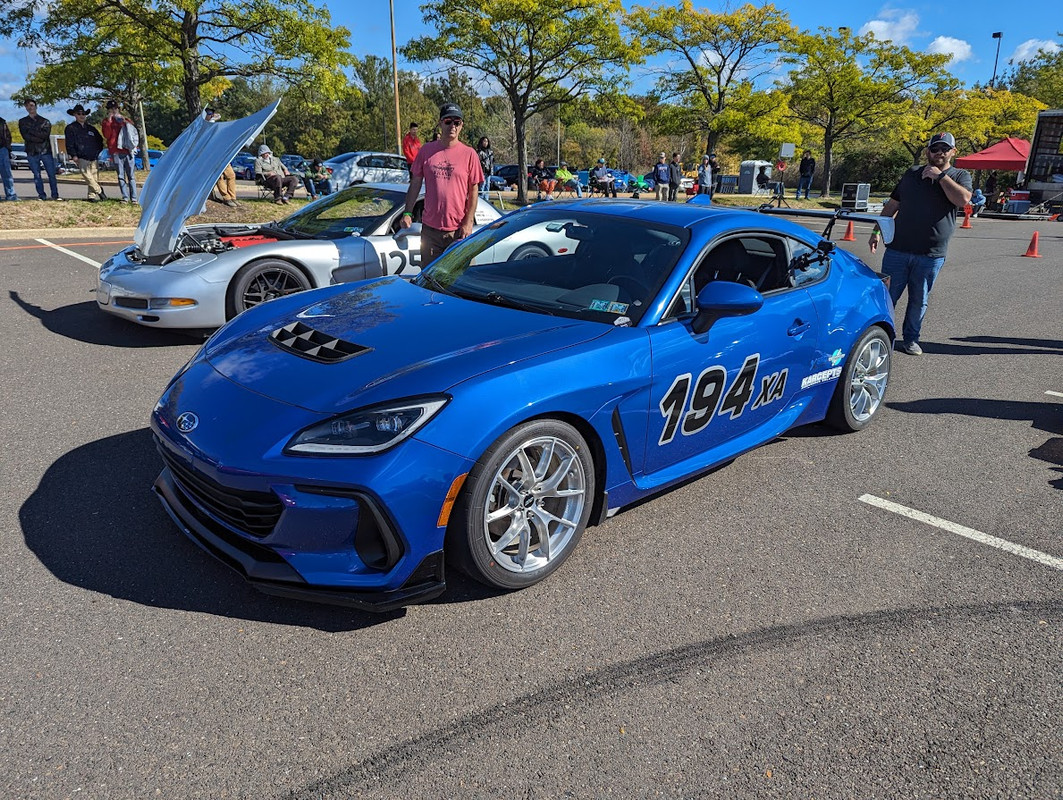
My first event in "XA" prep, against at least one real XA car too! The car feels great still, literally only softened the front bar for the less grippy site. I think the wing starts to help a little at high speeds, the car seemed a bit more stable at the ends of slaloms which were the only higher speed sections on yesterday's course. I'm going to struggle against the top XA cars without power, my plans for next year should get corner speeds up more and hopefully make up some of the difference there.
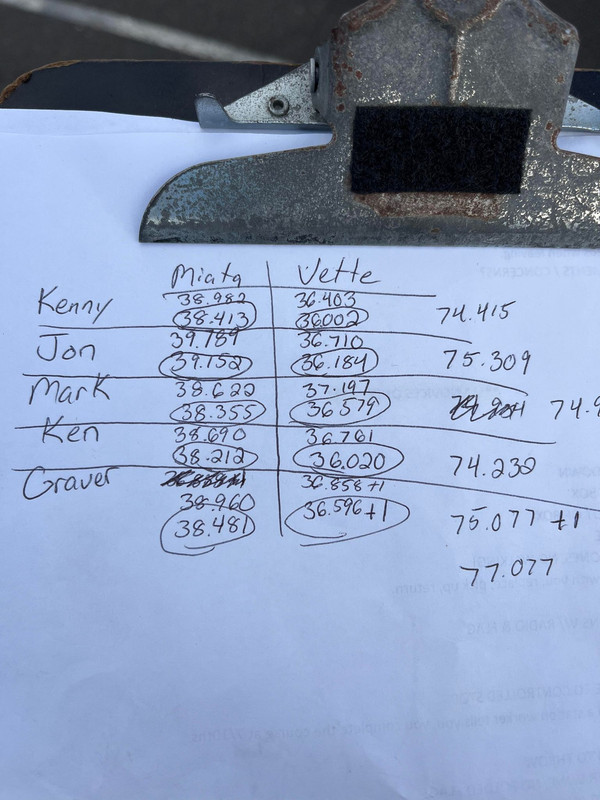
My fastest clean run:
My faster but dirty run (not sure where the cone was and nobody else seemed to know where either):
Philly SCCA does a neat thing where the Top 5 drivers in points get to drive two random cars for two runs each and your fastest run in each car is summed. I won this competition again, the third time in a row
and some pics from last week

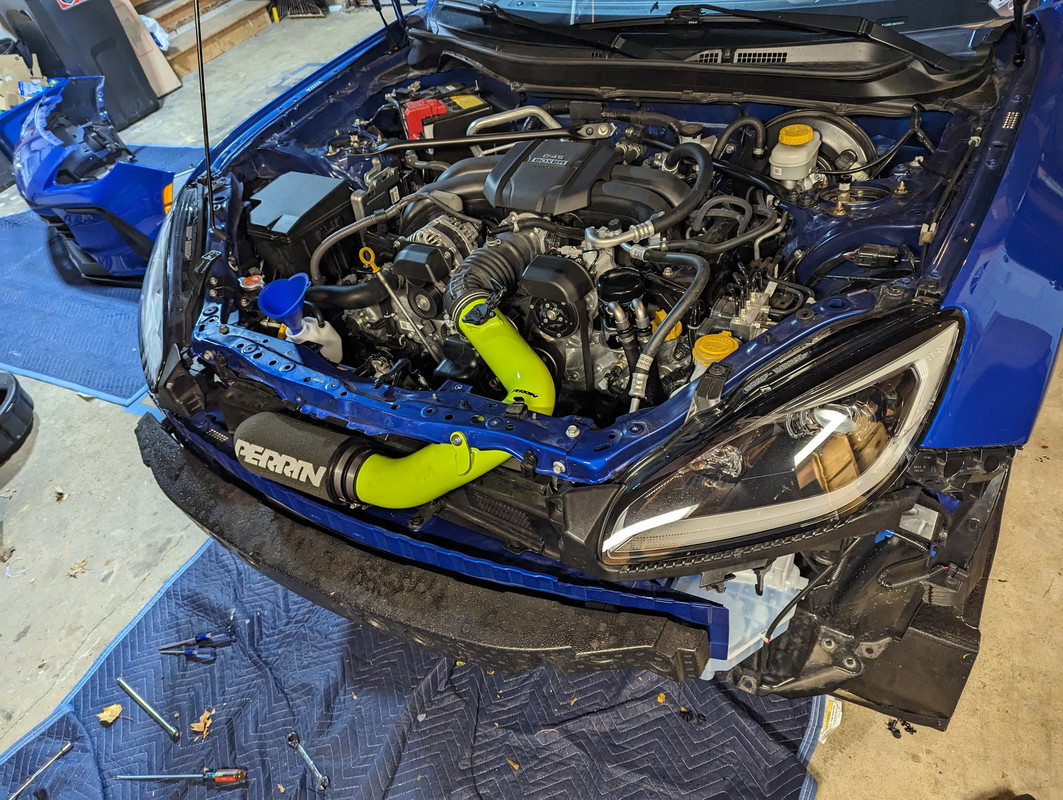
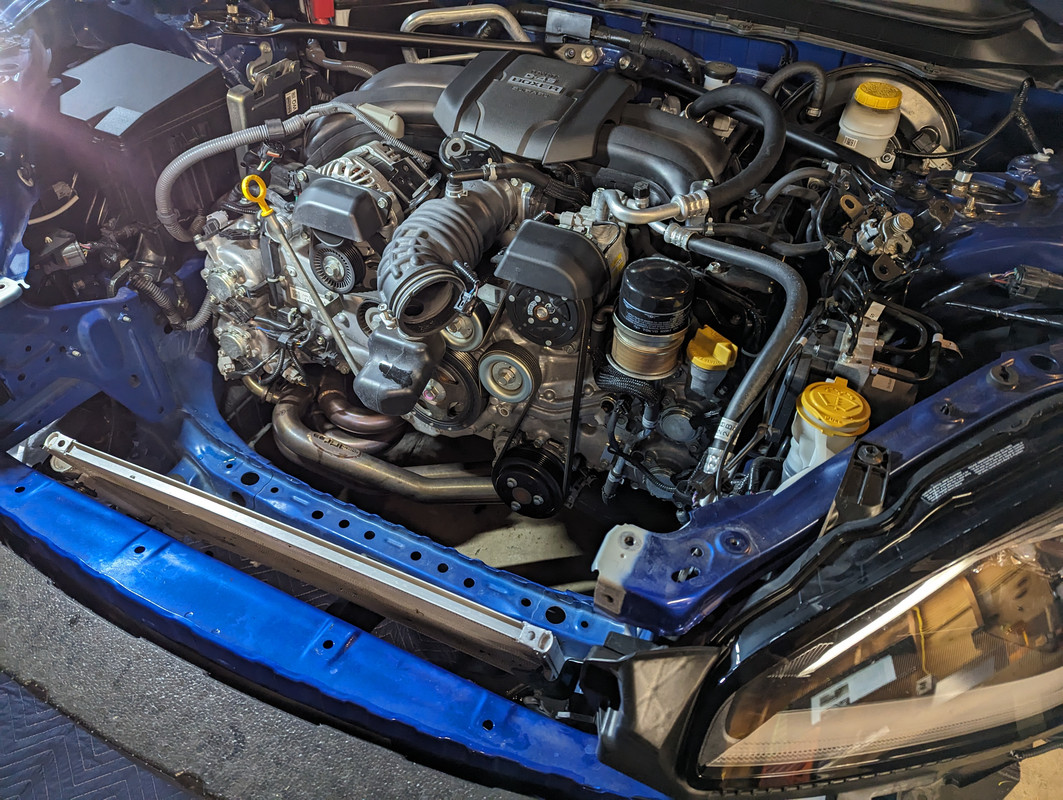
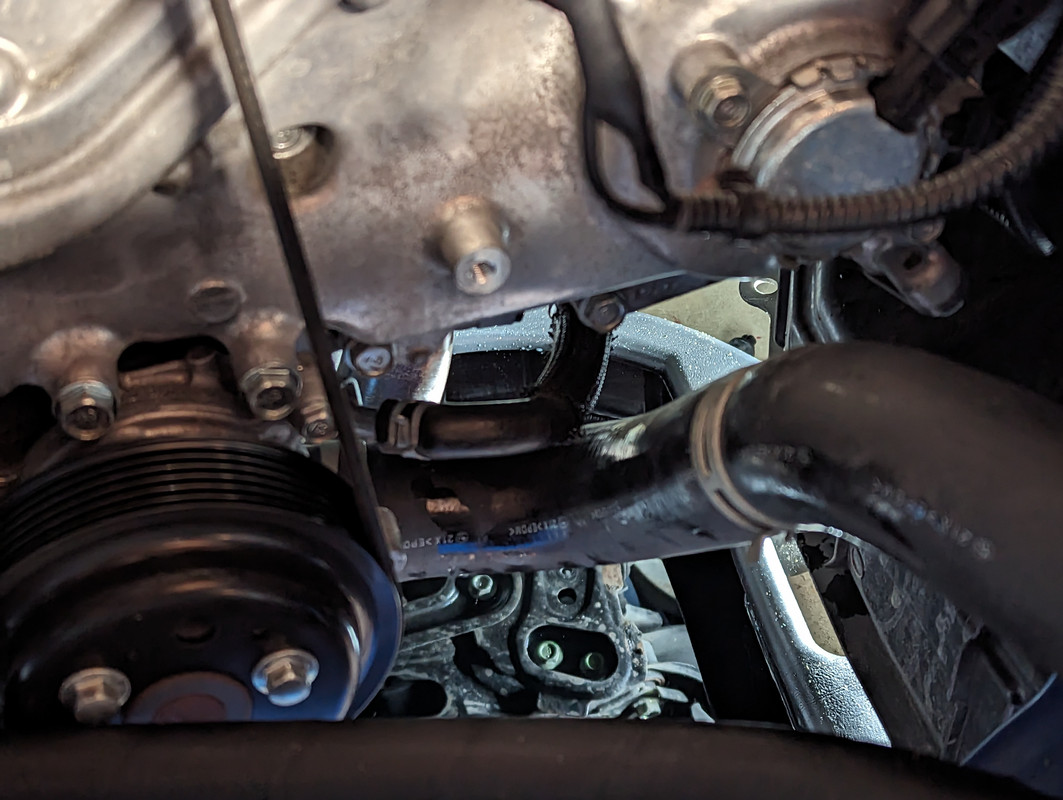
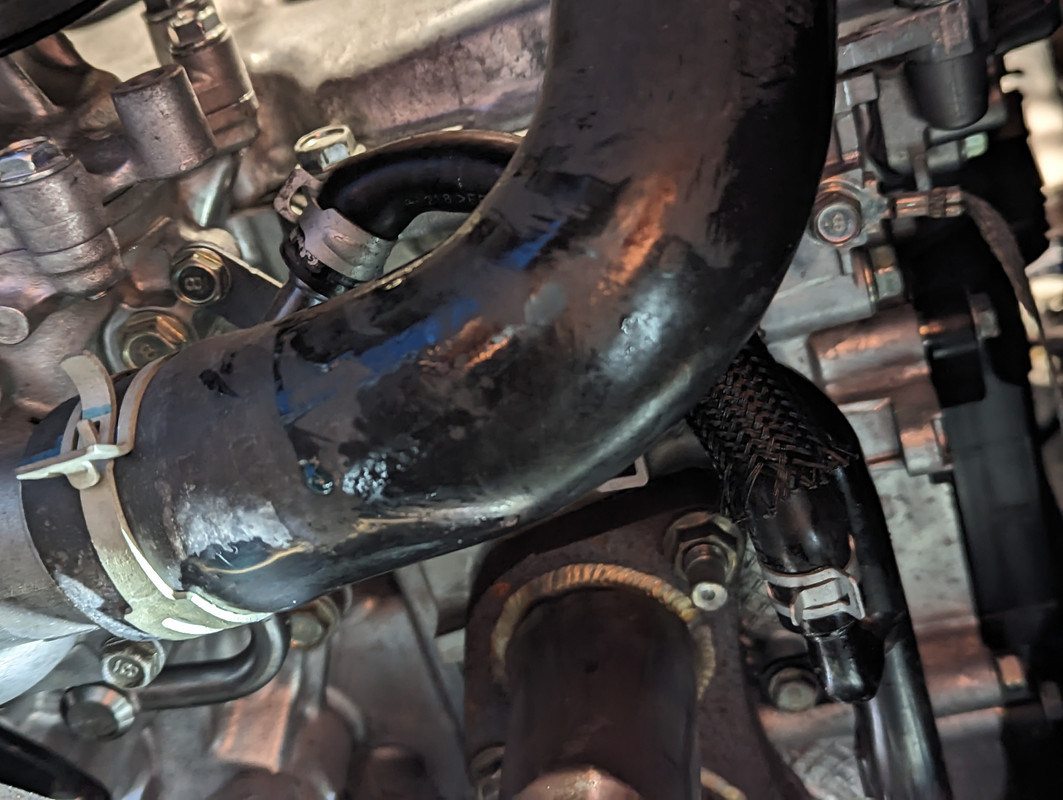
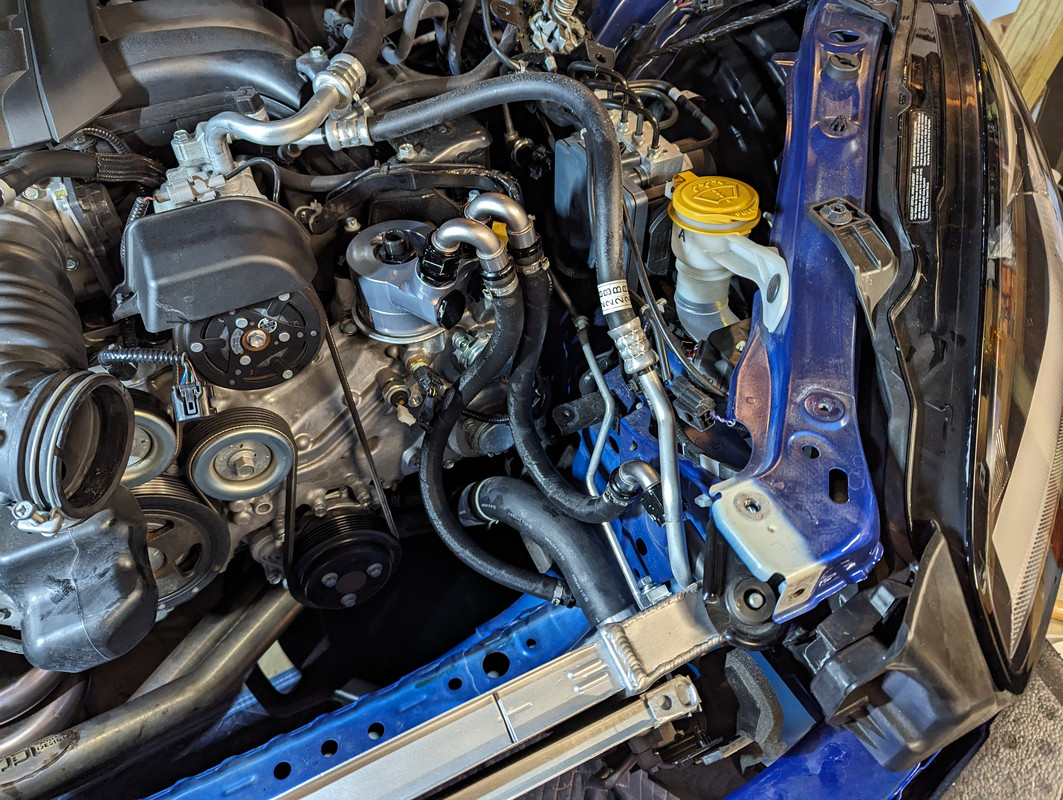
Installed the Jackson Racing Dual Cooler and deleted the factory heat exchanger. I was able to use one of the stock heat exchanger hoses to bypass between the two nipples that fed the stock heat exchanger, it was just long enough to not kink, haha.
Some data on temps so far:
Before I cut the hood, I saw coolant temps regularly in the mid 190s (Farenheit) and oil temps would heat quickly to 120+ by the first on ramp on my morning commute, plateauing at 210 on the street. Coolant temps peaked at ~201F at autocross but mostly in the upper 190s. Oil temps would peak in the mid 230s in a single autocross run, dropping back down again to low 200s by the next run.
With the hood vent, coolant temps were solidly in the low 190s on the street and they'd be in the mid 190s at autocross. Oil temps seemed to behave identically.
With the rain tray installed on the hood vent, the coolant temps would be in the low-mid 190s, like 192-194 F. Oil temps still identical.
Today, coolant temps were definitely a little slower to warm up and plateaued solidly in the 187-192F range even with the rain tray on the hood vent. Oil temps were lagging ~10 degrees F behind "normal" initially (it *just* hit 120F entering my morning commute on ramp) but then took AGES to get to 185 F and then it was stable there excepting when I peaked it at 194 F after ripping my favorite 270 degree off ramp at 60-80 mph in 3rd gear. It quickly dropped back down into the mid 180s. The oil temps are definitely slower to warm up than the OEM heat exchanger, but way quicker than an air/oil cooler even thermostatically controlled like I had on my first gen.
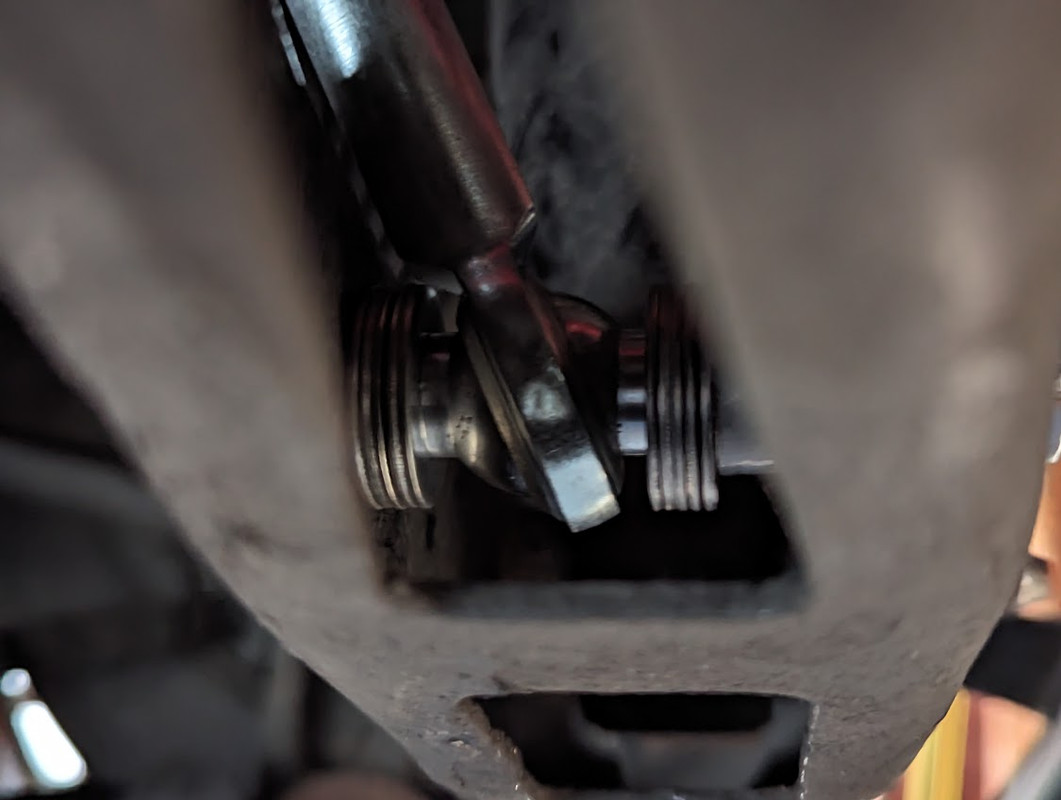
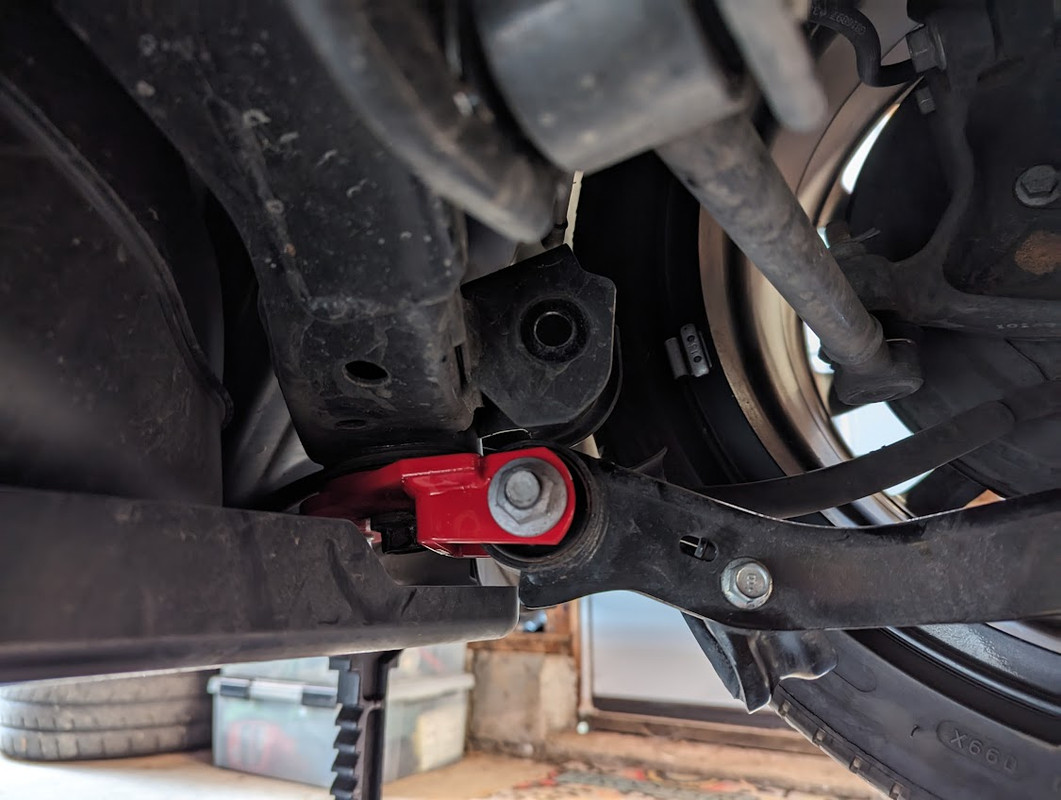
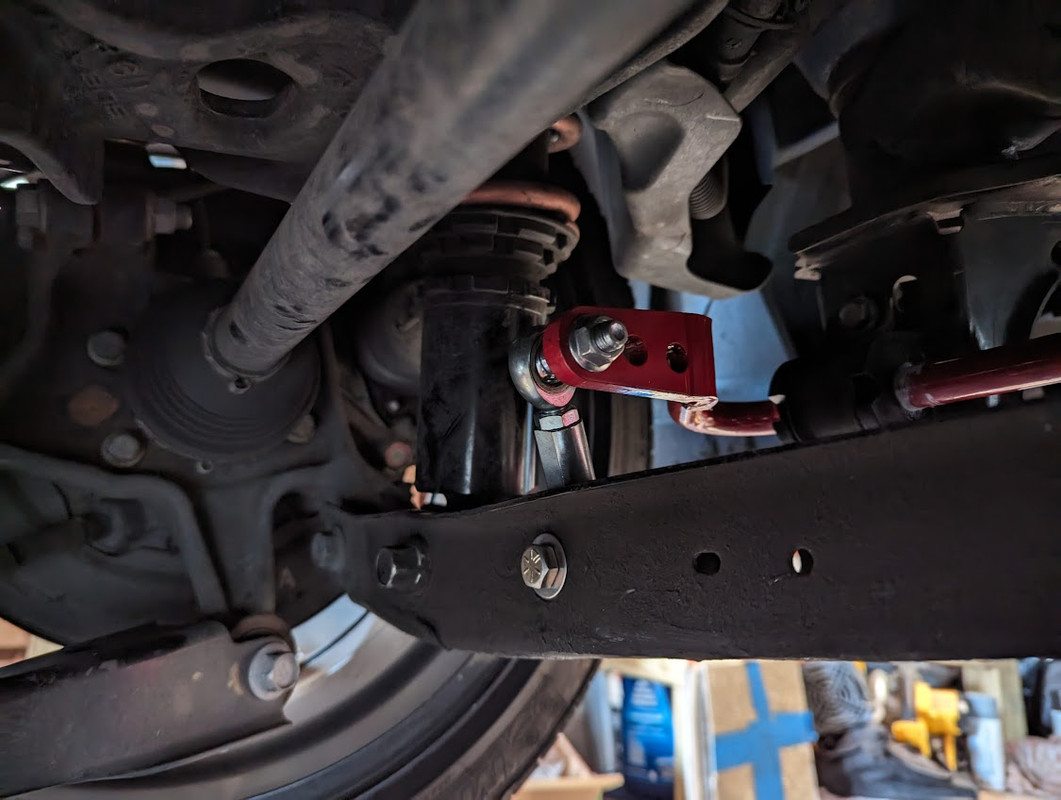
Installed the GP Sports "rear traction member collar" aka the "traction mod" that reduces the rear anti-squat for a more compliant suspension and better ability to put power down. Initial testing on the street says it does all of that very well! The car rides better and seems to settle into the road better on corner exit. There's a particularly bumpy intersection I drive every day that I couldn't accelerate out of hard on stock tires even in 2nd gear and now it just squats and goes. I can actually use first gear now without totally roasting the stock rear tires too on regular roads, so that's a marked improvement. Definitely curious how it does in performance driving!
I also installed the Perrin 16mm rear swaybar and made some DIY end links that I offset using some round tube and washers to fine tune the alignment to not bind the joint nor have the end link hit the control arm. Nothing too exciting to report here, but definitely excited to test these changes. I actually installed the end links last week and drove to work with the OEM rear bar all week, the non-OEM rear end links also seemed to make the car ride better, go figure not being all bound up helps a lot with ride quality.

How much weight have you added/subtracted from the car, Doc?
Ranked No. #1 in initial quality
Idiots, simply by being idiots, seem capable of achieving randomly bad things that are beyond the imaginings of sensible people.
Really good question. It's probably kind of a wash. Header is significantly lighter, wheels and tires are as well. Shocks are lighter. The pimpy front swaybar is heavier, the rear swaybar is heavier. The catback is slightly heavier than stock but the front pipe is lighter than stock. Rear wing added <5 lbs and the hood vent likely lost a few ounces? Aluminum hood so not much loss there really. The intake is likely heavier than stock.Originally Posted by j2k4

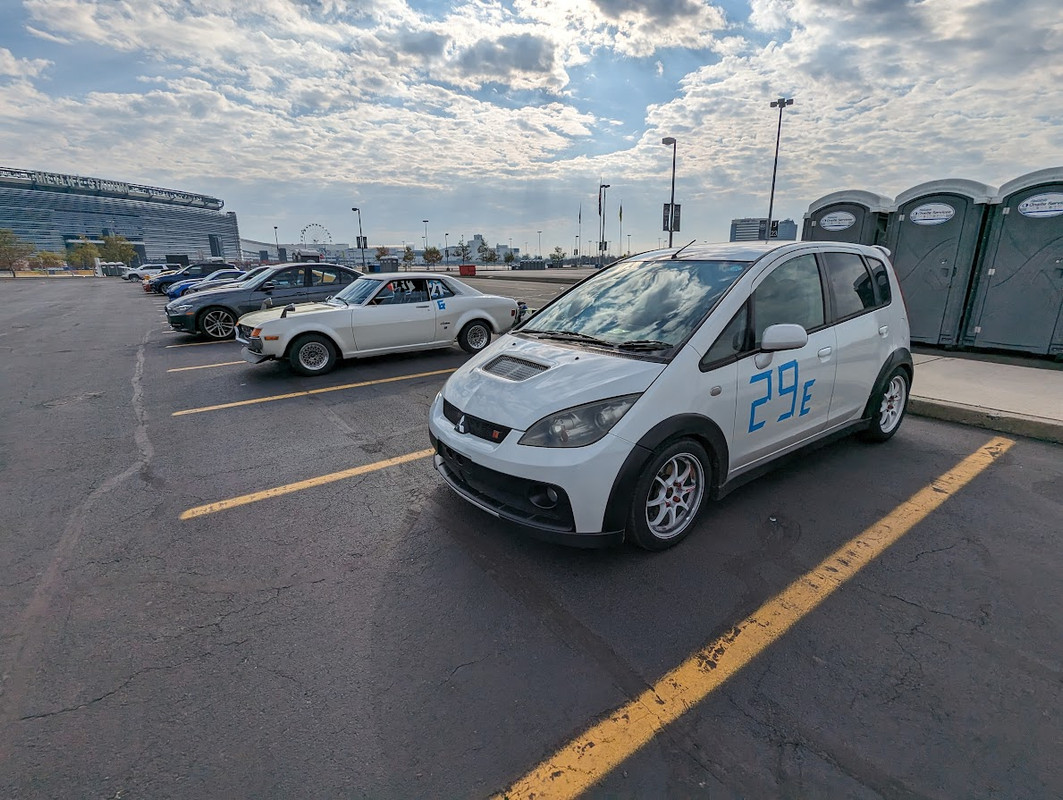
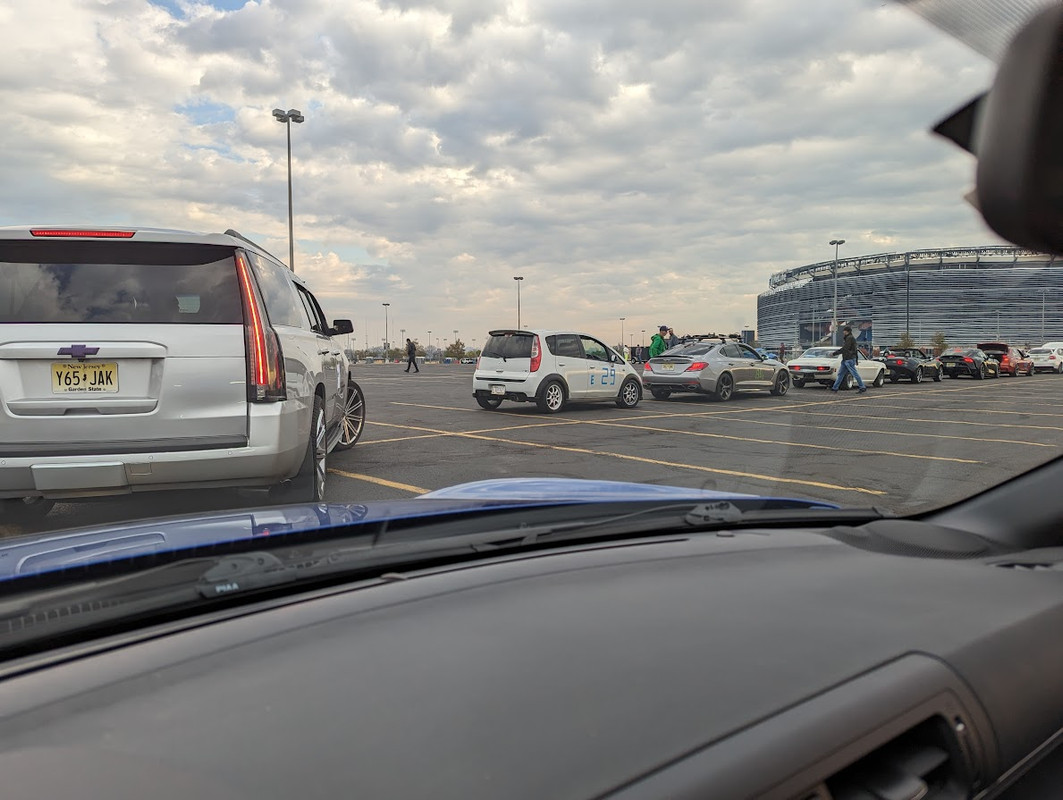
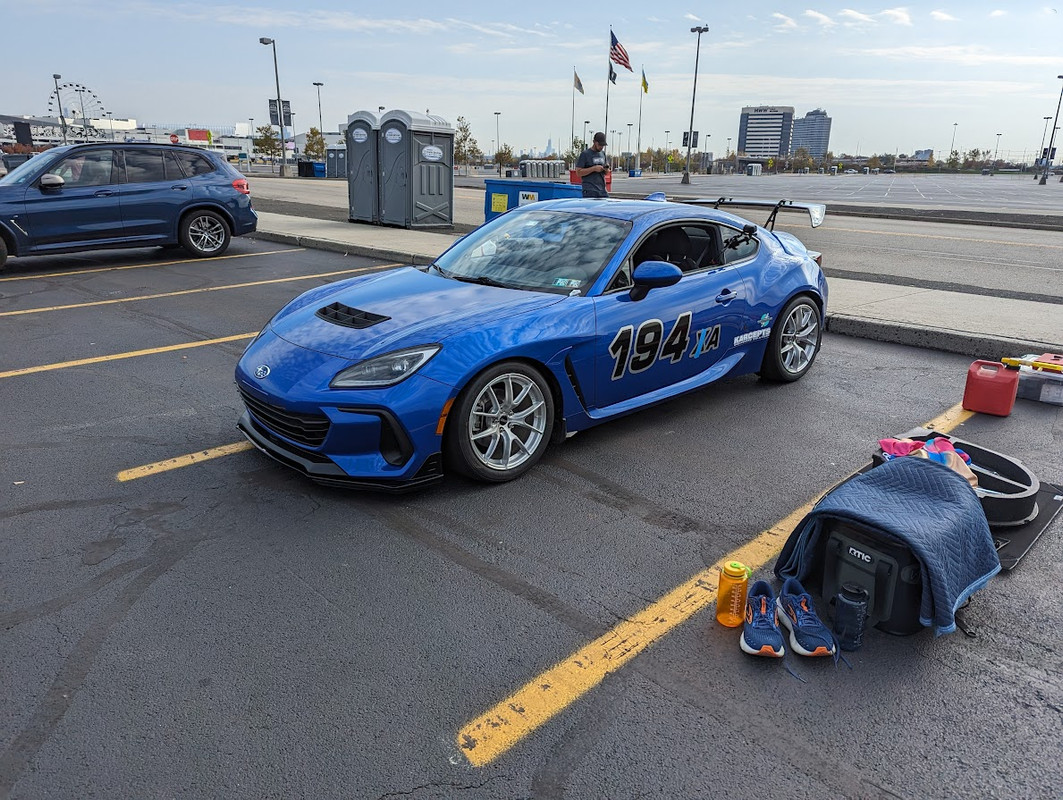
I did an autocross yesterday with Motorsports NE at MetLife stadium. The recent car changes have been... simply put, incredible. I took top PAX (non-SCCA event using their own PAX) and fastest raw time over a well driven GT4 RS, I took second using SCCA PAX, so that's a pretty darn solid result.
The anti-squat changes are a HUGE improvement, it's frankly kind of mind blowing. I would definitely recommend the traction mod for anyone that can do it within their rule set. The improvement in power down is really hard to describe, but it's really sort of mind blowing how early I can roll on the power now and not worry about the car getting unsettled over bumps or slightly imperfect inputs. I was so late to power on my early runs because it was just so settled and forgiving versus how it was before.
That said, the traction mod brings with it some setup issues. I went ~30% stiffer on the rear swaybar versus stock, but in practice it's likely more with the stiffer bar bushings and better end links, and that nearly perfectly compensated for the geometry changes creating a balance change. So you definitely need to plan ahead and plan on stiffer rear springs or swaybar to get the same steady state balance back now that the rear end is so much more stable and planted.
We made zero setup changes all day (not that we had time anyway since it was 3-4 minutes between runs which is pretty tight) and it was SUPER dialed right from the get-go.
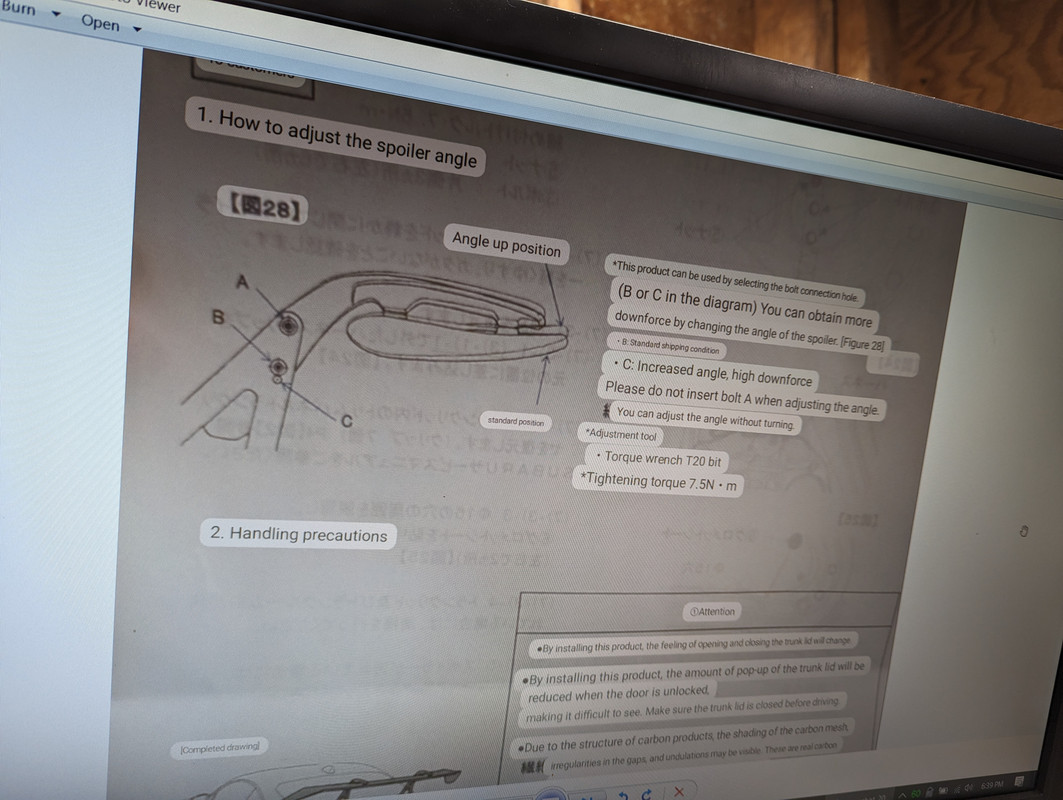
Related, but not? I measured the wing angle change between the two settings, ~1.5 degrees between the two settings. I left it in the lower AoA position for now until I do some front aero.
Here's my fastest run from yesterday:
Here's my codriver's fastest run from yesterday (I'll spare him the embarrassment of naming him haha):
Some random photos of yesterday's excitement!
and a quick outside video of my codriver on course, the intake noise when it's near rev limit or on the rev limit is *insane* sounding and a lot of folks came up to me to make sure my car was OK, haha
 Posting Permissions
|
3000gt.com 3000GT / Stealth International WWWboard Archive Jim's (RED3KGT) Reststop |
|
Team 3S 3000GT / Stealth / GTO Information daveblack.net |
|
Michigan 3S MInnesota 3S Wisconsin 3S Iowa, Nebraska, Kansas 3S |
North California 3000GT/Stealth United Society of 3S Owners 3000GT/Stealth/GTO Forums 3000GT/Stealth International |
|
3S National Gathering East Coast Gathering Upper Mid-West Gathering Blue Ridge Gathering |


 Reply With Quote
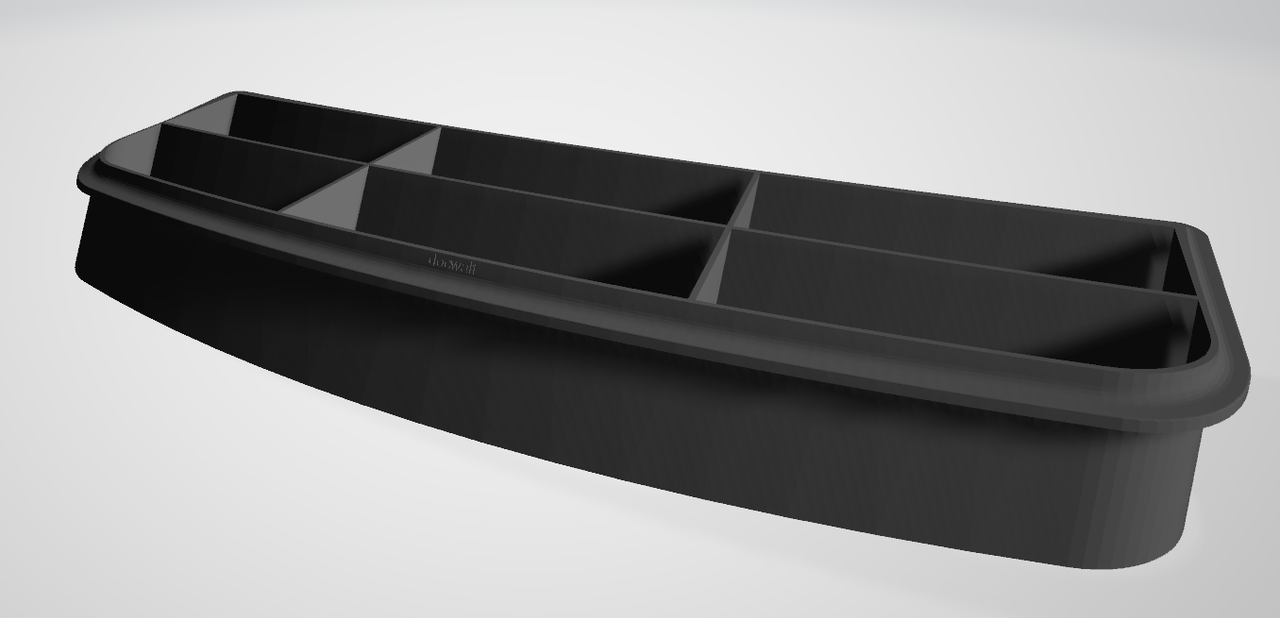


Bookmarks