Page 1 of 5 123 ... LastLast
Results 1 to 10 of 43

Thread: 94 Pearl Yellow RT/TT Project

  1. #1
    Forum User Not Verified
    Join Date
    Jan 2012
    Owner Since

    Location
    Sioux Falls, SD
    Posts
    58
    Thanks
    1
    Thanked 3 Times in 2 Posts

    94 Pearl Yellow RT/TT Project

    I finally started installing some parts that I've been accumulating during the past year. This is the first time I've really done anything with a car other than change the oil, change brake pads, and other simple things like that. I have done a few car audio builds but that's a different animal. As such, I will try to show some tricks and useful tools that I've come across (as a newbie) while working on the car.

    My brother does body work and paint as a hobby and has gotten rather good, especially when he takes his time, so he will be repainting the outside of the car hopefully this spring.

    Now onto the parts lists.

    Existing Parts (came with the car):
    * K&N FIPK intake filter
    * Eibach lowering springs
    * TSW Verano 18x8 wheels
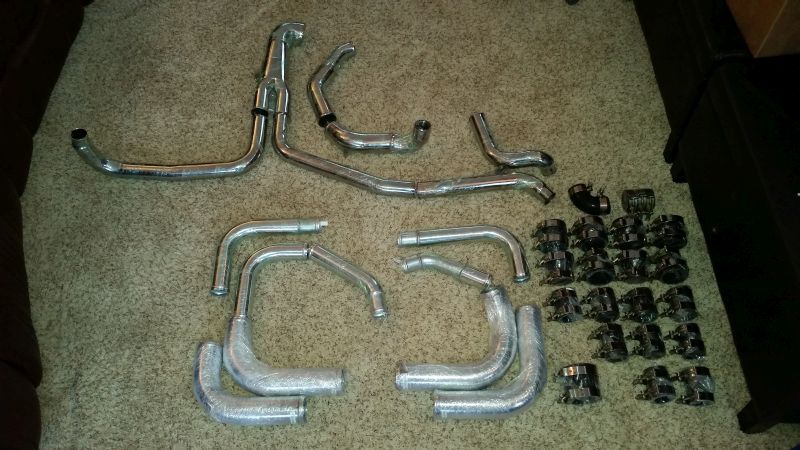
    * DNP hard intercooler pipes
    * ATR exhaust with hi-flow CAT
    * Short throw shifter (I was told it was made by OhioSpyderman)
    * Adjustable rear control arms
    * GReddy Type-S BOV setup for recirculating
    * Fuel loop

    New Parts:
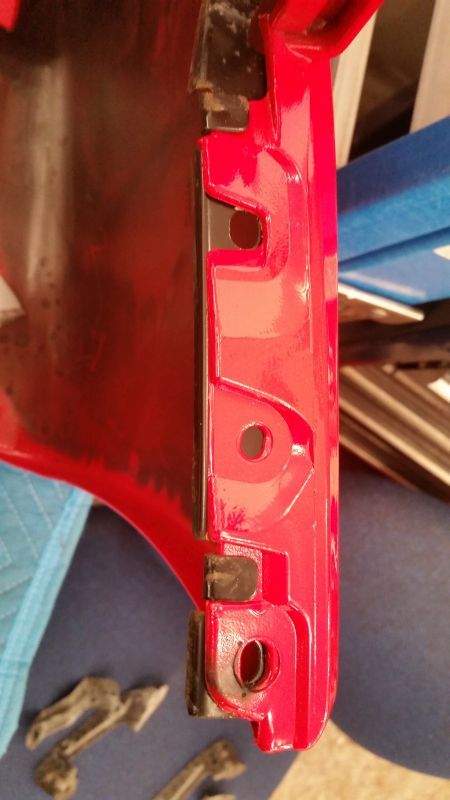
    * Various Mitsubishi OEM weather stripping, bumper brackets, etc.
    * oohnoo Dual core FMIC made for DNP hard pipes
    * Skillard front bumper splitter
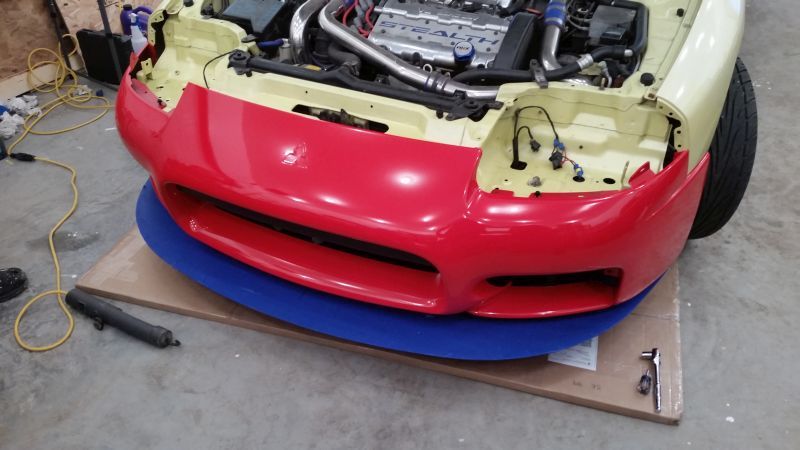
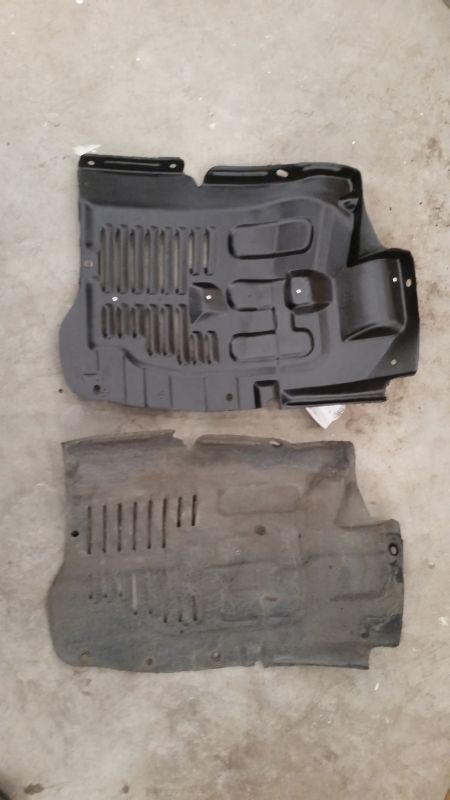
    * 1999 Mitsubishi front bumper with necessary brackets (minus the splash shields because I bought the front splitter)
    * 3SX Pre-Turbo hard pipes
    * New black couplers and T-Bolt clamps (for the DNP hard pipes) from SiliconeIntakes.com
    * Stainless Steel, Lined worm gear hose clamps for locations where T-Bolt clamps cannot be used (intake bubble, K&N air filter, etc.)
    * Replacement K&N air filter for the FIPK kit (old one was ratty)
    * Replacement 3SX adjustable rear control arms (old ones are a PITA to adjust due to corrosion and the heim joints are shot)
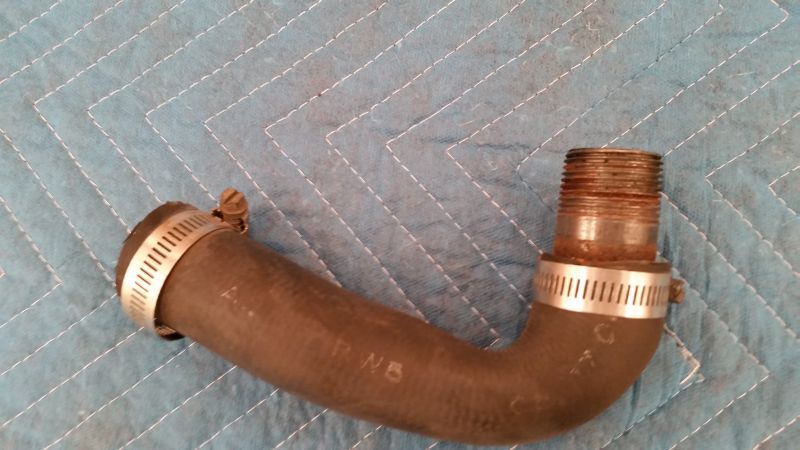
    * New OEM style radiator hoses
    * Aluminum high capacity radiator from 3SX
    * Extreme Dimensions 96 Stealth spoiler replica

    Still need to purchase:
    * Leather seat covers
    * TSW Portier 18x9 +30 wheels (if they will fit) or TSW Nurburgrings if the Portiers turn out to be heavy.
    * StopTech slotted rotors

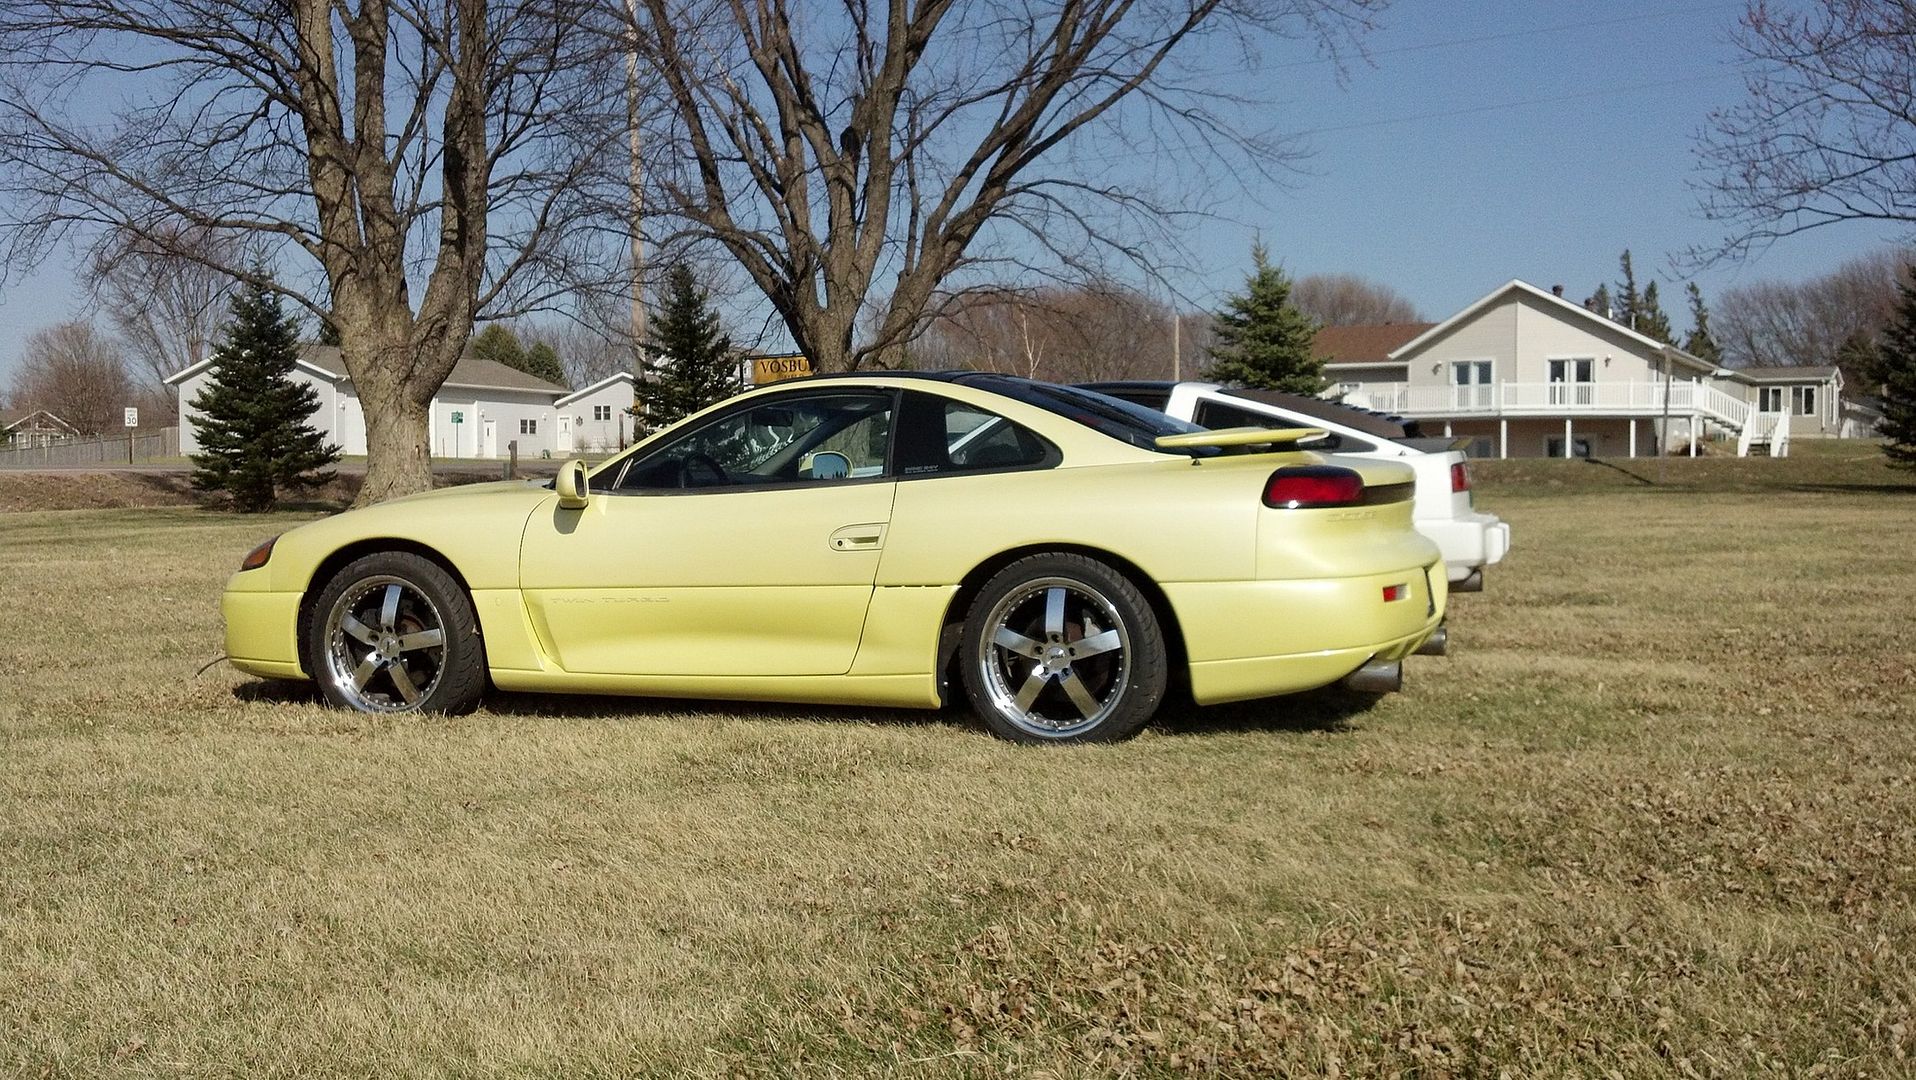
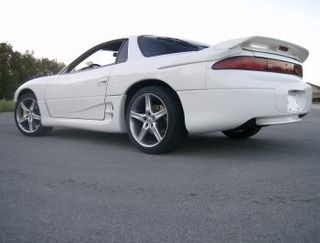
    Here's what the car looked like before I started tearing it apart.


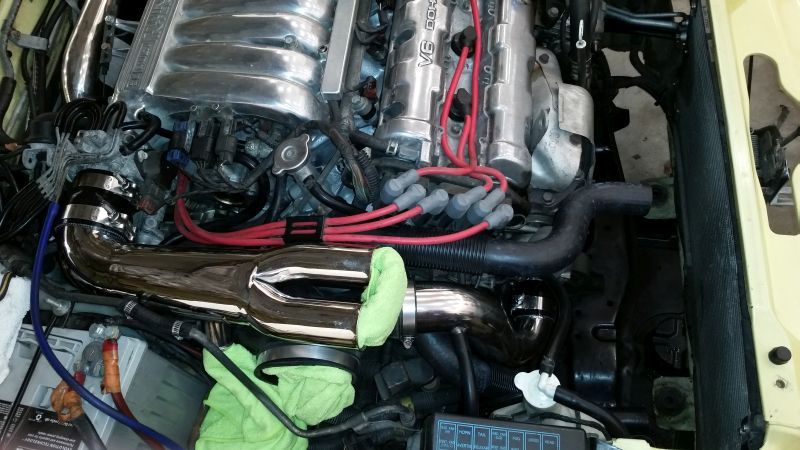
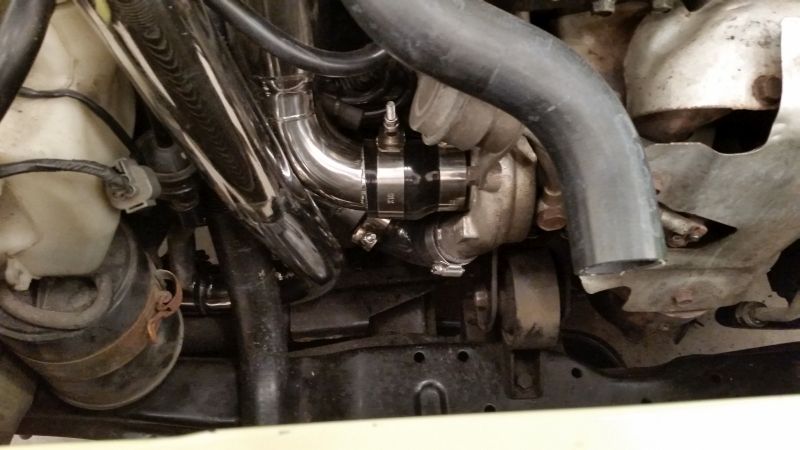
    The DNP pipes, stock radiator, stock SMICs and some other stuff have been removed. I polished the DNP pipes while they are out.


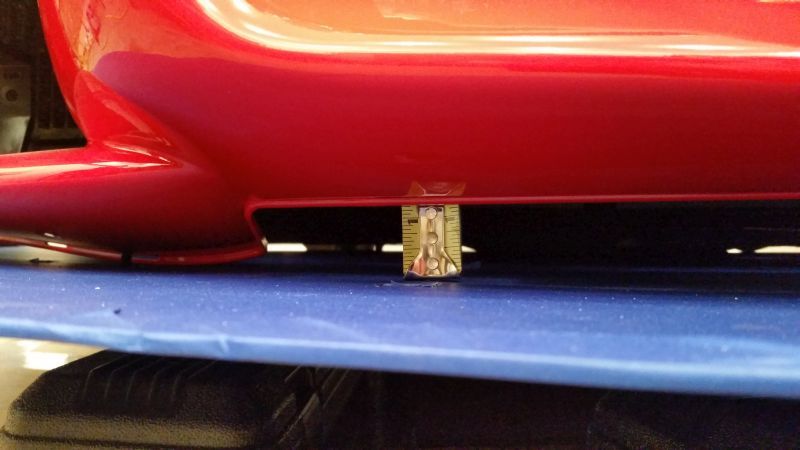
    I covered the front splitter with painter's tape to protect the powdercoating while doing mock ups. In addition to the cross-member mounting holes, I drilled holes beneath the radiator support and made a couple 1-3/4" spacers to bolt the splitter up to the radiator mount as well to help support it.


    I'm going to go into a bit of detail on my 99 bumper conversion because I wasn't able to find any really good information on what was absolutely 99 specific and what would work from the Stealth. Further more, I couldn't find pictures of just what these brackets looked like.

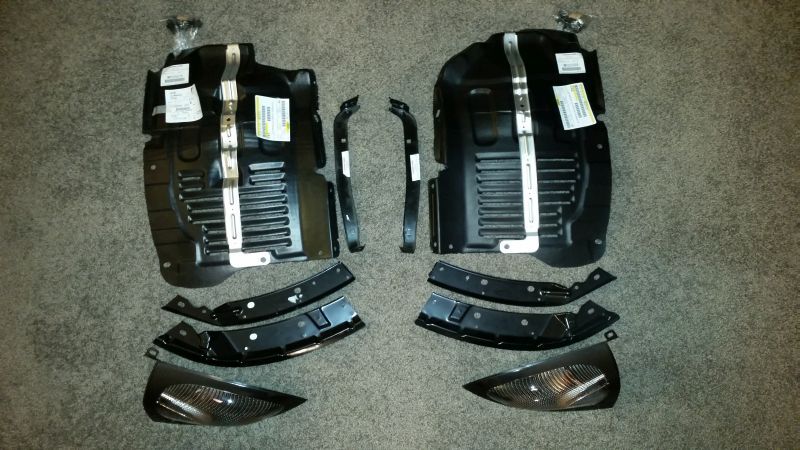
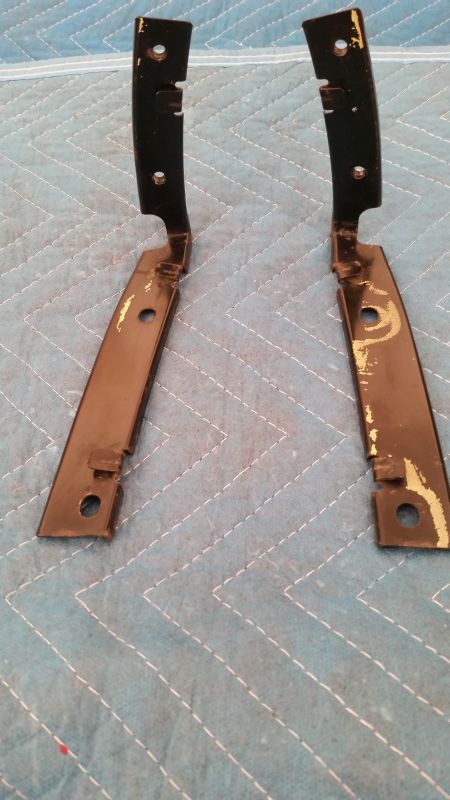
    Here is a picture of all of the brackets that I purchased for the 99 bumper conversion. The 2 large wheel well extensions really aren't needed; the 94 Stealth wheel well extensions will just have an unused mounting hole in each one, as far as I can tell. The sandwich plates are different; the 94 Stealth sandwich plates might be able to be modified to fit but I'm not going to try it since I already have the 99 plates.


    This is a side by side comparison of the new 99 wheel well extension and the old 94 stealth wheel well extension. Along the edge that attaches to the bumper cover (located along the bottom edge of each extension in the photo) you will notice 1 less mounting hole in the 99 extension.


    Here is a photo of how the wheel well extension brackets fit on the 99 bumper.


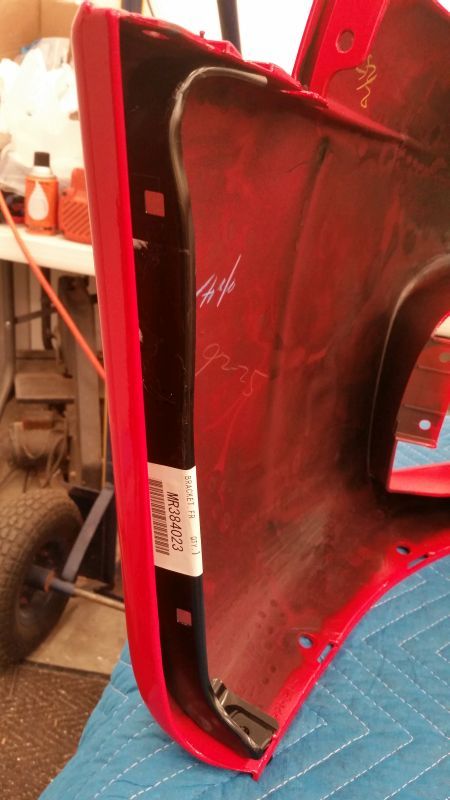
    The bumper cover to fender brackets from the 94 Stealth also appear to be reusable. I assume that the brackets on a 99 3000GT have a shorter vertical bar with only one mounting hole since the 99 bumper cover doesn't curve up behind the corner lights. The 94 Stealth bracket also does need 1 hole drilled in it to make way for an extra bolt along the horizontal bar. I haven't installed these brackets yet but I don't think the longer vertical bar needs to be cut down.


    Here you can see how the vertical bar extends above the bumper cover.


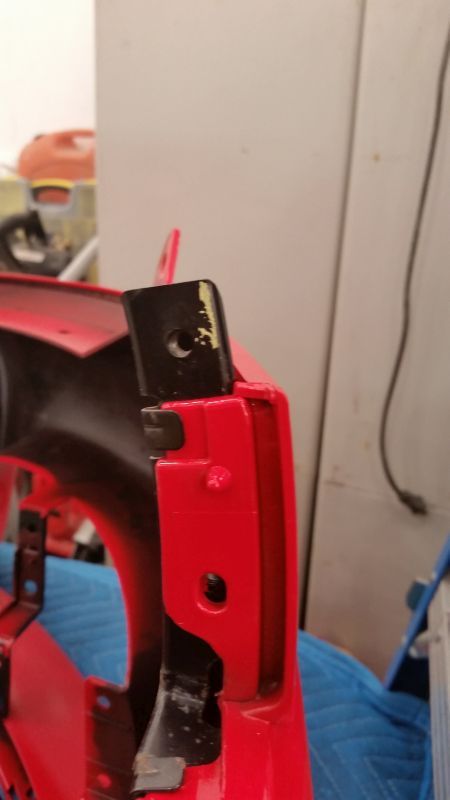
    This photo shows the 2 holes in the 94 Stealth horizontal bar lined up with the bumper cover. An additional hole in the middle needs to be drilled in the 94 Stealth bracket. IIRC, the center hole is used to attach the wheel well extension bracket.


    I found this plumbing pipe used to connect a chunk of hose from the BOV to the BOV port on the intake bubble. I'm not a fan of this type of "ingenuity". Also, somebody spent a lot of money for the K&N FIPK and then just folded up the mounting brackets instead of using them which caused the air filter to have a hole worn into the bottom of it. *facepalm* I also found wiring harnesses around the shift linkages that weren't secured in the metal clips. It took all of 3 seconds to place the harnesses in the clips. The positive alternator wire was also loose when I bought the car. It's a lot of stupid, little stuff that just needed another 2 minutes to do right.


    I purchased a legitimate 1.25" OD stainless steel joiner to attach the hose from the BOV to the intake bubble. This was $8 from SiliconeIntakes.com. I also purchased a new radiator hose to cut up for the BOV piping.


    When I bought the car it had blue vacuum lines that I swapped out for black. It also had corroded/rusty worm gear clamps and silicone hose couplers cut to various lengths with jagged edges so I purchased all new black couplers and T-bolt clamps for the intercooler piping. Since T-Bolt clamps are rather wide and don't always fit well, I also purchased stainless steel worm gear clamps that are lined so that the perforations can't dig into the hoses and cut/scar them. These worked great on the intake bubble.


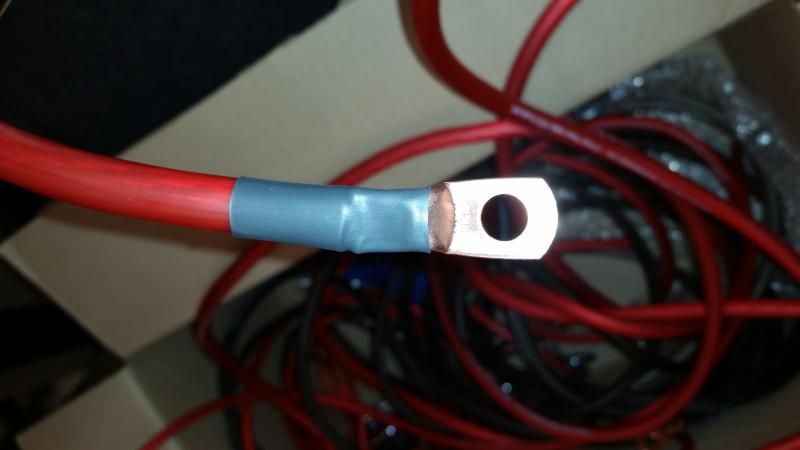
    I started to reassemble things; the pre-turbo pipes are in and the Y-pipe is back on. However, this week I decided to go ahead and replace the battery cables. So next on the list is to replace the battery cables and then get back to installing the new radiator, FMIC and intercooler pipes, etc.


    I am curious about how people usually attach the Skillard front splitter to the bumper cover. Are people just bolting the bumper cover tight to the splitter, at least on the side sections? Or do I need to purchase the factory splash shields or something?
    1988 300ZX Turbo
    1994 Dodge Stealth R/T Twin Turbo
    1999 Chevy Blazer
    2014 Hyundai Veloster Turbo

  2. #2
    Forum User
    Join Date
    Sep 2010
    Owner Since
    2005

    Posts
    329
    Thanks
    6
    Thanked 19 Times in 17 Posts
    Looks great! You should include all of the part numbers for the 99 bumper conversion if you have them, will make it even easier for others to follow.

  3. #3
    Forum User Not Verified

    Join Date
    Sep 2010
    Owner Since
    2004

    Location
    Cape Girardeau
    Posts
    4,791
    Thanks
    365
    Thanked 296 Times in 214 Posts
    seems like a reasonable build, save the original R/T parts please.

    Parting 6 speed
    Pampena 3.5 Stroker, GTX 2867 Gen IIs, AEM Series2, oohnoo SMIC, DN Hardpipes, FIC 1650s, Walbro 525, aermotive fpr, Dejon intake pipes, Tial Q, Koyo Rad, Samco Hoses, Stoptech 332mm fronts, HKS GT4 Coilovers, Spec 4+ LW, JDM 6 Speed, Billet shift forks, Pampena brace

  4. #4
    Forum User
    Join Date
    Mar 2014
    Owner Since
    2014

    Posts
    55
    Thanks
    36
    Thanked 0 Times in 0 Posts
    thanks for all the pics of the front end conversion!
    Built 2nd week of August 1992 as a 1 of 11 1993 Dodge Stealth R/T twin turbo (6g72 engine with stock TD04-9b turbochargers), pearl white exterior (W29), red leather interior, W5MG1 transaxle. Low mileage, just 68000 miles!
    Current modifications are: VMS racing 10.2mm spark plug wires & NGK BKR6EIX-11 spark plugs gapped down to 0.32", Touren TR9 3190 wheels, Maximal high flow main catalytic converter, gutted/deleted precatalytic converters, front & rear slotted & drilled brake rotors from ebay, T-bolt stainless clamps, Curt trailer hitch, rear bumper aluminum reinforcement from a 2nd gen car, LED backup & license plate bulbs, Pioneer AVH-X2500BT with backup camera, DSM SMICs converted by oohnoo, 3S warehouse sidemount oil cooler, Hurst shifter handle, EGR blockoff plates, Stainless bolt kit, LCDBC as an ECU monitor, 3SX Stainless-Steel Braided Brake Lines, Koyo radiator with brackets, Retractable license plate holder, 3SX rear control arms, Snake eye mod, Brake Caliper Stiffening Bolts, Pilot WI-HL6A 4656 Head Lamp Conversion Kit

  5. #5
    Forum User Not Verified
    Join Date
    Jan 2012
    Owner Since

    Location
    Sioux Falls, SD
    Posts
    58
    Thanks
    1
    Thanked 3 Times in 2 Posts
    I only have access to the car on the weekends as it is located 1 and a half hours away in my dad's heated shop so not much progress gets made each week.

    I'm pretty picky on how things are done so it took me about 8 hours to swap out the battery cables (battery to fuse box, fuse box to alternator, battery to starter (big and small wires), battery to transmission, battery to firewall) last weekend.

    I used a US Forge 08920 Crimping Tool ($15 from Amazon.com) to crimp the 4 gauge connectors. I used ring terminals with a closed off end and no seam down the middle to help prevent corrosion and make it easier to get a tightly crimped connection. I found out about the difference in ring terminals here: Battery Isolators which has a lot of other good info and other techniques.

    As you can see in the below pictures, I used the crimping tool in a vice when it was hard to hold the whole assembly with one hand while hammering with the other. This method worked with the ring terminals I bought that had 5/16" eyelets but the terminals with 3/8" eyelets were too stout and required using a hammer to at least finish the crimping process. I used mostly 5/16" ring terminals but did use one 3/8" ring terminal on the bolt for the transmission ground. For me, the 5/16" ring terminals were necessary for the battery terminals that I chose: KnuKonceptz Bassik battery terminal Lastly, I used 1/2" heat shrink (which will slip over the ring terminal after it's crimped) and 3/8" split loom for the 4 gauge wire.

    I also purchased a 12.5' extension cable for my battery tenders that I plan to cut to length and run it out to one of the front bumper openings. This will allow me to keep the hood closed while using a battery tender in the winter when the car is parked for extended periods of time.


    Since I've gotten some interest in the front end conversion, I also created an album of various pictures comparing the 1994 Stealth R/T front bumper brackets to the 1999 3000GT front bumper brackets in more detail. The Stealth brackets are the rusty ones. I will add to this album if I end up taking more pictures.

    1994 Dodge Stealth R/T to 1999 3000GT front end conversion pictures


  6. The Following 2 Users Say Thank You to Omega-Tron For This Useful Post:


  7. #6
    Forum User Not Verified
    Join Date
    Jan 2012
    Owner Since

    Location
    Sioux Falls, SD
    Posts
    58
    Thanks
    1
    Thanked 3 Times in 2 Posts
    It took a bit of trial and error to figure out how to orientate the 90* silicone elbow hooked to the front turbo outlet and the hard pipe immediately following it but I finally got it. I kept trying to get the hard pipe to exit the engine bay and come out into the bumper area parallel to the DNP pipe that connects to the Y-pipe in this area but that wasn't going to happen. Intstead, this hard pipe coming from the turbo angles forward.


    In the below picture you can see how the lower 2" diameter 90* hard pipe comes straight out from the engine bay and therefore points straight towards the front of the car while the upper 2" diameter 90* hard pipe is angled towards the drivers side (left side) of the car. I ended up needing to use a 6" (5" would also likely work) straight silicone coupler between this top 90* hard pipe and the hard pipe that's directly after the front turbo outlet to have the top 90* hard pipe end at about the same place as the lower 90* hard pipe does...so that the front 2.5" diameter 90* hard pipes will enter straight into the FMIC. The 6" silicone coupler also allows for some flexibility to get this top 2" 90* hard pipe to point towards the front of the car...or close to it. I'm probably over explaining this because I don't know if oohnoo is even making these FMICs still.


    I finally figured out how and where to relocate the horns since they interfered with the FMIC. I used a 2" x 2" L bracket found at most hardware stores. I had to drill out one hole in the bracket to fit a M8x1.25 sized bolt to screw into an unused threaded hole in the bottom of the passenger side headlight bucket.


    For the guys like me who haven't turned a wrench much on a car, here is a list of some tools I have found to be incredibly useful; some of which are in the picture:
    * Extended sockets - Mostly to tighten up T-bolt clamps.
    * Standard and wobble style socket extensions - There have been a lot of places where I couldn't get a straight shot to a bolt so wobble extensions have been great.
    * Crowsfoot wrenches - I used one to undo the bumper cover bracket in front of the radiator. A normal wrench will do but the crowsfoot gave me more stroke and therefore I could undo the bolts quicker.
    * Flex-head ratcheting wrenches - Goes places where normal ratchets are too tall.
    * Thumb wheel ratchets - These are awesome to help quickly tighten T-bolt clamps and other nuts and bolts. Then switch to a normal ratchet to gain more leverage for final tightening.
    * Thread checker - Most of the thread sizes I've encountered on the 3S are M6x1.00 and M8x1.25 but this is super handy to check the thread size of loose nuts and bolts, etc.
    * Hex bit sockets - I have some socket head cap screws in use so these are required for them.
    * Slide calipers - Useful for checking the size of various hoses, etc.


    For some of the push mount zip ties used to secure various wiring harnesses I found these panel removal pliers helpful. I picked them up at Harbor Freight. Being 2 piece instead of just a 1 piece pry bar style allows the push mount zip ties or other plastic retainers to be removed without rocking the tool on the metal of the car and possibly denting it. These can still scrape paint if not further padded but they give a solid prying surface.


    I tried to find a connector that would hook to the factory fog lights because I plan to power LEDs off of the fog light harness but couldn't find anything...until I remembered that the fog light connector reminded me a lot of the Metra brand speaker harness that I used in my 300ZX Turbo. So I went to a local car audio shop and had pigtails made. I believe Metra 72-9300 speaker harnesses will work. They don't have the lock part but a zip tie should hold them together nicely.
    Last edited by Omega-Tron; 02-15-2015 at 01:54 AM.

  8. #7
    Forum User Not Verified
    Join Date
    Jan 2012
    Owner Since

    Location
    Sioux Falls, SD
    Posts
    58
    Thanks
    1
    Thanked 3 Times in 2 Posts
    Behind the scenes I've been painting up various brackets and such. I also purchased a buffer and buffing supplies so I've been playing with that too; cleaning up some of the old polished pieces that have gotten dirty over the years.

    This weekend I dropped in the new radiator and got the FMIC mounted up. The stock passenger side fan is now in the way of the DNP pipes so I ordered another driver's side fan since that seems to be the best option for a "replacement" fan.


    Pay no attention to the crappy looking blue headlight plug. The low beam plug melted and this was my quick fix. I purchased a new plug that I will solder into the factory harness. IIRC, the previous owner had 100w bulbs installed.


  9. #8
    Forum User
    Join Date
    Mar 2014
    Owner Since
    x

    Location
    St. Louis
    Posts
    344
    Thanks
    41
    Thanked 40 Times in 25 Posts
    Very nice!!

    How effective are those intercoolers? I see a bunch of people running them and i know nothing about them. I will be going twin turbo and need efficiency. Also, stupid question i'm sure but as i've never used them, it doesn't matter which pipe goes where as long as they are on the correct side?
    Project LS3S - '94 Stealth
    - Build thread on 3si http://www.3si.org/forum/f1/mdoe8s-n...72/?highlight=

  10. #9
    Forum User Not Verified
    Join Date
    Jan 2012
    Owner Since

    Location
    Sioux Falls, SD
    Posts
    58
    Thanks
    1
    Thanked 3 Times in 2 Posts
    I don't know the details of the intercooler, tbh. I knew this was my best option since I never plan to go beyond td04 turbos, already had the DNP hard pipes, and heard of the surging issues that a lot of folks have with single core FMICs.

    I got my new driver's side radiator fan (Dorman 620-317) in the mail today. I paid $76 shipped for it which didn't seem bad. Then I went on eBay yesterday and found one for $40 shipped that's listed for a Galant (but is a replacement for the same Mitsubishi part number as the Dorman) that looks like it's the same fan but didn't include a brand name so I ordered that one too so I can have 2 new fans. I hope it isn't crap. I'll post a comparison when I get it.

  11. #10
    VR-3747 :D Not Verified
    Join Date
    Sep 2010
    Owner Since
    2008

    Location
    Dayton Ohio
    Posts
    1,792
    Blog Entries
    1
    Thanks
    19
    Thanked 123 Times in 86 Posts
    For the stock twins, the flows cross (bottom goes right to left, top goes left to right... or maybe vise versa, i can't remember). Mathematically, according to heat transfer, that is the most efficient way to set it up for this intercooler.

    However, it is not necessary, and you are talking a very light difference in efficiency.

    As far as overall intercooler efficiency goes, this is something that I think gets blown out of proportion (just like turbo lag... but I digress). This is not the best intercooler setup as far as overall efficiency, as this intercooler is cheaply made, but, it's a huge improvement over stock.

    The fin density isn't the greatest on this intercooler, and the overall construction is meh. It's solid, but still an ebay intercooler either way you look at it.

    BTW, I'm not knocking it... I have one myself and love it

    Love the build so far! You have great quality so far, it's good to see things thought out! I will be keeping an eye on this thread
    rise and rise again until lambs become lions

Bookmarks

Posting Permissions

  • You may not post new threads
  • You may not post replies
  • You may not post attachments
  • You may not edit your posts
  •  
The 3000GT/Stealth/GTO Web History Project
3000gt.com
3000GT / Stealth International WWWboard Archive
Jim's (RED3KGT) Reststop
3000GT/Stealth/GTO Information and Resources
Team 3S
3000GT / Stealth / GTO Information
daveblack.net
3000GT/Stealth/GTO Clubs and Groups
Michigan 3S
MInnesota 3S
Wisconsin 3S
Iowa, Nebraska, Kansas 3S
North California 3000GT/Stealth
United Society of 3S Owners
3000GT/Stealth/GTO Forums
3000GT/Stealth International
3000GT/Stealth/GTO Event Pages
3S National Gathering
East Coast Gathering
Upper Mid-West Gathering
Blue Ridge Gathering