Results 1 to 8 of 8

Thread: First gen SuperPro control arm polyurethane bushing rebuild

  1. #1
    Forum User verified

    Join Date
    Sep 2010
    Owner Since
    1

    Posts
    1,292
    Thanks
    77
    Thanked 89 Times in 55 Posts

    First gen SuperPro control arm polyurethane bushing rebuild

    Picked up a set of polyurethane bushings for the 1st gen control arms from GZP. This is a short how to with a few pics.

    Tools I used:
    air hammer
    drill
    press
    c-clamp
    propane torch
    hack saw

    Getting them off the car is the first challenge. If you are not replacing the lower ball joints then I would not use a pickle fork, you risk damaging the boot. Tip I got from Hans @ GZP is to whack the knuckle at the top of the ball joint. Since the ball joint is tapered, this will help to dislodge it. Then put a nut on top and it should pop out with a tap. Do not strike the threads, you'll mushroom it or ruin the threads.

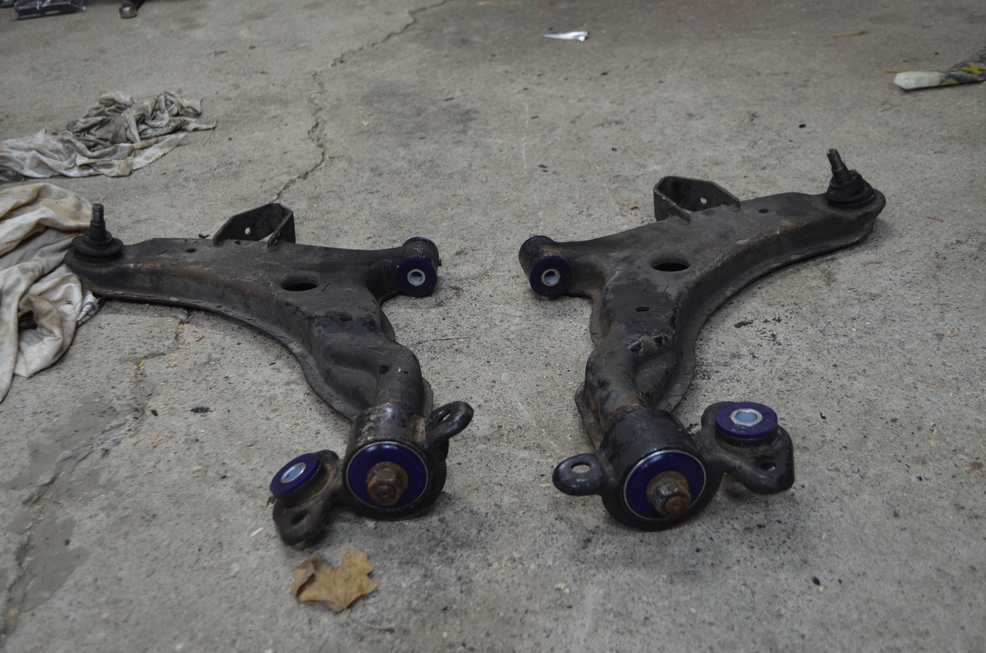
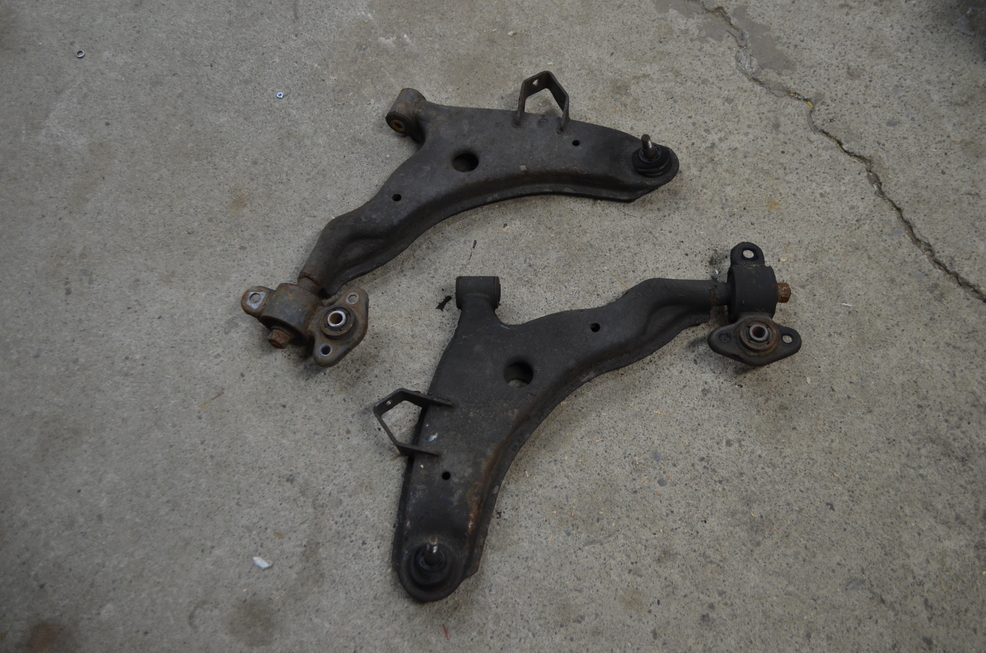
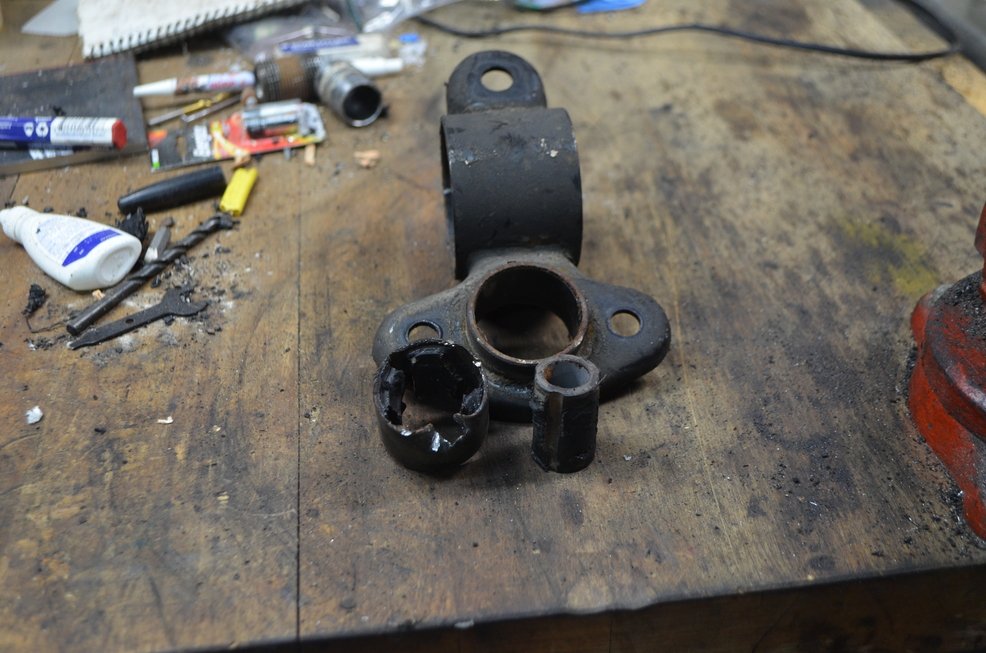
    This is what you should have to start. Mark the rear brackets; they are different! It's very slight but the holes are actually off centered.


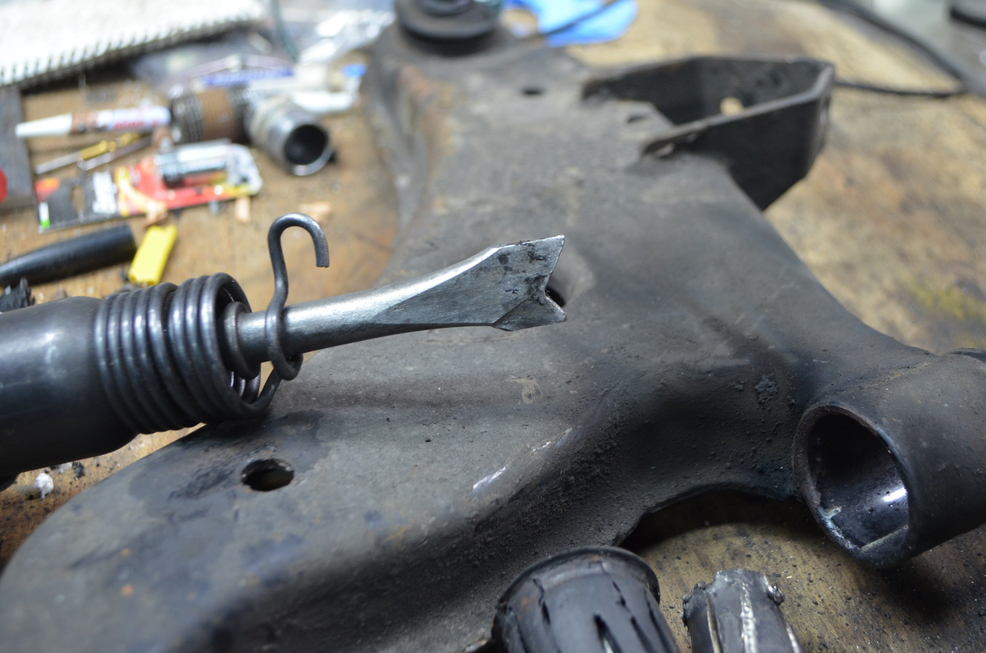
    Let's start with the front location bushing. First, drill out some of the rubber. The sleeve is tapered at the ends so use a small drill bit that will let you go all the way through without binding up or scoring the control arm. Then heat it up good and tap it out. I used an air hammer because it was faster.


    This is the air hammer bit I used for all the work.


    Next is the rear bracket. These bushings are more involved because they have metal sleeves on the outside.

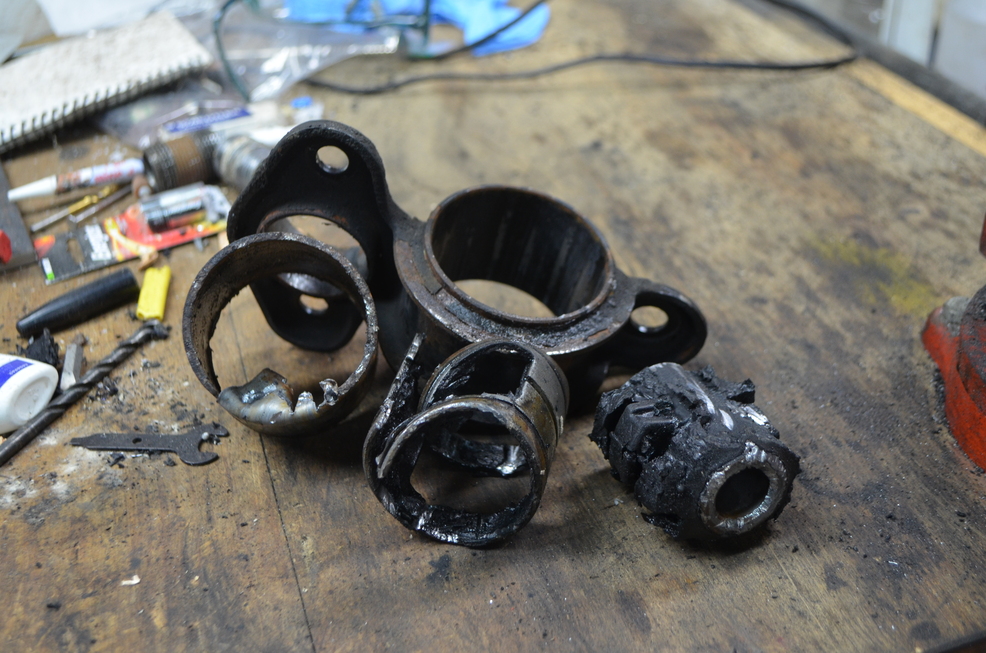
    Same strategy as before. Drill, heat, then remove the center sleeve.

    After, you'll be left with a metal sleeve. Use the air hammer and fold in one of the edges, then use that to hammer out the bushing. Works nice once you get it started.


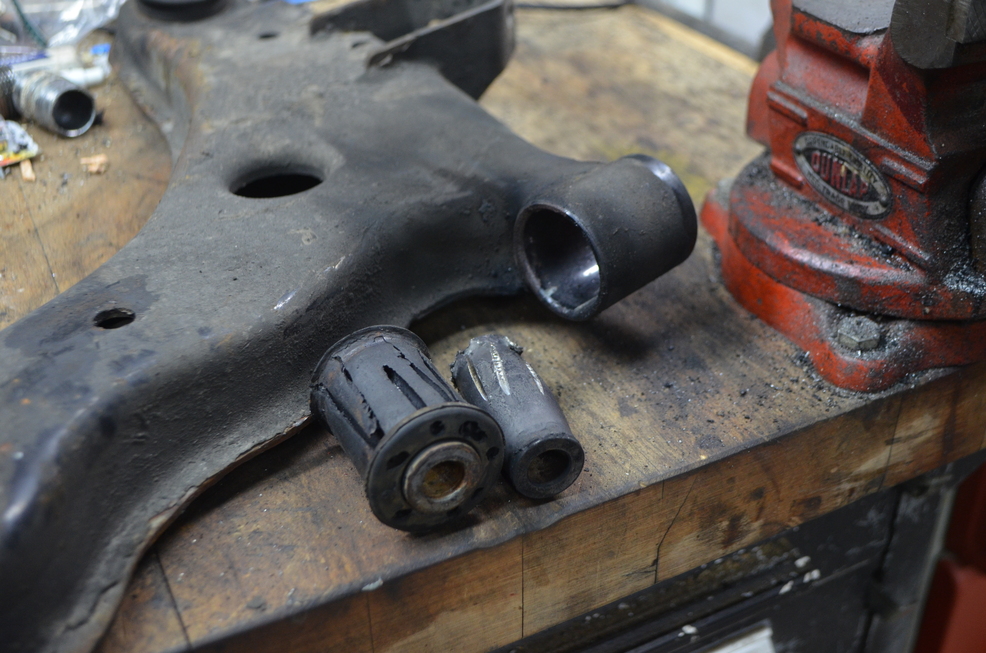
    The big bushing is harder.

    WARNING! Drill it out first before heating. Mine had trapped water and when I heated it up first and drilled, the nasty water came shooting out all over.

    Start by drilling out as much rubber as you can. Work from both sides. Be careful, nasty water will come out. Then hammer out the center.

    There are two metal sleeves. Cut the inner sleeve then hammer out.

    Then cut the outer sleeve and hammer it out.


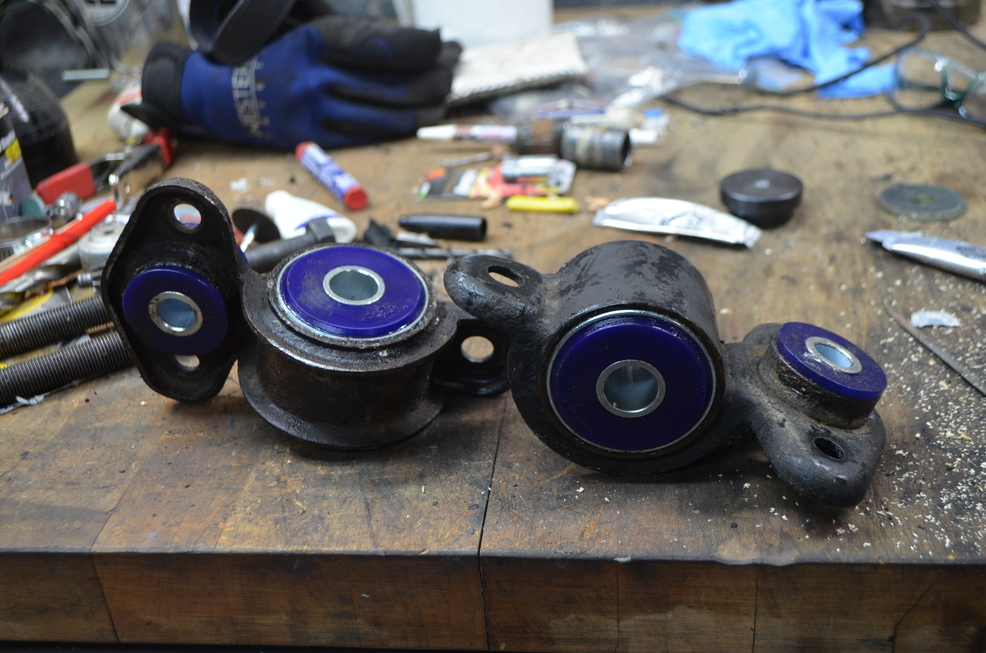
    Now we can press in the bushings.

    For the rear bracket, make sure the side marked "front" is facing the front of the car for the big bushing. Make sure you have the right bracket. They are different! I used a 12 ton press and it was working a good bit so I'm not sure if a vice would work here. You have to use a sleeve underneath because the back of the bushing protrudes out. The front side should be flush with the bracket.

    The small bushing has lips on both sides. You just press it in and both sides will pop out. Then insert the metal bushing in the center.


    The front bushing was easier. Just insert the bushings and use a c-clamp to add the metal bushing after.
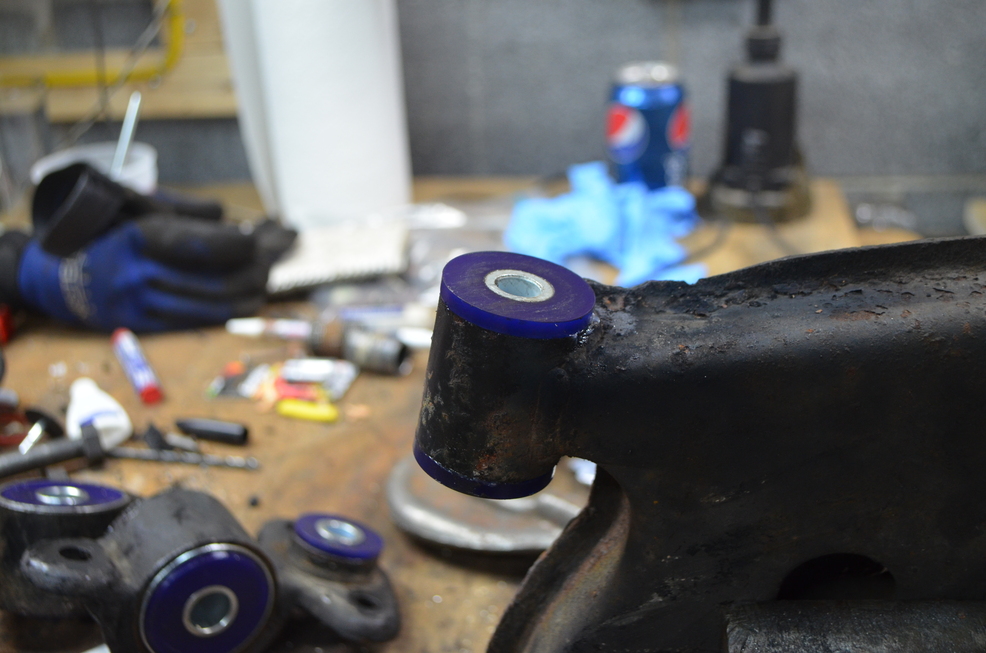


    All done!


  2. #2
    Nice! I just placed an order for these like 20 minutes ago lol

  3. #3
    Forum User Not Verified

    Join Date
    Sep 2010
    Owner Since
    2004

    Location
    Cape Girardeau
    Posts
    4,791
    Thanks
    365
    Thanked 296 Times in 214 Posts
    Thanks for the write up!

    Sent from my RM-845_nam_vzw_100 using Tapatalk

    Parting 6 speed
    Pampena 3.5 Stroker, GTX 2867 Gen IIs, AEM Series2, oohnoo SMIC, DN Hardpipes, FIC 1650s, Walbro 525, aermotive fpr, Dejon intake pipes, Tial Q, Koyo Rad, Samco Hoses, Stoptech 332mm fronts, HKS GT4 Coilovers, Spec 4+ LW, JDM 6 Speed, Billet shift forks, Pampena brace

  4. #4
    Forum User verified
    Join Date
    Oct 2013
    Owner Since
    2013

    Location
    SW Michigan
    Posts
    436
    Thanks
    24
    Thanked 9 Times in 7 Posts
    You said the 12 ton was a challenge? Or it was working hard. Do you think the 12 ton is enough? Need to do all the bushings on my car debating the 12 vs 20 if I can't find a place to do it for me.

  5. #5
    Forum User verified

    Join Date
    Sep 2010
    Owner Since
    1

    Posts
    1,292
    Thanks
    77
    Thanked 89 Times in 55 Posts
    It was working, not especially hard. I mainly was going to point out that using a vise or c-clamp would be a challenge.

    I have a 12 ton harbor frieght press and aside from the transfercase sleeve, I have not had a problem pressing anything for this car. Some people struggle with I think 4th gear but mine worked fine.

    Bigger is always better though

  6. #6
    Forum User Not Verified

    Join Date
    Sep 2010
    Owner Since
    2004

    Location
    Cape Girardeau
    Posts
    4,791
    Thanks
    365
    Thanked 296 Times in 214 Posts
    Quote Originally Posted by Elderloc View Post
    You said the 12 ton was a challenge? Or it was working hard. Do you think the 12 ton is enough? Need to do all the bushings on my car debating the 12 vs 20 if I can't find a place to do it for me.
    if you have the space for it I would get the 20. I also have the 12 ton harbor freight one and rebuilt my transmission with it, but the 20 ton seems a lot better built. The 12 is not really square in every dimension. I also had to modify it to accept the 5th gear for the 5 speed. I took toni's advice and cut the table on it and added bolts to make it wider. It is pretty compact though, which is nice for a small shop and it certainly can get almost any home/hobby work done.

  7. #7
    Member Not Verified
    Join Date
    Mar 2013
    Owner Since
    SL owner since Jan 2010. VR4 owner since Sep 2012

    Location
    Riverside, Cali
    Posts
    309
    Thanks
    25
    Thanked 28 Times in 15 Posts
    Wow thank you for doing this write up! . I bought this kit about a month ago but unfortunately i don't have the right tools to install them. Time to start buying some!

    1991 Monza Red VR4- Weekend ride: Tanabe Super Medallion Hyper exhaust, 0.8 bar WGs, Turbosmart MBC (@1 bar), 3SX turbo pre-pipes, Straight pipe, Greddy Type RS BOV, Godspeed FMIC w/ PPE pipes, Stillin DP, HKS duel filters, RPS stage 2 clutch, 3sx SS clutch line, Custom oil catch can w/ braided lines, Krank vents, Ohhnoo's fuel loop, HW fuel pump, PC'd 2G brake swap w/3sx SS lines, Hawk pads, and Stop Tech rotors; Various deletes, PC'd/polished engine stuff, Koyo rad, Greddy coolant cap, DBest custom oil cap, Pit Road M front strut bar, PRM plug cover, PRM tailights, PRM CF Falcon hood and PRM shift knob, Morgan Motorsports splitter, 19x8.5 +27/19x9.5 +24 Volk GT-Cs wrapped Nitto NT555s, 99' bumper conversion, 99' sail panels, 2G side skirts, Retrofitted 5G Celica mirrors, Retro Spec side splitters, RS rain guards, and RS rear window visor, factory GTO light up visors, Custom fit Top Secret style diffuser for 350z, Robo mod w/halos, 3G rear garnish, Momo steering wheel, Tein Street Flex coilovers, 3SX control arms, Apexi turbo timer, Apexi mechanical boost gauge, Zoom Engineering Penta rear view mirror, Veilside navigators foot rest, Pioneer HU

  8. #8
    Forum User
    Join Date
    Sep 2010
    Owner Since
    04'

    Posts
    65
    Thanks
    3
    Thanked 2 Times in 1 Post
    Any "first drive impressions" yet?

    Thanks for the write up!

Bookmarks

Posting Permissions

  • You may not post new threads
  • You may not post replies
  • You may not post attachments
  • You may not edit your posts
  •  
The 3000GT/Stealth/GTO Web History Project
3000gt.com
3000GT / Stealth International WWWboard Archive
Jim's (RED3KGT) Reststop
3000GT/Stealth/GTO Information and Resources
Team 3S
3000GT / Stealth / GTO Information
daveblack.net
3000GT/Stealth/GTO Clubs and Groups
Michigan 3S
MInnesota 3S
Wisconsin 3S
Iowa, Nebraska, Kansas 3S
North California 3000GT/Stealth
United Society of 3S Owners
3000GT/Stealth/GTO Forums
3000GT/Stealth International
3000GT/Stealth/GTO Event Pages
3S National Gathering
East Coast Gathering
Upper Mid-West Gathering
Blue Ridge Gathering