Page 1 of 24 12311 ... LastLast
Results 1 to 10 of 237

Thread: Back To Basics: Budget Rebuild

  1. #1
    Member verified
    Join Date
    Sep 2012
    Owner Since
    2010

    Location
    Decatur, TN
    Posts
    1,671
    Blog Entries
    7
    Thanks
    57
    Thanked 71 Times in 60 Posts

    Back To Basics: Budget Rebuild

    At the prodding of the Lady Ninja, and a few other people, I've decided I'm going to go ahead and make my build thread now. I had been planning to wait till it was completely together and running before doing so, but, you know...BRG is a helluva drug after all.

    In a nutshell, after a transfer case failure on the highway in the middle of a long distance road trip in Dec 2011, I spent 6 months fighting with Dodge to replace the t-case (which was still under the safety recall.) When they finally did and I drove the 5 hours up to the car, it would no longer run. After fighting with them, they refused to work on the car and I eventually had it towed back down. Once it was back down, I found the CAS failed. I got about 2 weeks driving it before I had a horrible oil leak on the car and a noise from the engine.


    Pulling the motor out revealed a rusty, oily nasty mess of an engine bay. The front of the engine was coated in a nice sexy layer of oil, so it wasn't rusted up, just filthy. Never found out where the leak was coming from exactly, presumably under the oil cap or the front corner of the valve cover. At any rate, I decided I would fix whatever the noise was and clean it up and that would do for now. Boy was I wrong.


    Whether it was from sitting or just low oil pressure from age, the camshafts had strips of metal gouged out of them which had been bouncing through the motor (and presumably the oiling system.)


    The bearings all looked pretty trashed, the mains were just copper. Heck, they may have even still been the factory bearings for all I know.


    The clutch and flywheel were worn well beyond FSM specs, so they needed to be replaced as well.


    Given mileage on the vehicle (178k) it should receive a 60k at a minimum, factor in the potential for metal in the oil and the need for new bearings, and I decided a new oil pump was in order as well. While the cylinder walls were in great shape, and the rings seemed to be in good shape still, decided to completely disassemble it to get it tanked and cleaned out and cleaned up. Potential metal meant turbos needed to be rebuilt or upgraded. While I couldn't afford to rebuild with forged components and big ass parts, I decided that the cost of rebuilding it could be kept manageable and decided to undertake the experience.
    Mods: 2g 3k body conversion, 2g Brake upgrade, Rota P45R rims
    Projects: Interior sound deadening, 14Bs, forged bottom end, custom radiator and sound mounts

  2. #2
    Member verified
    Join Date
    Sep 2012
    Owner Since
    2010

    Location
    Decatur, TN
    Posts
    1,671
    Blog Entries
    7
    Thanks
    57
    Thanked 71 Times in 60 Posts
    While the cast crank was still in tolerable shape, I decided to switch to a forged unit and picked one up off of the forums for around $200 shipped, and sold my old cast crank for around $130 bucks for a total cost of $70.
    I picked up some WRX 13Ts for around $200 bucks and sent them off to Rob Beck with my 9Bs to get converted, for a cost 700. I then sold the left over 9B parts for 50 bucks for a total cost of $850.
    I scored a 25 spline transmission and tcase off of eBay for around $400 shipped to replace my 18 spline that grinded 2 and 3. Sold my old one to Ray for $350. Total cost: $50
    New in box Clutchmasters FX100 from a store close out off of eBay for $75
    Lightweight flywheel with around 10k on it for $125 shipped
    I also bought a used single core FMIC set up for $300.
    New set of piston rings for $100
    New Kings Bearings $100
    Set of Evo560s from Gump for $200, sold my old 360s for $40. Total cost: $160
    Used oil cooler, new lines and adapter, plus professional flushing: $150
    AEM wide band: $120
    Machine work for block, flywheel and precision checking that all rod ends were still round and in spec: $100
    120k Parts: $450
    Flash ECU, $550. Sold the old ECU for $200. Total cost: $350.
    New heads, cams, spare block: $350 initial. Sold old heads, spare block and ended up paying nothing for it.
    3g Lifters: $90
    Misc Paint, gaskets, RTV, etc: ~$60
    Prosport Gauges: $150

    Final cost: $3,150

    Could've kept costs down by not doing some of the upgrade stuff I did, but when in Rome...
    Last edited by sergechronos; 09-13-2013 at 11:42 PM.

  3. #3
    Member verified
    Join Date
    Sep 2012
    Owner Since
    2010

    Location
    Decatur, TN
    Posts
    1,671
    Blog Entries
    7
    Thanks
    57
    Thanked 71 Times in 60 Posts
    While I had everything out and the motor was off at the machine shop, I went ahead and painted the engine bay to clean up some of the disaster that was 20 years of grime and fluids eating the paint.


    Upon getting the block back, painted it a high temp cast aluminum (and the transmission as well.)


    Spent some time and did some DIY powder coating (decided to sell the gun though, wasn't wild about it and couldn't afford it for now, I'll do it again later)


    Took quite a bit of finagling to get the parts on in the right order with the 13Ts, which is a pain in the ass. I ended up ditching the metal lines for the turbo coolant lines, used barbed fittings and reinforced hose, covered with a protective sheeting that provides protection up to 800F. Much easier to work with. I have another water neck which I will be converting to AN fittings. All in all, looks good together IMO, but I'm not sure how the chrome powder coat will hold up long term.


    With everything put back together and dropped in, I attempted to start it, and found the front cams were reversed. Should've checked it before I installed them.

    http://s12.photobucket.com/user/majw...6d315.mp4.html


    After resetting the cams and the timing, I started it up and it runs, but idles very high.

    http://s12.photobucket.com/user/majw...8894e.mp4.html

    Chasing some vacuum leaks down, bad leak from the lower intake plenum, new one should be here within the next few days.

    Beyond that, leaking from the crappy 3SX misfit oil pan and I have a replacement for that coming shortly as well.

    I'll add more to this stuff in the next few days.
    Last edited by sergechronos; 09-13-2013 at 11:55 PM.

  4. #4
    Forum User Not Verified
    Join Date
    Sep 2010
    Owner Since
    2009

    Location
    The Big House.
    Posts
    282
    Thanks
    53
    Thanked 126 Times in 98 Posts
    Quote Originally Posted by sergechronos View Post
    Could've kept costs down by not doing some of the upgrade stuff I did, but when in Rome...
    A slippery slope many of us know all too well. Good luck with the build buddy.

  5. #5
    Member verified
    Join Date
    Sep 2012
    Owner Since
    2010

    Location
    Decatur, TN
    Posts
    1,671
    Blog Entries
    7
    Thanks
    57
    Thanked 71 Times in 60 Posts
    Quote Originally Posted by Vantage View Post
    A slippery slope many of us know all too well. Good luck with the build buddy.
    Quite thankfully it is mostly done at this point. New lower intake, and a new oil pan should leave me with just needing to break it in then start tuning. There are some parts off of there that I replaced that I forgot, such as my factory SMICs, and a set of 550s I sold. All told, there's a few hundred difference, total was probably in the 2700ish range. Some of the upgrades like the switch to 13Ts were not much more than rebuilding the 9Bs would've been, and while I could've chanced leaving the 9Bs and oil cooler with factory components, it just wasn't worth the risk so..Semi-forced upgrades that pushed the cost up. I probably could've snuck in around the 2k mark if I went with factory replacement stuff.

  6. #6
    Chris said ninjas don't fall down.
    Join Date
    Sep 2010
    Owner Since
    7/07/07

    Location
    Driving Chris back.
    Posts
    563
    Thanks
    75
    Thanked 103 Times in 68 Posts
    Subscribed

  7. #7
    JNS Engineering verified
    Join Date
    Sep 2010
    Owner Since
    1994

    Location
    San Jose, CA
    Posts
    2,112
    Thanks
    61
    Thanked 155 Times in 110 Posts
    Best of luck finishing it up. That last 5% can be incredibly frustrating as we all know

    Mod list (scroll down the page)
    JNS Engineering has your Spyders covered (and uncovered too!!)

  8. #8
    Member verified
    Join Date
    Sep 2012
    Owner Since
    2010

    Location
    Decatur, TN
    Posts
    1,671
    Blog Entries
    7
    Thanks
    57
    Thanked 71 Times in 60 Posts
    I swear i will get around to finishing both this thread, and this build. Unfortunately school and my daily driver have been demanding all of my attention (and money) of late.

    While I skipped some parts in the first couple posts, I'll be going back and hitting them now, starting with: The transmission.

    My old 18 spline was grinding 2nd and 3rd and reverse, and just generally refused to cooperate. I attribute that to what appeared to be never unchanged fluid for the clutch master and slave cylinders, as well as questionable changes to the transmission fluid itself. I purchased new master and slaves for the system (didn't get the braided clutch line, probably will do that later though), and cleaned the reservoir for the master out. Went with a Clutchmasters FX100 that I picked up off of eBay from a store close out, although the clutch fit what I was needing anyways in terms of power it could handle (in truth a factory probably could as well.) Went with a lighter weight flywheel, although not super light, with a 14lb Comp. As much as I liked the idea of keeping up the rotational mass during shifts and all with the factory flywheel, dropping some weight off of it to allow for quicker revs is a better trade off for how I use it: Namely in the twisties where I spend most of my time in one or two gears and don't change much.


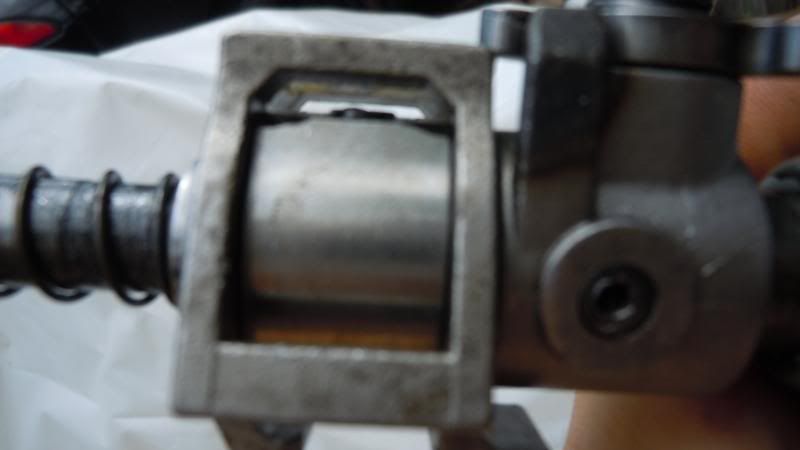
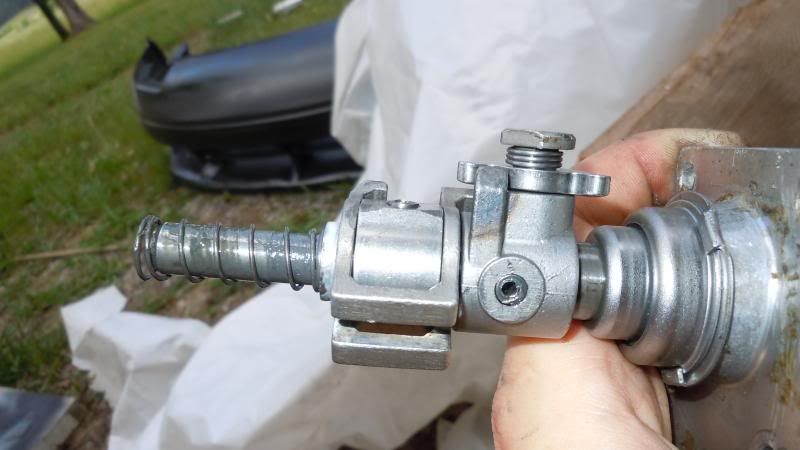
    While the transmission was out, I also smoothed the corners of the selector shaft. Not sure how big of a difference it will make when it is in, however the corners were definitely catching on the cage just rotating it in my hands. I'm hoping this helps prevents any hang ups between gear changes. Grinding down the corners was easily done with a bench grinder, although I imagine that you could use a hand file and achieve good (possibly better) results. I also painted the transmission, however seems I didn't take any pictures of it. Rest assured, much better than it was. Bit of sanding and sprayed with a high temp primer and cast aluminum plus clear coat. Cleans up much easier, and no longer looks like shit.

  9. #9
    Member verified
    Join Date
    Sep 2012
    Owner Since
    2010

    Location
    Decatur, TN
    Posts
    1,671
    Blog Entries
    7
    Thanks
    57
    Thanked 71 Times in 60 Posts
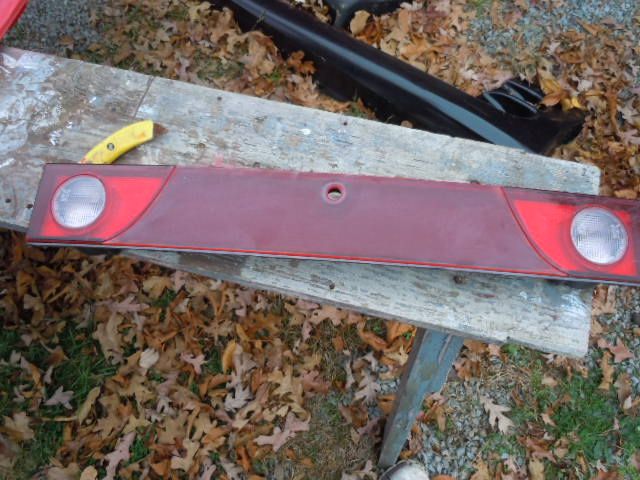
    During the time it was down, I also started working on swapping the body to a 2g 3k (considering I'd love to have a 6 speed as well, should've just sold the damn thing and bought a 94 VR4 but oh well.)


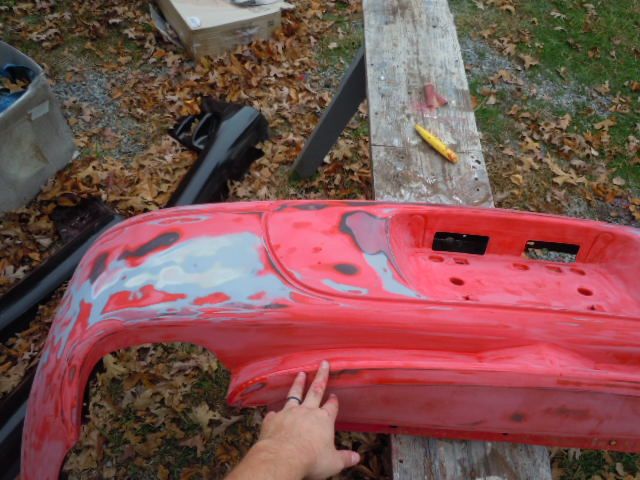
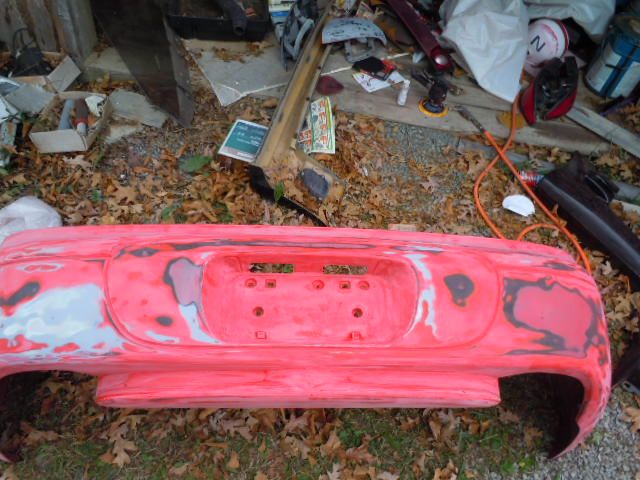
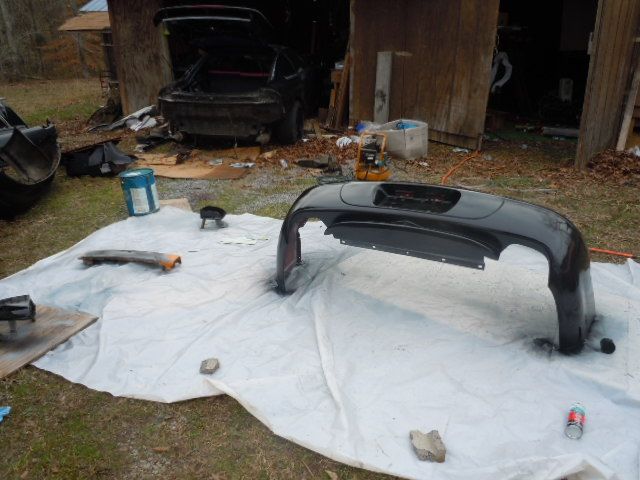
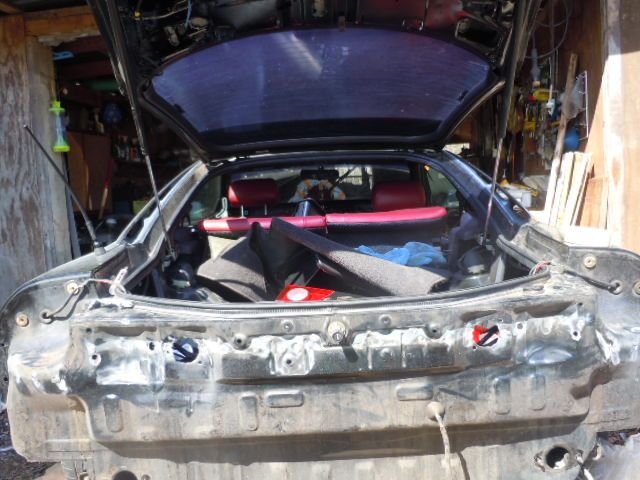
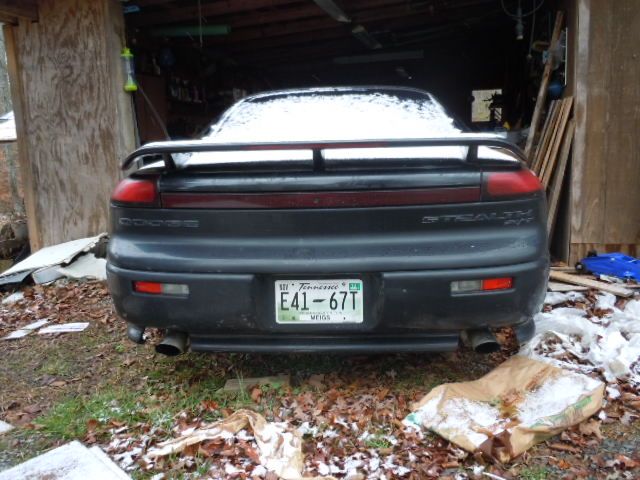
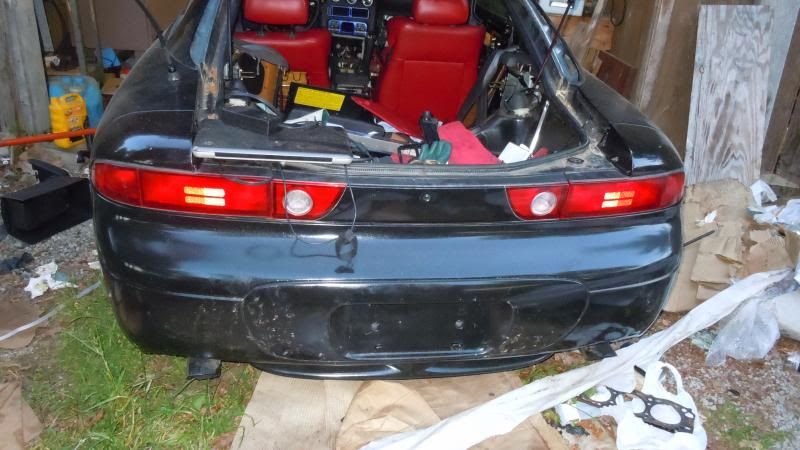
    Got the rear bumper last fall, and it had a couple nice dents. A bit of time with a heat gun popped them right out and I went to work sanding. The paint was coming off in a few places and there were some deep deep gashes. So I went pretty far with sanding, put a sealer on it and then started laying down a high build primer to fill in the gouges.


    The corner caps were much easier to work with, although the center garnish actually proved to be a bit of a pain in the ass to get into the small spaces between the panel and the light without sanding the light.


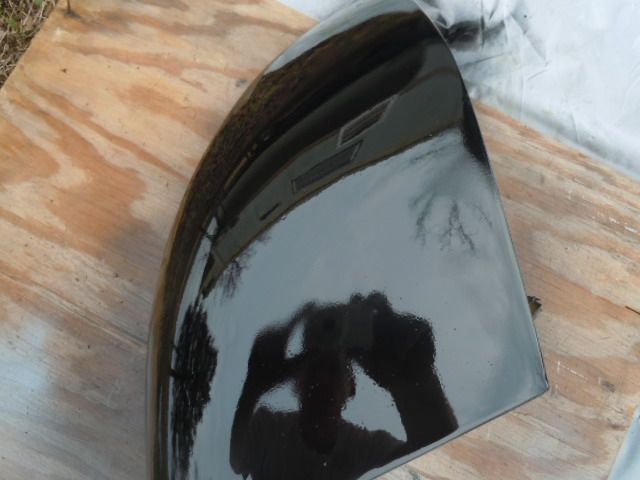
    Once I had them all sanded down and primed, I went to work spraying. Used rattle can because at the time I didn't have a good enough compressor to do it with a pot. In retrospect, that was a bad decision as the solvent took super long to dry out and the paint got marred by debris and leaves blowing around. However, it turned out alright and I'll be respraying the car anyway.


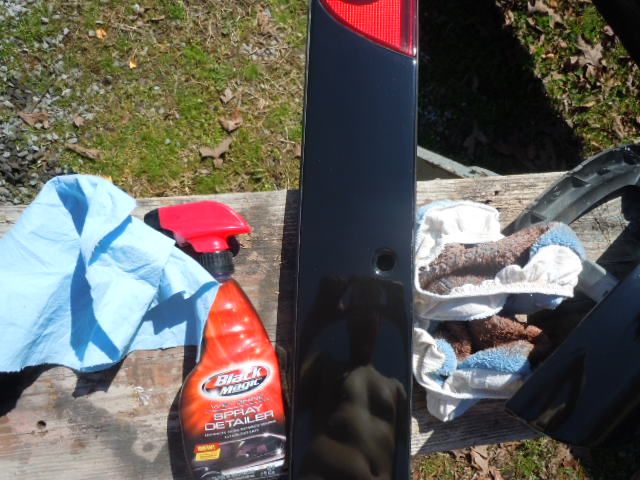
    After I let it dry a couple days, I wet sanded the work so that it didn't look quite so rattle canned, and came away pretty happy with the results


    Of course I still had to actually convert the rear end, which required a lot of drilling. By the time it was done, my rear end looked kind of like swiss cheese. I will eventually get a welder and patch those holes up. For now, I secured the brackets with nuts and bolts.


    Overall though, pretty happy. I went from:


    to:


    Definitely should've just gotten a bigger compressor then and sprayed with an HVLP, but lessons learned for the future.

    I also have the rest of a 2g swap now (in black no less) but need headlight buckets, so I will post another update in the future once I track some down at a reasonable cost and do the swap. Really need to sell my old 1g TT parts to free up the money to do that though.

  10. #10
    Member verified
    Join Date
    Sep 2012
    Owner Since
    2010

    Location
    Decatur, TN
    Posts
    1,671
    Blog Entries
    7
    Thanks
    57
    Thanked 71 Times in 60 Posts
    While I had it all down and apart, I fixed a few other things: Namely swapped the steering wheel over to one out of a 3G Eclipse (needs a new air bag), installed real gauges in the center, and installed an AEM wideband in the A Pillar. The carpet will be getting replaced, and the seats and such will be recovered to fit with my goals.

    Old Steering Wheel:


    New Steering Wheel:


    With a different cruise control stalk I could retain the CC function, requires one out of a 2g DSM as I recall, so I will be picking one of those up before too long.

    The interior will be one of the last things I do, but the steering wheel was at such a price I just couldn't say no..20 bucks shipped

Bookmarks

Posting Permissions

  • You may not post new threads
  • You may not post replies
  • You may not post attachments
  • You may not edit your posts
  •  
The 3000GT/Stealth/GTO Web History Project
3000gt.com
3000GT / Stealth International WWWboard Archive
Jim's (RED3KGT) Reststop
3000GT/Stealth/GTO Information and Resources
Team 3S
3000GT / Stealth / GTO Information
daveblack.net
3000GT/Stealth/GTO Clubs and Groups
Michigan 3S
MInnesota 3S
Wisconsin 3S
Iowa, Nebraska, Kansas 3S
North California 3000GT/Stealth
United Society of 3S Owners
3000GT/Stealth/GTO Forums
3000GT/Stealth International
3000GT/Stealth/GTO Event Pages
3S National Gathering
East Coast Gathering
Upper Mid-West Gathering
Blue Ridge Gathering