Page 1 of 3 123 LastLast
Results 1 to 10 of 28

Thread: Aftermarket gauges in center cluster

Hybrid View

Previous Post Previous Post   Next Post Next Post
  1. #1
    At least my jackstands are reliable Not Verified
    Join Date
    Sep 2010
    Owner Since
    2005

    Location
    Rochester Hills, Mi
    Posts
    554
    Thanks
    47
    Thanked 56 Times in 45 Posts

    Aftermarket gauges in center cluster

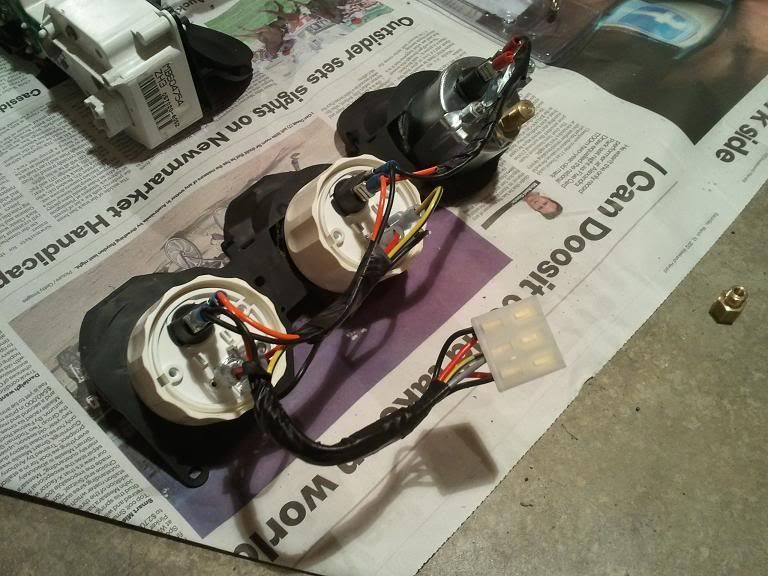
    I've worn out the search button trying to find an example of how people are getting the 52mm gauges in the center stack. I found quite a few completed examples, so I know it can be done. There are three pieces in there, the white body housing, the black bezel, and the clear cover. I spent a few hours last night carving out the black bezel to get the gauges to drop in from the front. I got them in the bezel no problem, and carved out the back of the white body and it fits together just fine.

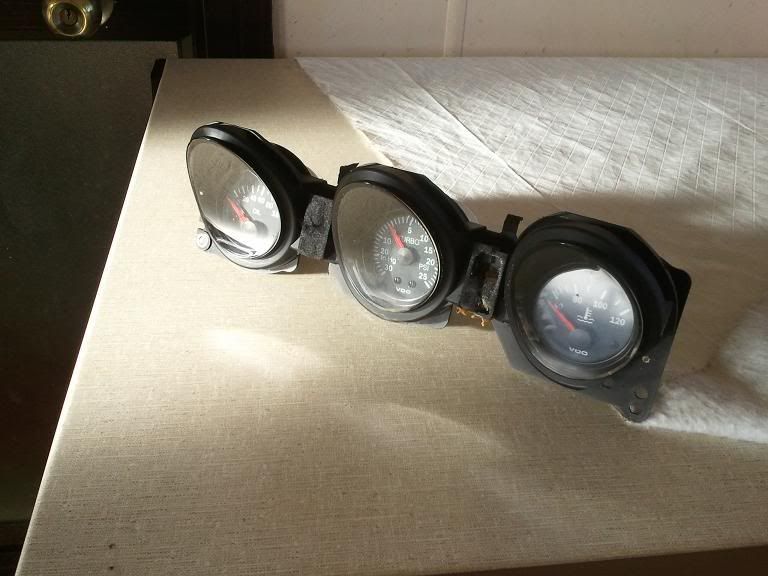
    Here's the problem: When I go to put the clear cover on it hits the bezels of the actual gauges and won't sit flush on the black bezel like it used to.

    How are you guys getting the cover to go over the aftermarket gauges?

    95 Base 3k: 6G74/TT/AWD conversion

  2. #2
    Forum User Not Verified
    Join Date
    Sep 2010
    Owner Since
    2009

    Location
    The Big House.
    Posts
    282
    Thanks
    53
    Thanked 126 Times in 98 Posts
    What gauges? I did my AEM's a few years ago and don't recall the clear plastic being an issue? I'm assuming your new gauges are flush with where the stock gauges originally sat?

  3. #3
    At least my jackstands are reliable Not Verified
    Join Date
    Sep 2010
    Owner Since
    2005

    Location
    Rochester Hills, Mi
    Posts
    554
    Thanks
    47
    Thanked 56 Times in 45 Posts
    They are VDO gauges. They have a pretty small lip on them, I'm afraid to sink them down any further lest they might just fall through.


    This one you can see the gap that is quite large.

    Last edited by Uniuno; 02-08-2014 at 09:43 PM. Reason: Fixed image links

  4. #4
    Forum User Not Verified
    Join Date
    Sep 2010
    Owner Since
    2009

    Location
    The Big House.
    Posts
    282
    Thanks
    53
    Thanked 126 Times in 98 Posts
    What about taking the gauge bezel ring/clear cover off? There's no way the cluster cover will fit flushly over top of those it doesn't look like regardless of how much material you take out. Wish I would've taken pictures of mine before I installed them.

  5. #5
    At least my jackstands are reliable Not Verified
    Join Date
    Sep 2010
    Owner Since
    2005

    Location
    Rochester Hills, Mi
    Posts
    554
    Thanks
    47
    Thanked 56 Times in 45 Posts
    I think the gauge bezel is the only thing there to hold them in. I'll explore that option when I get home from work though.

    I was planning on writing up a "how-to" once I figured it out. I've taken a decent amount of pictures so far.

  6. #6
    Forum User
    Join Date
    Jan 2011
    Owner Since

    Posts
    203
    Thanks
    3
    Thanked 31 Times in 22 Posts
    Here's mine, 52mm VDO also


    It was a while ago when I did mine, but I'd say you've got to carve more out and get the gauges down lower in the plastic housing. I recall them being a very tight fit, so you might have to really jam them in there tight.

  7. #7
    -Driftus Maximus- Not Verified
    Join Date
    Sep 2010
    Owner Since
    2004

    Location
    Corunna, IN
    Posts
    733
    Thanks
    35
    Thanked 16 Times in 15 Posts
    I have a spare set of center gauges if you screw up. But it looks good and I love the fact your putting them behind the lens.
    1st place NG12 - Drags FWD 3S. 16.764 @ 83.88mph
    2nd place NG13 - Drags FWD 3S. 18.862 @ 75.62mph (with spun bearing)

    '92 Stealth ES
    '95 Stealth R/T
    '93 3000GT VR4

  8. #8
    At least my jackstands are reliable Not Verified
    Join Date
    Sep 2010
    Owner Since
    2005

    Location
    Rochester Hills, Mi
    Posts
    554
    Thanks
    47
    Thanked 56 Times in 45 Posts
    With the help of Alan, we found the solution:

    I ended up cutting into the lense itself. I used a sharpie to make it dark on the back side so that it doesn't look goofy. This was a spare test lense.


    For realz:


    Wired and ready for install


    Finished:


  9. #9
    Thermal Engineer- Mmbr Since:8/2005 verified
    Join Date
    Sep 2010
    Owner Since
    6/2005

    Location
    Ann Arbor, MI
    Posts
    730
    Thanks
    277
    Thanked 128 Times in 98 Posts
    Dannnnng!

  10. #10
    Looks good.
    Last edited by Z16A; 02-09-2014 at 04:49 PM.

Bookmarks

Posting Permissions

  • You may not post new threads
  • You may not post replies
  • You may not post attachments
  • You may not edit your posts
  •  
The 3000GT/Stealth/GTO Web History Project
3000gt.com
3000GT / Stealth International WWWboard Archive
Jim's (RED3KGT) Reststop
3000GT/Stealth/GTO Information and Resources
Team 3S
3000GT / Stealth / GTO Information
daveblack.net
3000GT/Stealth/GTO Clubs and Groups
Michigan 3S
MInnesota 3S
Wisconsin 3S
Iowa, Nebraska, Kansas 3S
North California 3000GT/Stealth
United Society of 3S Owners
3000GT/Stealth/GTO Forums
3000GT/Stealth International
3000GT/Stealth/GTO Event Pages
3S National Gathering
East Coast Gathering
Upper Mid-West Gathering
Blue Ridge Gathering