Page 2 of 5 FirstFirst 1234 ... LastLast
Results 11 to 20 of 45

Thread: Want to learn how to Powder Coat?

  1. #11
    Forum User verified
    Join Date
    Sep 2010
    Owner Since
    ~2006

    Location
    Pittsburgh, PA/Wheeling, WV
    Posts
    867
    Thanks
    36
    Thanked 15 Times in 11 Posts
    Good info on that page, thanks. Hope you continue to expand it.

    I do have a question for you: When I was powdercoating my calipers I had a few difficulties. One was getting a good ground on them. I just had one metal hanger through the mounting hole. Is this good enough? I did not ground the rack to the earth as you did but may try it.

    A bigger problem was getting even coverage. In order to get the powder to stick in the crevices, I had to turn down the voltage (or it would stick to the edges) but then it was very easily blown off. How do you decide on air pressure/voltage?

    Lastly, do you pre-heat your parts before coating them? I heated mine to temperature to get all the "crap out" (and there was a lot of crap), let it cool, cleaned it, then warmed it before spraying on the powder.

    How many coats do you do on a typical part and how thick do you lay it? I thought I was going to light so I laid it on one time and got a run in the oven! I did two decent coats on my calipers but I am starting to see a little rust develop on some edges of the back calipers.

    When I baked mine I started the timer as soon as I shut the door so I might not have baked it enough. Also did have it grounded to earth/etc.

    I would really like to cut down on the time it takes me and get better at getting even coverage/etc as I would like to powdercoat basically my entire car eventually LOL

    Thank you!!

  2. #12
    Forum User verified
    Join Date
    Sep 2010
    Owner Since
    2005

    Posts
    293
    Thanks
    13
    Thanked 23 Times in 18 Posts
    Quote Originally Posted by HLxDrummer View Post
    Good info on that page, thanks. Hope you continue to expand it.

    I do have a question for you: When I was powdercoating my calipers I had a few difficulties. One was getting a good ground on them. I just had one metal hanger through the mounting hole. Is this good enough? I did not ground the rack to the earth as you did but may try it.

    A bigger problem was getting even coverage. In order to get the powder to stick in the crevices, I had to turn down the voltage (or it would stick to the edges) but then it was very easily blown off. How do you decide on air pressure/voltage?

    Lastly, do you pre-heat your parts before coating them? I heated mine to temperature to get all the "crap out" (and there was a lot of crap), let it cool, cleaned it, then warmed it before spraying on the powder.

    How many coats do you do on a typical part and how thick do you lay it? I thought I was going to light so I laid it on one time and got a run in the oven! I did two decent coats on my calipers but I am starting to see a little rust develop on some edges of the back calipers.

    When I baked mine I started the timer as soon as I shut the door so I might not have baked it enough. Also did have it grounded to earth/etc.

    I would really like to cut down on the time it takes me and get better at getting even coverage/etc as I would like to powdercoat basically my entire car eventually LOL

    Thank you!!
    Thanks, I will definitely continue with it.

    When I ground a part, It usually has at least one bolt hole, this is where I always try to ground. I have quite an assortment of extra bolts for this car so I just use those since they will get powder coated. Make sure you clean the bolt along with the part if you go this route. I will usually thread the bolt in a little, and hang the part from this bolt, I wrap picture hanging wire around the bolt and make a little loop and hang that on my rack. Or I will just clip my alligator clip right to the bolt if the part is too heavy to hang from the wire. This bolt method is good for 2 reasons, It contacts the part very well, unlike a hook. And if I am doing 2 coats, I will make 2 loops of picture hanging wire and wrap a piece of tape around one. After the first coat, I just take off the tape and I still have a clean, bare metal ground to attach to(the ground wont work for 2nd coats if you are grounding to an area that is powder coated, you need to get to bare metal somehow).

    Having a good ground also helps with your 2nd issue. When powder refuses to spray into a corner or crevice, this is called a faraday cage effect. I honestly don't know the science behind why, but somehow the area actually resists electrical fields and your powder. There are a couple ways around this:

    The best way is a good gun that has a faraday wave board option, this is in the $1000 range so I don't have one. This magical device is supposed to solve this issue.

    You can also heat up the part to around 150 degrees if you can tell its going to have these issues. You can look a part and see that some areas are going to be no fun to get powder into. So just stick it in the oven and let it get to around 150, pull it out, do not connect the ground at all, only spray the crevices and areas you expect to have issues with. Then wait for it to cool back to room temp, hook up your ground and spray as usual. If you are already in the middle of coating an item and you don't want to blow it all off and start over, you can actually use a heat gun and heat up the faraday areas, spray them and let the part cool down before you continue coating. The heating method does offer a fix, but the coating can get thick whenever you heat a part up.

    If you refuse to heat up a part, you can spray these faraday areas first, I have actually made a little paper nozzel to stick on the end of my gun to spray these areas. After you spray the areas, then just coat the rest as normal.

    I definitely run my parts through a heat cycle before coating. Cast iron and aluminum will get pre-heated every time. My process is: degrease, bake, degrease again, sandblast, blow off with air, clean with denatured alcohol, let dry and wipe off any fuzzies or dust with a clean paint brush. Then I'm ready to coat. I bake the parts 50 degrees higher than what the powder cures at. So if it cures at 350, then I bake at 400, if it cures at 400, then I bake at 450. The bake time depends on how big the part is, if small, I bake for 30 minutes, if it is large, I'll bake for an hour. You can actually see the part smoking in the oven. If it is still smoking even after an hour, you need to leave it is no longer smoking.

    I normally spray one coat, I find if the coating is too thick, it is way easier to chip. If I am doing gloss black or chromes, I will add a clear coat. Sometimes I run into an issue called edge pull, where the powder actually does not stick to the sharp corners, if this happens, I will do another coat. This may be why your calipers started rusting, could you still see a very fine line of metal on the corners? Also for something like calipers or any steel or iron parts that will be subjected to water like that. I will pretreat the metal with an iron phosphate called surecoat 915. This serves as a 2nd defense if your powder coat gets chipped or anything. It will stop the rust from spreading underneath the powder coat and keep it confined to just that one chipped area.

    If you started the timer as soon as you shut the door, I can almost guarantee they are undercured. If undurcured, the powder will not stand up to abuse like it should. Unfortunately, you may have to do them again one day not too far away, but when done right, they should hold up great for years.

    I know where you are coming from. The process definitely takes a long time when you are new. I remember starting a batch of like 5 small parts, and by the time I was done, 5 hours had passed. For me, it is the masking that eats the time up. Just keep doing it and you will get faster at it. There are little tricks to get faster though, and I will be posting them on the site. But basically, just make sure you or organized, think of everything you need to do in the process before you start and organize accordingly.

    Learn how to Powder Coat at www.powdercoatguide.com.

  3. #13
    Forum User verified
    Join Date
    Sep 2010
    Owner Since
    ~2006

    Location
    Pittsburgh, PA/Wheeling, WV
    Posts
    867
    Thanks
    36
    Thanked 15 Times in 11 Posts
    Great post man I appreciate it!

    I remember reading about the Faraday Cage thing. I think the issue is the powder has a + charge and the part has - and whenever you spray into those cracks it doesn't have enough momentum to overcome the electrostatic attraction to the edges surrounding the crack. If you crank up the air pressure it goes in but it'll blow away after a while... I like your idea of keeping it warm. I had to do that with my calipers but I had the ground attached and tried to do them all while it remained warm. Should have let it cool like you said.

    Ya I definitely saw smoking. Calipers looked nasty after heating them the first time, haha

    I don't think my issue was edge peel.. if you look at them it just looks like a little bit of red tinted clear over a few corners. Like it was super thin. But no peeling or cracking or anything.

    I'll have to look up how the iron phosphate works.. Do you have to clean it off? Leave it on and PC overtop?

    Hopefully they cured enough that they will last if I am careful. It was a lot of work taking them apart/prepping/etc especially when it is my only car lol It may have helped that the part was already warm when I put it in as a mentioned, though.

    My Dad actually found a massive oven that you can probably fit a rear subframe in (already has insulation and everything), just need to find a way to heat that sucker! Right now I'm using a double oven that I was going to chop the center out of but I think I'm just going to maybe get a bunch of oven coil to put in this new box...

    Thanks again!

  4. #14
    Member Not Verified
    Join Date
    Sep 2010
    Owner Since
    2004

    Location
    Silver Spring, MD
    Posts
    163
    Thanks
    47
    Thanked 6 Times in 5 Posts
    Quote Originally Posted by 99ishVR-4 View Post
    If it is a normal color like black, red, blue, etc I would spray the first color and bake it for 75% of the cure time, take the part out of the oven and let it cool down. Attach ground, then shoot 2nd color and bake for 2nd colors full cure time. This allows the 2 coats to crosslink to each other. Not doing it this way can cause delamination of the 2nd coat.

    If its a chrome or candy color, you would fully cure the first coat, let it cure, completely cool, shoot the 2nd coat and full cure it again. This does have a higher risk of delamination but not doing it this way causes a fine cracking appearance in the chrome.
    In regards to two stage paints, I have encountered an issue with dormant blue tgic color. After multiple tries (partial cooking, applying both coats at the same time, fully cooking both coats seperately, etc...) I found one method that works. In my experience I had to fully cook the first color, then immediately coat the second color (clear coat) before it cools. If not the dormant color does not come out. I first spray the dromant blue (purple powder), fully cook it (turns chrome), then re-powder with clear while hot (you can see it starts turning purple as you spray), fully cook the part again (turns blue), then repeat clear coat while hot for any areas that do not change colors. I have not experience this issue with any other colors. I'm not sure if this is an issue that only applies to this color or if it applies to all dormant colors.
    MODS - DNP Intake with K&N Style Filter, Polished DOHC Throttle Body with Portmatched Plenum, Portmatched Intake and Exhuast Ports on Heads, Ported Intake Passages in Heads, Performance Valve Job (Street), 3SX WebCams Reground Cams, .20 Overbored Block/Pistons, 3SX Fed Spec Downpipe with Gutted Rear Pre-Cat, 3SX Stock Size Crank Pulley, BigTyla Ground Wires, MSD Spark Plug Wires, Seatlle92VR4's Hyper-Flex Polyurethane Motor, Ultimate Performance Strut Bars, 3SX Polyurethane Suspension Bushings, Shift Kit

  5. #15
    Forum User verified
    Join Date
    Sep 2010
    Owner Since
    2005

    Posts
    293
    Thanks
    13
    Thanked 23 Times in 18 Posts
    Quote Originally Posted by HLxDrummer View Post
    Great post man I appreciate it!

    I remember reading about the Faraday Cage thing. I think the issue is the powder has a + charge and the part has - and whenever you spray into those cracks it doesn't have enough momentum to overcome the electrostatic attraction to the edges surrounding the crack. If you crank up the air pressure it goes in but it'll blow away after a while... I like your idea of keeping it warm. I had to do that with my calipers but I had the ground attached and tried to do them all while it remained warm. Should have let it cool like you said.

    Ya I definitely saw smoking. Calipers looked nasty after heating them the first time, haha

    I don't think my issue was edge peel.. if you look at them it just looks like a little bit of red tinted clear over a few corners. Like it was super thin. But no peeling or cracking or anything.

    I'll have to look up how the iron phosphate works.. Do you have to clean it off? Leave it on and PC overtop?

    Hopefully they cured enough that they will last if I am careful. It was a lot of work taking them apart/prepping/etc especially when it is my only car lol It may have helped that the part was already warm when I put it in as a mentioned, though.


    My Dad actually found a massive oven that you can probably fit a rear subframe in (already has insulation and everything), just need to find a way to heat that sucker! Right now I'm using a double oven that I was going to chop the center out of but I think I'm just going to maybe get a bunch of oven coil to put in this new box...

    Thanks again!
    The iron phosphate that I use can be sprayed or dipped, I have only done the spray so far but I am considering the dip. I dilute it and put it in a bug sprayer type bottle and spray for 30 seconds, and just let the excess run off. After it dries, you can powder coat. This is what I use:

    SURCOAT 915 ( 1 gallon ) - $34.95 : Powder365, Customer Service Like No Other

    I know what you mean about the calipers, the set I pictured I did for a girl that needed her car back the next day. It took me pretty much the entire day to do the job.

    Good luck on the oven, it would be awesome to be able to do subframes. I'm pretty sure I will still have to have a shop do mine. I was thinking about trying to hang one side of it in my home oven and build a box around the half that sticks out, I just don't see an easy way to get it in there once it is coated without wiping off powder everywhere.

  6. #16
    Forum User verified
    Join Date
    Sep 2010
    Owner Since
    2005

    Posts
    293
    Thanks
    13
    Thanked 23 Times in 18 Posts
    For anyone that is following the site, just wanted to let you know that I have been busy for the last week and haven't had much of a chance to work on it, sorry. Will try to get back to it before Friday.

  7. The Following User Says Thank You to 99ishVR-4 For This Useful Post:


  8. #17
    Member Not Verified
    Join Date
    Feb 2011
    Owner Since
    2009

    Location
    Scottsbluff, NE
    Posts
    872
    Thanks
    37
    Thanked 49 Times in 36 Posts
    Hey man thanks for taking the time to make this thread and the site and answer questions. You are right there is a lot of info out there but it's hard to find unless you search endlessly. I have done a few sets of intercooler pipes and a couple sets of wheels and have had a blast learning how to make things come out how I want them to.

    One question I had for you. Where do you buy the plugs and such that you would use to plug all the holes in a torn-apart brake caliper? I may be taking a shot at my first set of calipers soon and while I have heard you can do them with the seals in, it is better to take them apart. I just need to figure out where to get good masking supplies. Also, do you use high-temp tape that you can bake, and if so where do you get it?

    Edit: So after I posted this I actually looked around on the powder365 site and found everything I was asking about. Thanks again!
    Last edited by DK77; 01-24-2013 at 02:23 AM.
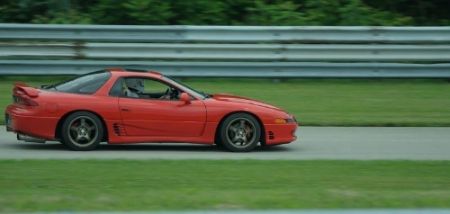
    1995 Dodge Stealth R/T Turbo
    Mods: DR750s, BC Sportsman rods, Ross pistons, ACT HD 6 puck clutch, 5 speed transmission, 300M output shaft, Broomfield racing billet transfer case housings, Spectre air filter, GM 3.75" MAF w/translator, DN Pre-turbo pipes, Pampena/CX Racing dual core FMIC, M2 Performance turbo-back exhaust, Walbro 450lph E85 pump, SXPerformance fuel filter, stainless fuel feed lines, EK2 Mfg fuel rails, SXPerformance AFPR, 1000cc Bosch injectors, 99 VR4 replica ECU w/ Chrome for tuning, Kenne Bell Boost-a-Spark, Blitz SBC i-D boost controller, IPS oil cooler, Intrax springs on KYB GR2 struts, Enkei Kojin 18X9.5 +30, Nexen N3000s, 99 front end, carbon fiber steering wheel, Pioneer AVH-X2600BT, JL C2 6.5" and 6"x9" speakers, free 4 channel amp for subs (LOL), twin Alpine 10" type E subs.

    Made 608whp/631wtrq on Pampena's dyno @ 31 psi.

  9. #18
    Forum User verified
    Join Date
    Sep 2010
    Owner Since
    2005

    Posts
    293
    Thanks
    13
    Thanked 23 Times in 18 Posts
    Quote Originally Posted by DK77 View Post
    Hey man thanks for taking the time to make this thread and the site and answer questions. You are right there is a lot of info out there but it's hard to find unless you search endlessly. I have done a few sets of intercooler pipes and a couple sets of wheels and have had a blast learning how to make things come out how I want them to.

    One question I had for you. Where do you buy the plugs and such that you would use to plug all the holes in a torn-apart brake caliper? I may be taking a shot at my first set of calipers soon and while I have heard you can do them with the seals in, it is better to take them apart. I just need to figure out where to get good masking supplies. Also, do you use high-temp tape that you can bake, and if so where do you get it?

    Edit: So after I posted this I actually looked around on the powder365 site and found everything I was asking about. Thanks again!
    I spent forever trying to mask the brake caliper piston holes with aluminum foil and high temp tape only to tear it all out because it wasnt going to look clean when done. So because i had all brand new seals, I used the old rubber piston boots to mask the holes and it worked perfectly. As for the plus for bolt holes, I got this kit since they had the best price:
    50 HIGH TEMP PLUGS for Powder Coating 5 sizes!

    As for the tape, go to epsi.com and get their phone number. Call them and ask for a sample of their orange tape, they will send you a roll free of charge. I will never buy tape from anywhere else as thats great customer service. While it is good to have the hi temp tape just in case, I have been using electrical tape for a lot of masking. If you mask a part and stick it in the oven for a full cure, when you go to remove it, the powder will flake off and you will have a hard edge, so now I stick my parts in the oven and let it get to around 170 degrees, just enough for the powder to be stuck to the part, I then pull the parts out of the oven and pull the masking off gently(dont man handle the parts here). Then stick it back in the oven for a full cure. This wiill give you much cleaner lines for not much more work. If you use a bolt to mask a bolt hole, do the same thing and just back the bolt out a few threads to break the powder connection between the bolt and the part. This way you dont need high temp tape, just make sure you dont leave any other tape in for a full cure as it will be a mess when you go to unmask.

  10. The Following User Says Thank You to 99ishVR-4 For This Useful Post:


  11. #19
    Forum User verified
    Join Date
    Sep 2010
    Owner Since

    Location
    STL, MO
    Posts
    1,144
    Thanks
    190
    Thanked 36 Times in 29 Posts
    Subbed for awesome thread
    1991 Stealth RT/TT
    Mods- Greddy Type S and a spun bearing.

    [Yesterday 11:43 PM] R/T93 : Im reading hulk comics on Youtube
    [Yesterday 11:45 PM] R/T93 : he has to fight the silver surfer hand to hand...
    OhioSpyderman:why do you have to pee on my wheaties Dave?

  12. #20
    Member Not Verified
    Join Date
    Feb 2011
    Owner Since
    2009

    Location
    Scottsbluff, NE
    Posts
    872
    Thanks
    37
    Thanked 49 Times in 36 Posts
    Thanks for the tips. I have accidentally left regular masking tape before and you're right it was a mess.

Bookmarks

Posting Permissions

  • You may not post new threads
  • You may not post replies
  • You may not post attachments
  • You may not edit your posts
  •  
  • History
  • Information
  • Groups
  • Events
  • Resources
3000GT/Stealth/GTO Information and Resources
Team 3S
3000GT / Stealth / GTO Information
daveblack.net