 View Profile
 View Forum Posts
 View Forum Threads
 Show All Albums
 Private Message
 View Articles
 View Blog Entries

Yeah I saw that, pure car pornOriginally Posted by Jimvr4


Yeah I saw that, pure car porn
What paint did you use on the transmission? Its the closest I have seen to what a brand new transmission looks like. Really looks great and I'm a little lost on what I want to do with mine. I was considering breaking it down to powder coat it but I am getting a little anxious to you know, drive it, lol.
Keep up the beautiful work. Making me jealous how much further ahead you are
Here's the paint I used, it's actually a high temp paint I got to do the exhaust stuff
Rust-Oleum 248904 Automotive 12-Ounce High Heat 2000 Degree Spray Paint, Flat Aluminum - Amazon.com
I'm really anxious to drive it too. Hoping I don't have a bunch of start up problems with the upgrades
Progress pics are needed
You have done an AWESOME job Jim!!!!
Can't wait...
Bob.
95 Caracus Red Spyder VR4 (sold 6/12/21 )
Cianci FG Viper Hood/Aerocatch Pins
Quad Carbon Fiber Tipped Borla Catback
Stock 18" 6 Spoke Chromies
K&N FIPK
Indiglo Gauges
JimVR4's Remote Start/Top Op Computer
92 Wheat Beige Metallic Stealth TT (sold 6/14/20
OhioSpyderman Short Shifter (in both!!!)
SBC-iD Boost Controller (in both!!!)
Oldest son - 94 Danube Blue VR4 (sold 10/19)
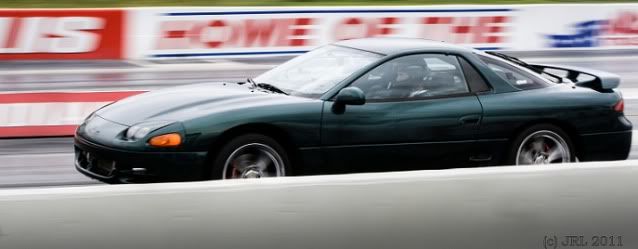
Middle son - 93 Panama Green VR4
Pics to come this weekend.
Tuesday night I reassembled the transmission and sealed it with Permetex Ultra Black using just a thin layer since the housings looked really smooth. Last night I pumped in just under 3 bottles of MT-85. Looks to be leak free this morning so feeling good about that. Still have to reseal the TC but not needed to begin the engine drop in so it may wait.
Test fitted my plenum and discovered I had interchanged the PS bracket and rear hoist bracket. Swapped them around and then discovered the plenum didn't want to line up perfectly. I think the hoist bracket must have bent slightly on pulling the engine out. Was going to mount up the coil pack but I have the front hoist bracket spaced out with washers for the drop in. I think that one may have bent a little too. Need to try to position the load leveler further from the engine this time.
Will probably seal up the rear valve cover tonight. I think I'll leave the front unsealed until I verify oil pressure.
That hoist bracket will definitely need some dead blow, or rubber mallet lovE to line up if you pulled the engine minus the intake. The front as well. Leave the intake bolts to the lower loose to get the rear brackets started. It help much.
Help them, for they know not that which they do not know!
CoopKill's Mistress Makeover Thread!
"Punk, Nutswinging, Small Time, Asshat, Monkey, Jerkoff, Loser that rides on other peoples accomplishments!" ..


I'm going throw those plenum supports in the scrap heap, they are a PITA and good for nothing.
Parting 6 speed
Pampena 3.5 Stroker, GTX 2867 Gen IIs, AEM Series2, oohnoo SMIC, DN Hardpipes, FIC 1650s, Walbro 525, aermotive fpr, Dejon intake pipes, Tial Q, Koyo Rad, Samco Hoses, Stoptech 332mm fronts, HKS GT4 Coilovers, Spec 4+ LW, JDM 6 Speed, Billet shift forks, Pampena brace
Yuppp. I ditched mine. They're just no good for anything.
Mods: 2g 3k body conversion, 2g Brake upgrade, Rota P45R rims
Projects: Interior sound deadening, 14Bs, forged bottom end, custom radiator and sound mounts
Yeah it turns out they're really good at getting in the way of the VC bolts lol
Rear turbo studs came in and mounted up the rear precat. Test fitting the plenum and discovered the rear support bracket and PS bracket were interchanged so that was fixed.
Filled the transmission with MT-85 after letting it sit for about 36 hours. Checked in the morning and no leaks. Test fitted the slave cylinder to get the orientation of the banjo bolt and hard line. Then connected the flex line into the car. Hmm should think about getting the SS braided line for the flex before I bleed it.
All was well in the morning and left for work.
Friday evening the missus went to a dance recital so I had hours of uninterrupted garage time planned. Got into the garage after a quick bite to eat and struggled with the rear valve cover gaskets falling out of place and not being able to thread on the bolts with the brackets in the way. To top it off the power went out around 7:30 PM and my struggles continued until I was trying to thread bolts in by bicycle flashlight. Not a recommended method lol. At one point I thought I just need to tap the cover over with my rubber hammer which was propping up the transmission keeping it level. I managed to lift it too far on that side and moments later I was staring at a fresh pool of MT-85 oil that had poured out of the axle holes. Time to call it a night before I did something REALLY stupid.
In the morning with new light and clarity I discovered the rear corner of the gasket was folded inward so it was an easy fix. So with the rear valve cover bolted down I just needed to prepare for the assembly of the transmission and motor and the lift. This was the first idea. Not a good location and I wouldn't be able to bring the motor over to connect them.
OK, transmission repositioned. Note the use of the dog's food bin as a pedestal. This worked - for a little while until the plastic gave way under 160 lbs of gear lol. A quick scramble to lower it to the floor and then used a rolling chair to hold it. Final moments of the engine assembly on the stand. Only issue I had was using the top two trans mounts that are near the water housing as the fit is so tight there. Next time I may get longer bolts and use the guide pin holes instead.
Hanging freely. After test fitting on the stand I knew the plenum would have to come off for the lift.

Bolted up the rear plate and bell housing cover.
Flywheel bolted up. I lowered the motor down a bit and used Oohnoo's crank pulley tool to wedge the crank while I torqued the bolts.
Southbend Stage 4 FE clutch going in. Lubed the splines and used the provided centering tool.
Lubed the splines, release fork, pivot fulcrum, and TO bearing in preparation.
Lot's of struggles with trying to mate the trans and the motor with both on rolling supports. Need to get a couple of long bolts and cut of the heads and use the as guide pins. Finally ditched the chair and went with a floor jack for the trans. With two guys helping I was finally able to thread in the guide pin bolts and pull them together.
Now for the lift and drop in
I kept the PS pump and adjust pulley mounted but they ended up having to come off during the drop in.
Getting close. I applied a ratch strap around this time to start leveling out the assembly. Should have mounted up the trans mount pin and been ready with the bolts there. That one ended up being the first one we could connect. Unfortunately the front and rear mounts on the subframe had to be loosened up as they interfered. Finally got the assembly down in there and got the front pin connected, so two of the four mounts.
Really close here but the damn DS mount is twisted. Not good enough quality control as the hole in the insert wasn't straight to begin with. The hoist here is wrapped around the pin and note the position of the pry bar. Still my helpers had to leave and I could not finish it off without someone else prying while I drive the pin home.
Hopefull will get this sorted today or tomorrow. I'm taking two weeks of vacation to work on the car and spend time with the kids (21, 23, 25) who will be here for a short time. Garage space is freeing up now so I should be able to move the hood and bumper of my son's bed!

|
3000gt.com 3000GT / Stealth International WWWboard Archive Jim's (RED3KGT) Reststop |
|
Team 3S 3000GT / Stealth / GTO Information daveblack.net |
|
Michigan 3S MInnesota 3S Wisconsin 3S Iowa, Nebraska, Kansas 3S |
North California 3000GT/Stealth United Society of 3S Owners 3000GT/Stealth/GTO Forums 3000GT/Stealth International |
|
3S National Gathering East Coast Gathering Upper Mid-West Gathering Blue Ridge Gathering |

 Reply With Quote

 Visit Homepage





Bookmarks